
In the next article we will take a look at three ways to install Android Studio on Ubuntu 18.04. Although the steps that we are going to see I have tried them in Ubuntu 18.04, they can also be tried in previous versions of Ubuntu. The first two installation options are very simple, so it is advisable to start with them.
Before getting into the installation, we must clarify that Android Studio requires a lot of resources of the system. For this reason, the machine on which we are going to install this program needs to meet some requirements so that it works without problems.
Android Studio requirements
Here are some important specifications that your machine must meet:
- 64-bit distribution capable of running 32-bit applications.
- GNU C Library (glibc) 2.19 or later.
- 3 GB of RAM minimum, 8 GB RAM recommended. Plus 1GB for Android Emulator.
- 2 GB minimum available disk space, 4 GB Recommended (500 MB for IDE + 1.5 GB for Android SDK and emulator image system).
- Una 1280 x 800 minimum screen resolution.
When we verify that we meet the necessary requirements, we can continue with the installation.
Three methods of installing Android Studio 3.1.4 on Ubuntu 18.04
Method 1. Ubuntu software option.
Ubuntu's software option remains the easiest possibility to install software in Ubuntu. To install Android Studio 3.1.4 from here, simply search for Android Studio in the search box and you will get the install option.
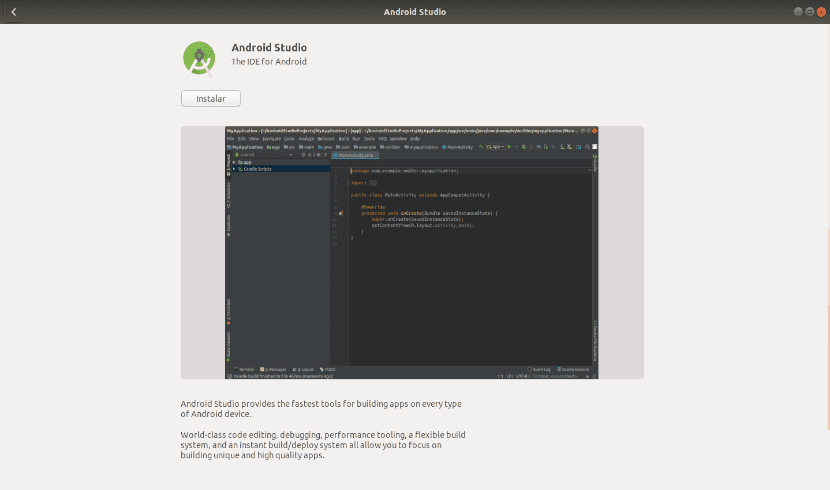
Once the software is located, its installation is as easy as click the install button. After a successful installation process, you should be able to locate the launcher in Ubuntu. If it installed successfully, you can skip the remaining methods and review the final configuration section.
Method 2. The Snap tool.
The tool Snap can be very useful for installing software packages. Snaps are containerized software packages that make installation easy. There are no files to modify or write any commands.
However, you must first have Snap installed on your machine. For install snap, you just have to open a terminal (Ctrl + Alt + T) and write in it:
sudo apt install snapd
After successfully installing Snap, you can now proceed to install Android Studio 3.1.4 with the following command:
sudo snap install android-studio
This will take a while, you have to wait a few minutes. It is expected to install successfully, but if for some reason the installation fails due to an error like the following:

You need add the –classic parameter to the command as seen below:
sudo snap install android-studio --classic
If it installs successfully, you can skip the other methods and review the final configuration section.
Method 3. The Zip file.
This is a reliable method to install Android Studio 3.1.4. However, it may take some time.
First we will have to install the Oracle Java Development Kit. Installing the Java Development Kit requires some prerequisites that can be installed with the following commands:
sudo apt update && sudo apt install libc6:i386 libncurses5:i386 libstdc++6:i386 lib32z1 libbz2-1.0:i386 wget
Now we can proceed with the JDK installation that a colleague already explained to us in a previous article.

After following the steps shown there, after a successful installation, we can check java version with:
java -version
We can also check java compiler version with:
javac -version
Next, we move to the download directory and we download the Android Studio zip file there. This can be done with the following commands:

cd Descargas

wget https://dl.google.com/dl/android/studio/ide-zips/3.1.4.0/android-studio-ide-173.4907809-linux.zip
After downloading, unzip the file in the / opt directory with the following command:
sudo unzip android-studio-ide-*-linux.zip -d /opt/
To run Android Studio, you have to go to the bin directory located in the unzipped directory of Android Studio and run the file studio.sh.
cd /opt/android-studio/bin

./studio.sh
This will launch the Android Studio installation, but we will not do it yet. Before we go to symbolically link the studio.sh file with the / bin directory. In this way we can run Android Studio from any directory on the command line. We will do this with the following command:
sudo ln -sf /opt/android-studio/bin/studio.sh /bin/android-studio
Final configuration
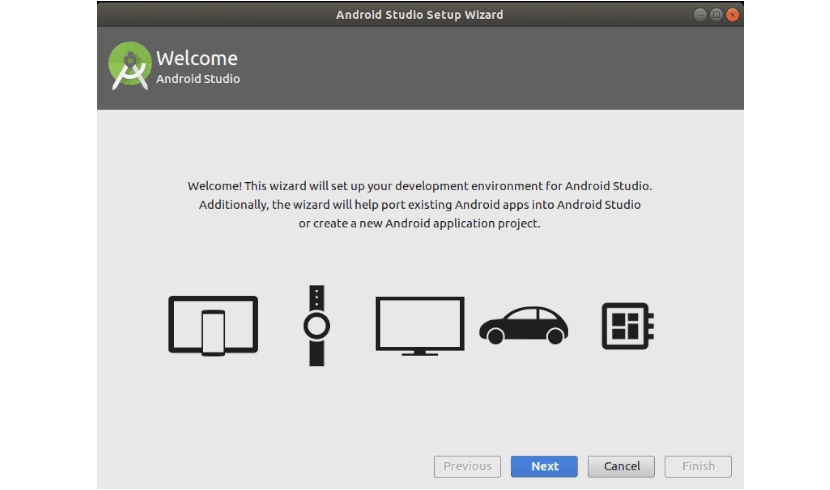
If you used method three, type android-studio in terminal and continue with the Android Studio Installation Wizard.
Running the setup wizard will take some time as the application is expected to perform other downloads.
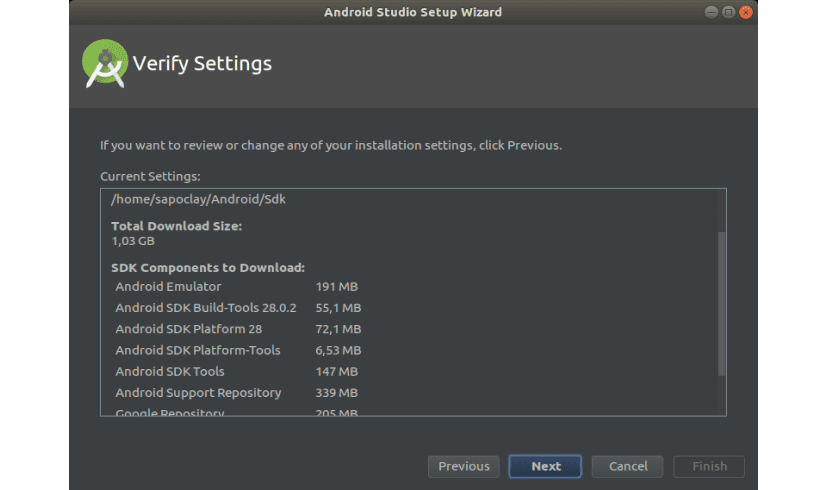
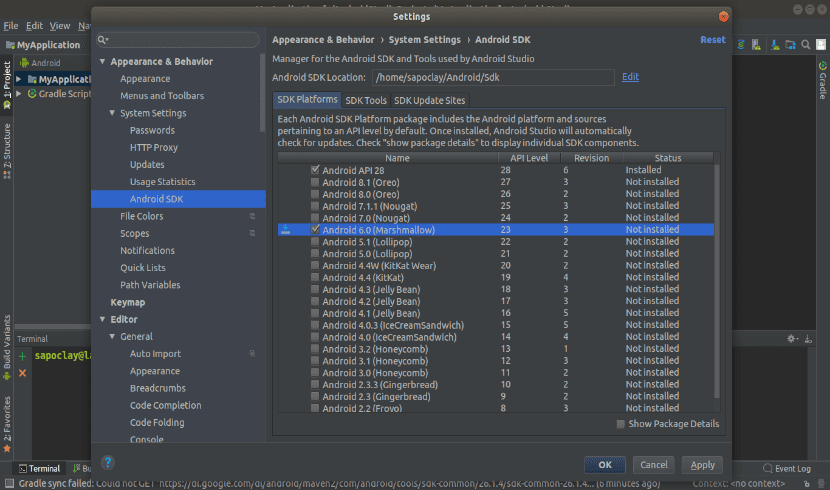
After completing all possible downloads, you must download the required SDK to develop the software. This is expected to appear by default, but if not, it can be downloaded via the following steps:
Click 'Fillet', soon 'Settings', then 'Android SDK'. You'll see the Android SDKs for the different versions from Android. We end up choosing the ones we are interested in downloading.
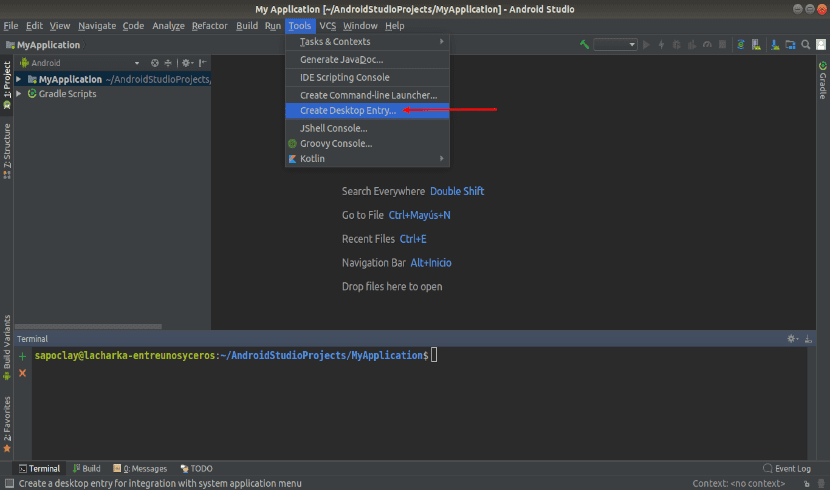
For those who installed using the third method, they can now add a launcher. Clicking 'Tools' and later 'Create Desktop Entry'.
After this, there you have it, Android Studio 3.1.4 installed on your Ubuntu 18.04. If anyone needs to know more about this IDE, they can refer to the project website.
Thanks a lot. I have installed it with snap and everything is perfect 🙂