In the next article we are going to take a look at how can we install Batocera on Ubuntu using VirtualBox. Batocera.linux is an operating system that is specialized in retrogaming. This system has the advantage that it can be installed on a bootable USB, on the hard drive of any computer that we have at home, or it will also allow us to create a virtual machine and use it from there. This last case will be the one that we will see in the following lines.
Batocera includes many features and is built using the best game emulators. In addition to being totally free, by default including some retro games in its installation, and as if that were not enough, it will give us the possibility of loading ROMS to add more games.
What is Retrogaming?
I suppose that today, not everyone is familiar with the alien machines that were in arcades a few years ago. Video game geeks spent hours playing to kill Martians in them.

These types of games were very popular during the 80s., in which video game machines proliferated in public establishments such as arcades and bars. In addition, the appearance of small personal computers helped its spread.
Retrogaming can be defined as nostalgia for this type of game, such as Martians or Pac-Man. It is known as retrogaming, in Spanish "to play the classics", to the hobby of playing and collecting old equipment, video games and arcade games.
Install Batocera in VirtualBox
One of the advantages of Batocera.linux is that it is very easy to install, and it also offers compatibility with a multitude of devices:
- Older 32-bit PCs.
- Modern 64-bit PCs.
- MacOS computers and laptops.
- Batocera.linux for handheld consoles (Anbernic RG351P, GPi Case, Odroid Go Advance, etc…)
- Raspberry Pi (Raspberry Pi 0 W/WH, Raspberry Pi A/A+, Raspberry Pi B/B+, etc…)
- TV Boxes with certain processors (Libretech H5, Amlogic S905/S905x, Orangepi-pc, etc…)
- And others …
As is evident, to use Batocera in VirtualBox it is necessary to have this virtualization software installed with which to be able to use the vdi disk that we are going to create. Besides it will be necessary to have the Oracle VM VirtualBox Extension Pack (also known as 'Guest Additions') installed as well. If you don't have it installed on your Ubuntu system, you can follow the instructions that were posted on this blog a while ago.
Download a version of Batocera.linux
After installing VirtualBox, the first step to follow is to enter on the download page of the official Batocera website and download the image that corresponds to your device. For this example I chose to download the version Standard Desktop/Laptop.
Once the download is done, we will have in our system an image of Batocera in “IMG.GZ”. which we will have to unzip and extract the IMG image.
Convert the IMG file to a VDI
The key step to be able to use Batocera in Virtualbox is going to be convert the Batocera IMG file to a VDI. This can be done from the command line (Ctrl+Alt+T), locating ourselves in the folder where we have the .IMG file saved, it is only necessary to use the command:

VboxManage convertdd batocera-x86_64-33-20220203.img batocera.vdi
As the size of the default disk is going to fall short, especially if we want to add ROMS and BIOS, we can change it to make it bigger. This can also be done through the terminal (Ctrl+Alt+T). To create an image of 20 GB of physical size with the vdi disk that we just created, the command to use will be the following:
![]()
VboxManage modifyhd batocera.vdi --resize 20000
Create the virtual machine
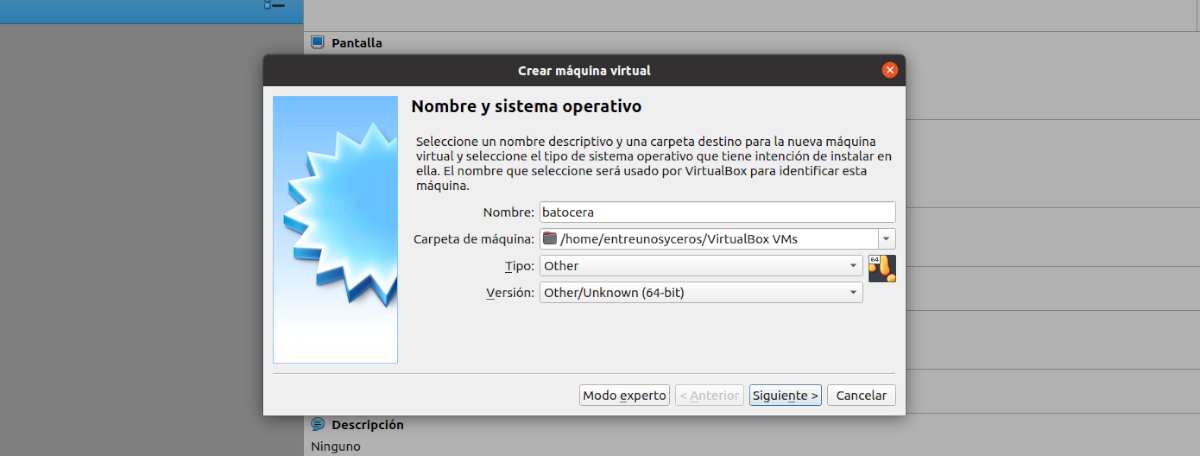
Once VirtualBox is started, we will only need to click on “New”. So we can start create a virtual machine for our retro gaming system.
In the first screen that we are going to see, we will have to give it a name and indicate what type of system it uses. We go to the next screen by clicking on “Next".
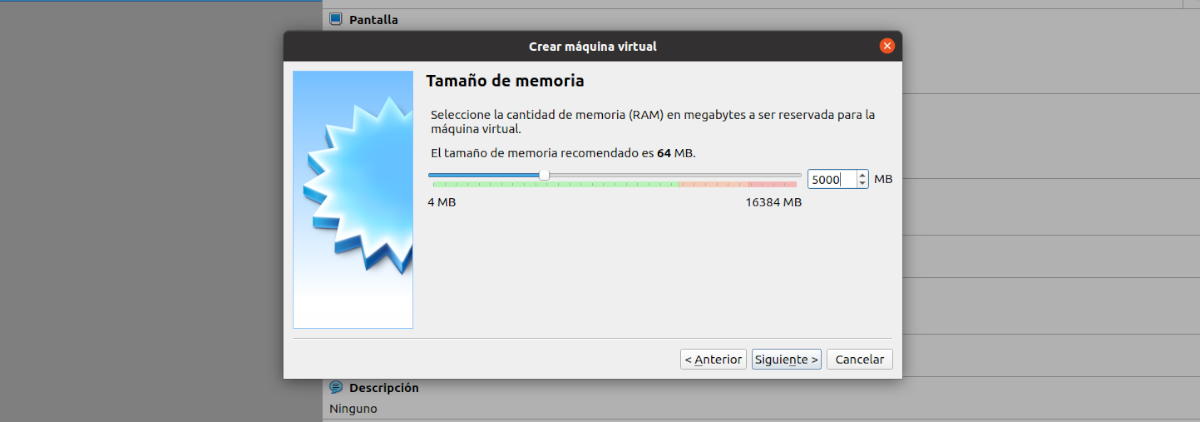
The next step will be indicate memory size. Although Batocera does not require too much memory, its thing is not to fall short, but not to go too far either. This will depend on how much memory you have available. We continue by clicking on “Next".
Now another window will appear on the screen in which we are going to select the .vdi hard drive that we created lines above (for this example I called it batocera.vdi). We can do this by clicking on the icon indicated in the following screenshot, and selecting it in the folder where we have it saved. To finish, just click on “Create".

Now we have the Batocera virtual machine created and ready to go. Although we still have to modify some things in the preferences of this machine. If we select the newly created machine, we can access its preferences by clicking the button at the top of the window that says “Configuration".
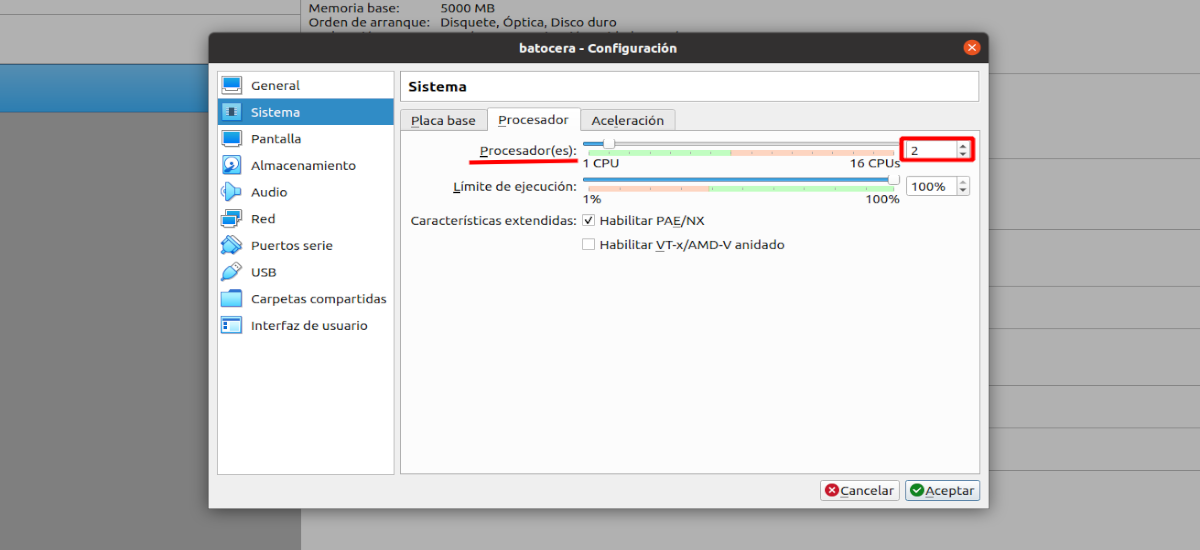
In the window that will open, we will see that we have a list on the left. In this list we will have to select the option “System”. This will display three tabs on the right side of the window. There we are going to go to the one called “Processor". In the number of processors we will indicate “2”, with which Batocera will work more smoothly.
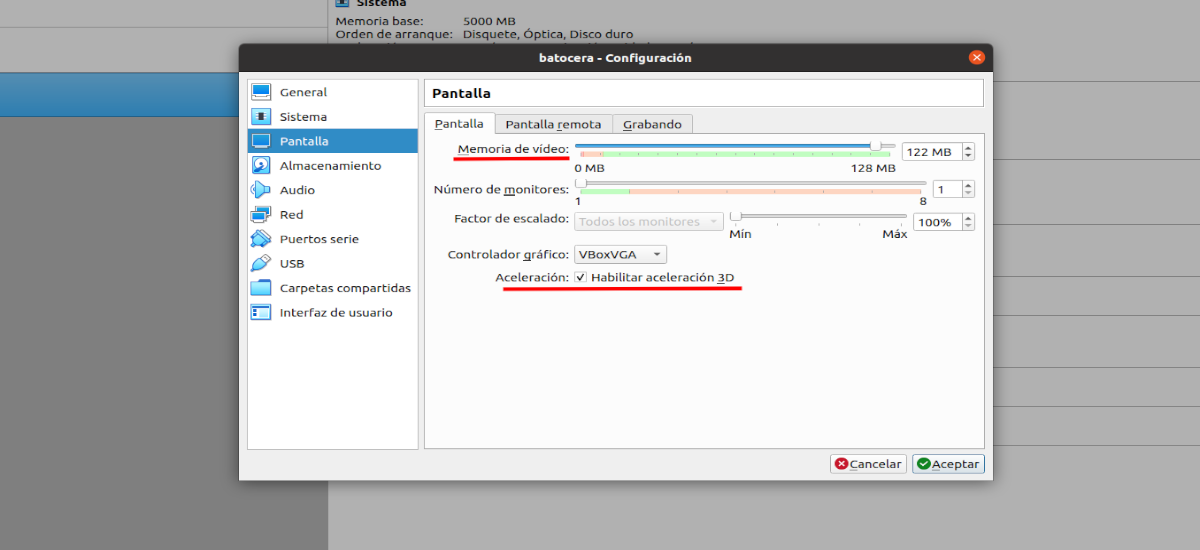
Then we will go to the option “Screen”, which we will find on the left side of the screen. This will reopen three tabs on the right side. In the tab called "Screen” let's upload the video memory (this will depend on how much memory you can use). We are also going to enable 3D acceleration.

Another thing that we will need to do will be in the option “Red”, which can be found on the left side of the window. This will open four tabs on the right side. In the first one we will enable the network adapter (if it is not already enabled) and in the drop-down we are going to select “bridge adapter". This way we will have the virtual machine on the same network as the host computer.
With this we will have finished the configuration of the virtual machine, so we can now click on «Accept» to close the settings window. At this point, It only remains to start the virtual machine that we are creating.
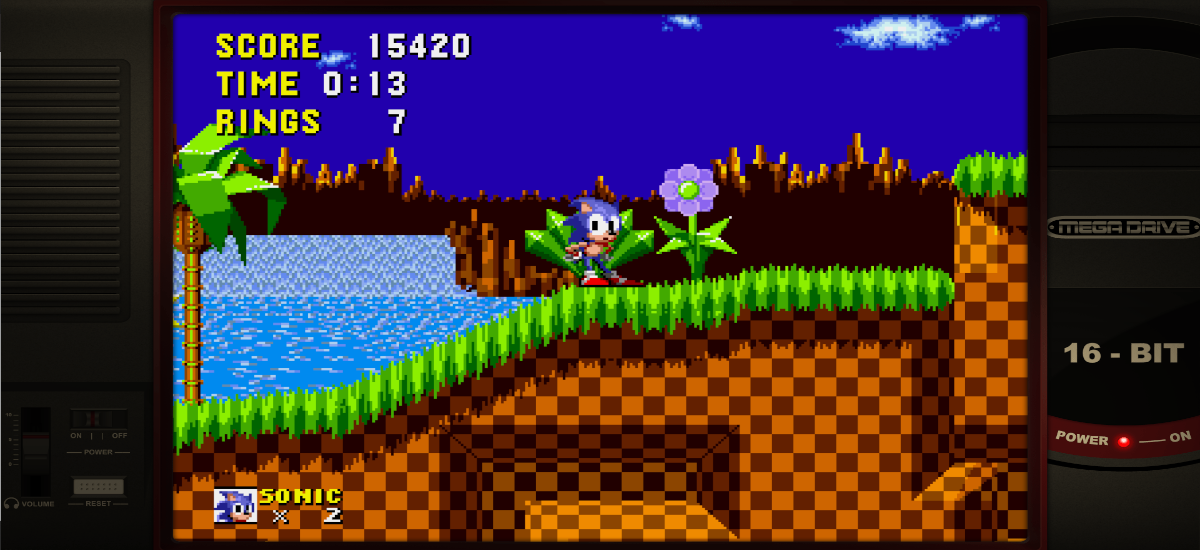
As we will see, Batocera will start to start showing us a screen like the following.
A quick look at Batocera
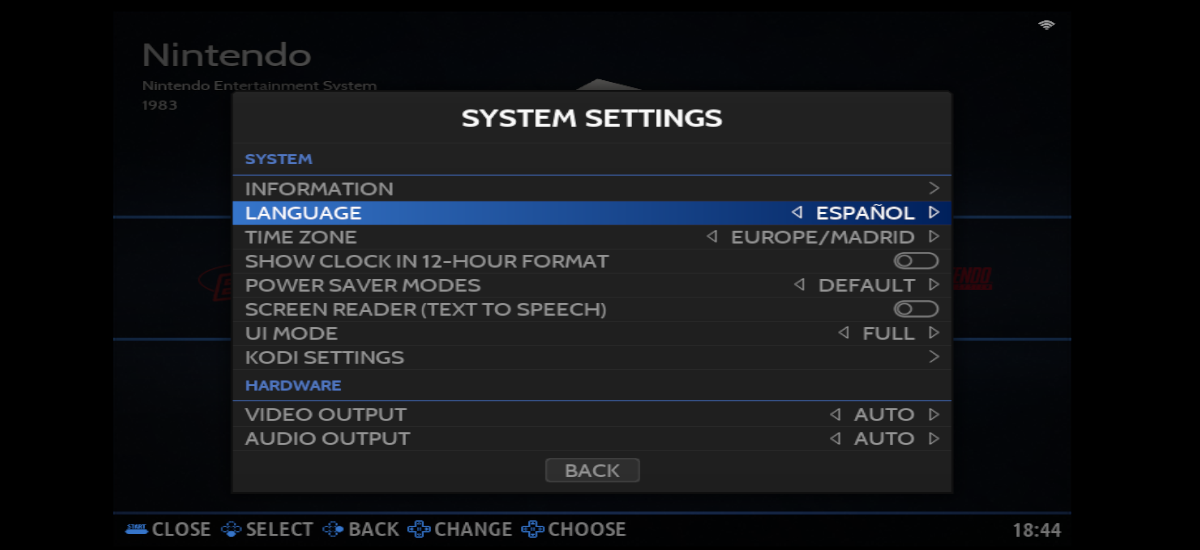
Before you start playing anything, you need to shop around the settings menu. To access it, you only need to press the “Space” key.. This is where we can translate Batocera into Spanish (among other languages), and modify the many customization options it offers. To learn more about the configuration, it is advisable to go through the Project Wiki.

After translating the interface into Spanish, and make the configurations that we see necessary (this will depend on each user), we can take a look at the games that Batocera.linux comes with.
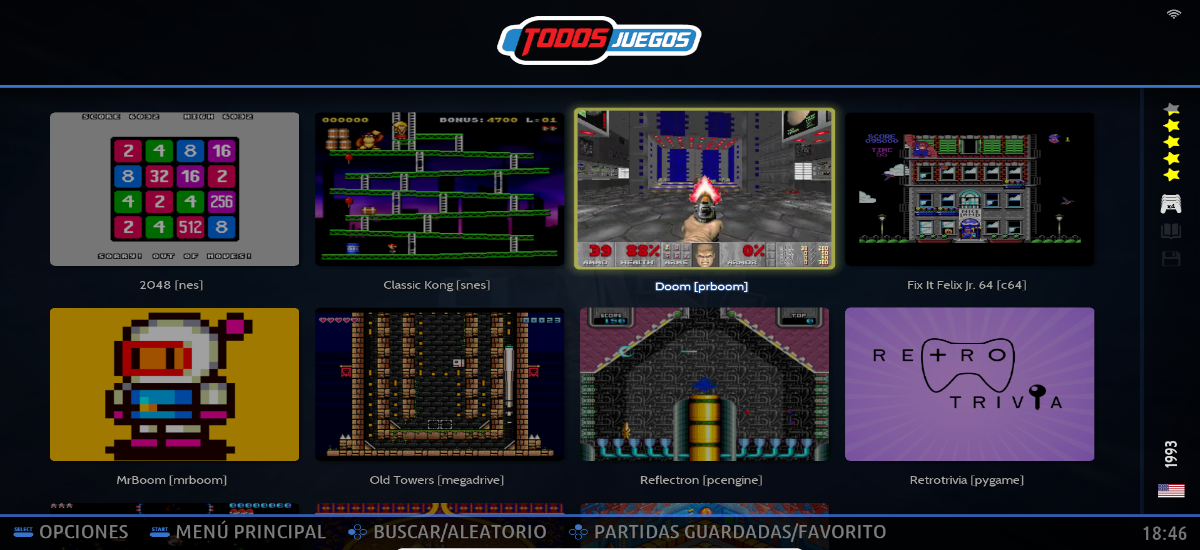
As I said lines above, we can install more games using their corresponding ROMS. We will also see that the emulators that it brings with it are not as many as we would like, even though it will allow us to add more using the corresponding BIOS.

If we have the virtual machine started, and we press the "F1" key we will see that a file explorer opens where we can find different folders. But the ones that interest us the most are the ROMS folder, in which we will have to put the games that we want to load into Batocera (inside we will find a folder for each emulator), and the BIOS folder, in which we will have to paste the BIOS for the emulators to load.
The ROMS
It's basically about the games. As I was saying, Batocera includes some free and open source sample games, but does not include any official or original games for any consolesince that is illegal. Batocera is designed so that users can play the backup copies of the games that we already have in physical format.
Having the above clear, the ROMS will have to be copied by hand in a specific folder of the system. In addition to being able to use the Batocera file manager, like when we created the virtual machine we configured the network device as “bridge adapter”, we will see that On the host computer, in the network option, we will have a location called Batocera available (File sharing). This will be the case as long as the virtual machine we created is turned on.
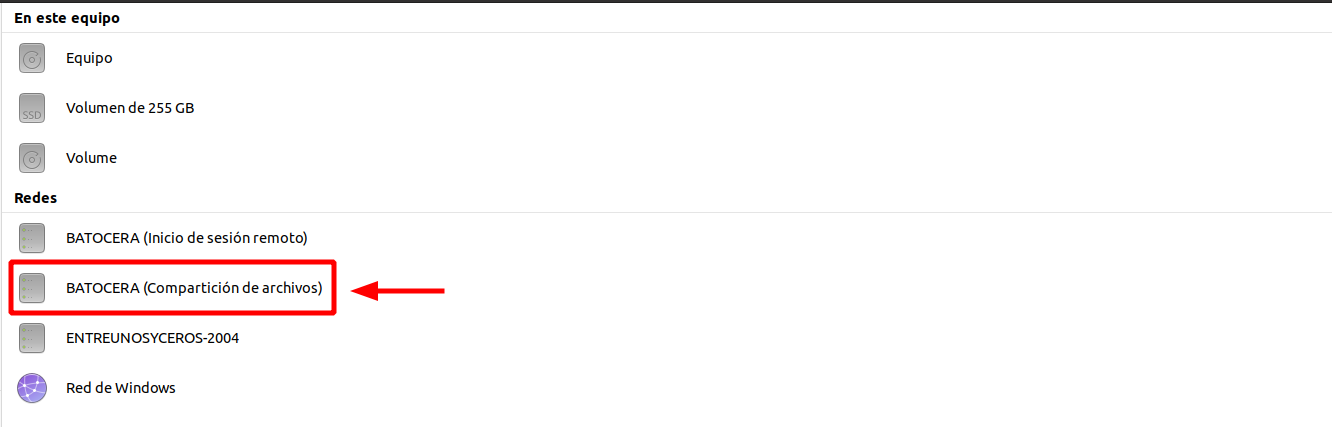
Within this location, we will find the folder “Share”. There we are going to see the Batocera file system, in which we will find the folders for the ROMS. Inside this folder we will see a lot of subfolders, each one corresponding to a different retro console. For example, within the “megadrive” folder we will paste the MegaDrive games, in the “dreamcast” folder the DreamCast games and so on with the rest.
the bios
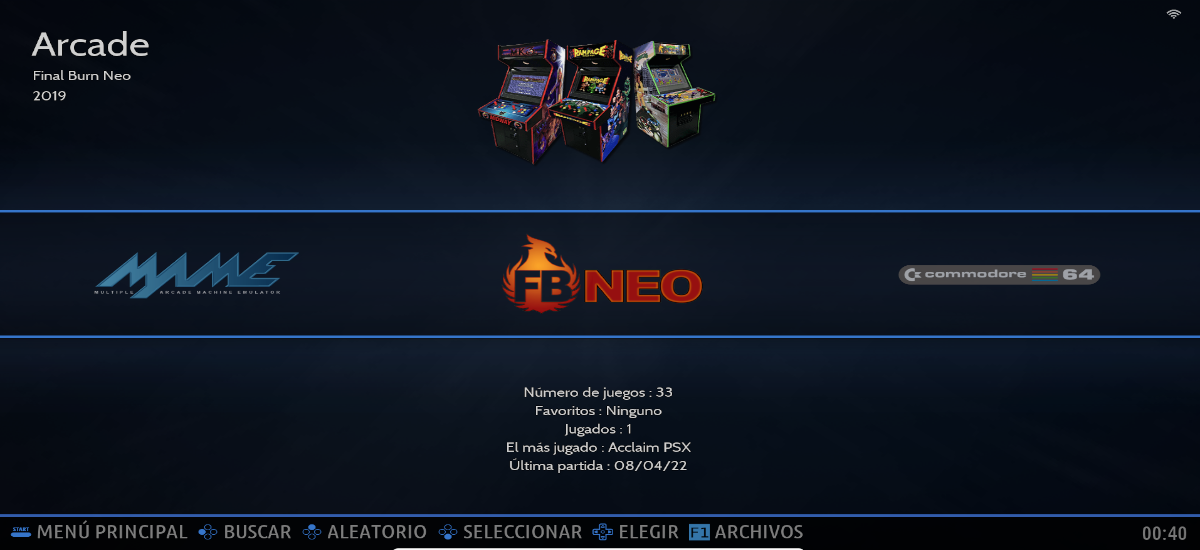
As I indicated above, the emulators that Batocera brings with it are not all that may interest us. Some emulators such as Neo Geo and some arcade machines require additional files to be installed in order to read the games. These are the BIOS files, which we will have to copy in the folder /share/bios by Batocera. We can access it either from the Batocera file explorer (“F1”) or through the network option of the host computer.
The BIOS files contain proprietary code, so they are not included with the distribution of this system nor are they available on the official Batocera website.. So if someone wants them, they will have to look for them at their own risk.
Once we have everything to our liking, we are only going to have to select the system that we want to emulate, choose a game and from there, have a good time. To learn more about the installation and how to work with this project, users can consult the Wiki or the project website batocera.