
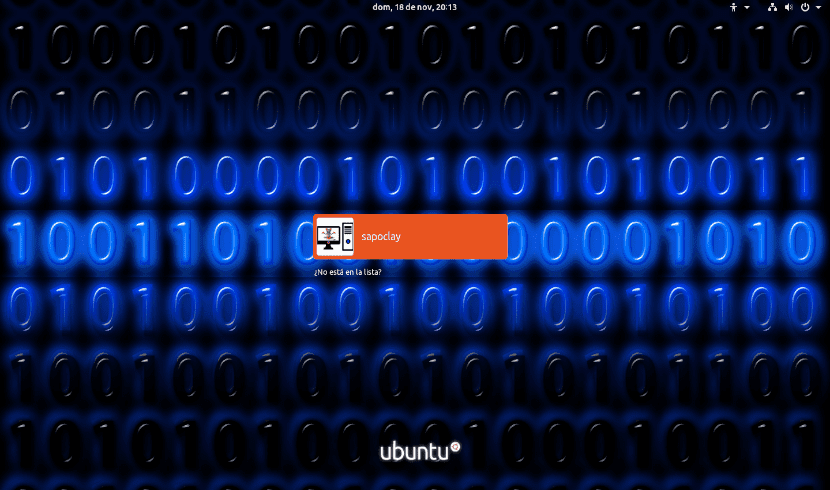
In the next article we are going to take a look at how we can change the background of the login screen in Ubuntu 18.10 In a simple way. All Ubuntu users find that every time we log into our computer, we will see the screen that asks us for the user password to appear, to verify that you are who you say you are.
This is the step that all users must follow. After entering the password, we can now enter our Ubuntu world. Even that you can enable automatic login, which is not highly recommended especially if you share the team, every time you log in you will have to go through this process over and over again. As Ubuntu releases versions, the login screen changes background. But during the use we make of any of these versions, we will always see the same background.
If you are one of those who are tired of the default login screen of the system, let's see how to give it a personal touch. Having a background to our liking is always appreciated when entering our desktop. Some time ago, a colleague indicated to us in a article as do the same for the Lightdm session manager using the dconf program.
However since Ubuntu switched from Unity to the GNOME desktop environment and GDM3 as a login agent, the way to change the background of the login screen has changed a bit. In the following lines we will see how to establish a custom background without using any program for it.
Change the background of the login screen in Ubuntu 18.10
By default, Ubuntu will allow us to modify the desktop wallpaper and the lock screen background. Nevertheless, there is no direct option available to change the background of the login screen. We are going to have to do this by working our way through some system settings. This is simpler than it may seem.
If you have installed any session manager, and you are currently not sure which one you are using, you can check it by opening a terminal (Ctrl + Alt + T). In it you will only have to write:

sudo cat /etc/X11/default-display-manager
If we are clear that we use GDM3, we can start now searching and saving an image background that we like.
The next step will be to open a terminal (Ctrl + Alt + T). In it we are going to launch the following command:

sudo cp ~/Imágenes/Imagen.png /usr/share/backgrounds
Obviously in the previous command, each one will have to change the name of the image and the path to it.
If you prefer to use the graphical environment to copy the image to the background folder, also you can use file manager. Launch the following command in the terminal (Ctrl + Alt + T), and when the file manager window opens, paste the image into the folder.
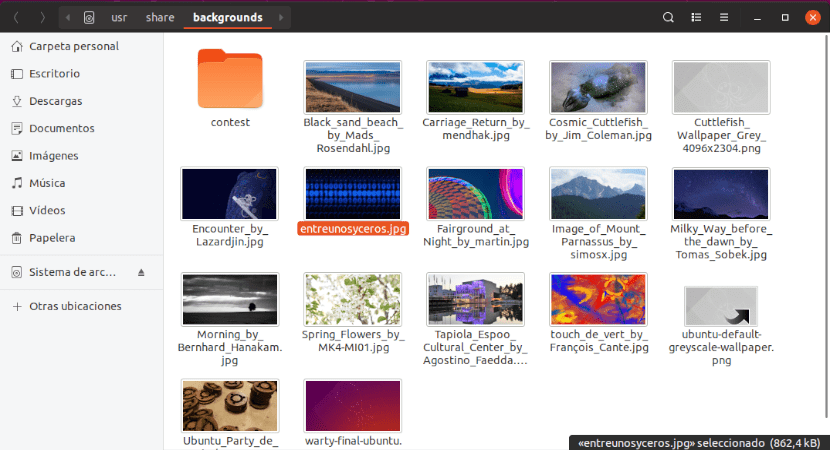
sudo nautilus /usr/share/backgrounds/
Once the image is saved, it is time to edit the CSS file that defines the background of the login screen. We will do this by launching in the terminal (Ctrl + Alt + T) the necessary command to edit the gdm3.css file:

sudo vim /etc/alternatives/gdm3.css
Here we will see all the CSS code. There we will have to find the section indicated in the screenshot below. The section to change should be over the 1981 line.
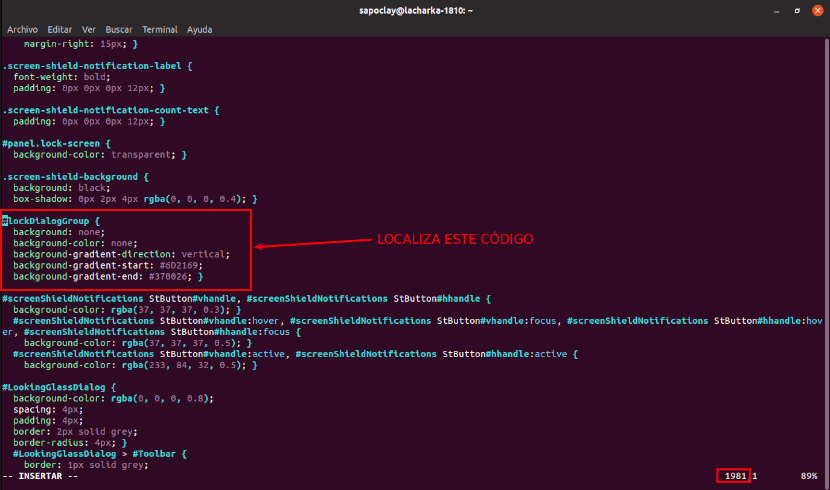
Once the section is located, we are going to change all the background inputs. Delete or comment on them and change them to the following:
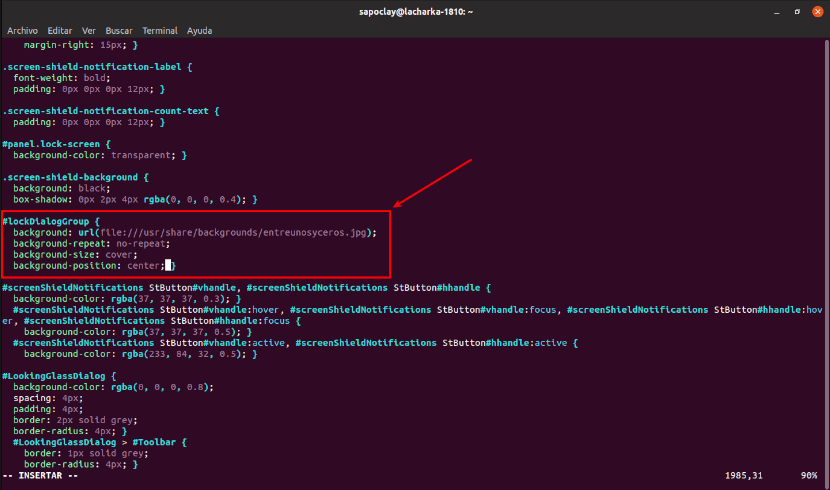
#lockDialogGroup {
background: url(file:///usr/share/backgrounds/Imagen.png);
background-repeat: no-repeat;
background-size: cover;
background-position: center; }
Once you finish changing the file, save it and close the editor.
The final result
After completing all the steps, we only have reboot system or log out user. After this we will see a new background on our login screen. For this example I I have tried .jpg and .png images and both types have been seen correctly.
One question, the images can be of any resolution or do they have to have a particular resolution?
For the article I used images with resolutions similar or equal to those in the / usr / share / backgrounds / folder. But the higher the resolution, I guess the better the background will look. Salu2.
In my tests, say that with that example the image got out of control and destroyed the login screen
Hello to me I generated the same error
with this code I worked the change of image in 19.04 I hope it works for you
#lockDialogGroup {
background-color: #000000;
background: url (file: ///usr/share/backgrounds/yoututosjeffdsgdrsf.jpg);
background-repeat: no-repeat;
background-size: cover;
background-position: center;
hello… and how do I take a screenshot of the lock screen is it worth the redundancy?
Hello and for the ubuntu 20.04 version?
By changing the: #lockDialogGroup {
background: url (file: ///usr/share/backgrounds/Imagen.png);
background-repeat: no-repeat; (<—— they were only with this background-size: cover;
background-position: center; } Well, when I save it and restart the computer, it does not completely enter the user home screen (As the screen reader was activated, it only begins to say the first words and they are cut off), directing me to a programming loop and loading. GOOD I WOULD LOVE FOR YOU TO HELP ME RE-SCHEDULE THE CHANGES I MADE, RETURNING IT AS IT WAS BEFORE. SINCE I THINK MY COMPUTER IS NOT SUITABLE FOR SUCH CHANGES. PLEASE I WILL BE WAITING FOR YOUR ANSWER.
Good Community. Begin my comment by putting everyone in the background, I have just started in the Linux world - Ubuntu-. I have version 20.04 installed on my computer. I have been able to verify that it uses GDM3.
Well, I have been doing this tutorial step by step (and other similar ones that are on the Internet). When I get to the part of looking for the css file, unfortunately when I open the file it comes out completely blank; that is, it does not have any type of text.
The doubts that come to me is whether this procedure does not work in the new versions of Ubuntu; or it must be a problem with the installation of the operating system.
It is NOT that it is very transcendental, but I would like to learn.
Greetings, I await your responses.