
In the next article we are going to take a look at how can we flush DNS cache in Ubuntu. Every now and then the DNS cache needs to be flushed on your Ubuntu system. With this we will avoid IP address conflicts. In case someone doesn't know yet, say that the DNS (Domain Name Service) is responsible for assigning the name of a website to the corresponding IP.
DNS is considered one of the critical parts of the Internet connection. With the purpose of faster access to visited websites more often, our machines keep track of DNS records, or in other words, cache them.
Naming to IP addresses is by far the best known feature of the DNS protocols. For example, if the IP address of the Google site is 216.58.210.163, most of the people arrive writing www.google.com and not the IP address as it is much easier to remember. The site's IP address could change for many reasons, without you having to rename the website. If you want to know more about the domain name system, you can consult the article they have published on Wikipedia thereon.
If the DNS cache is never cleared, it can lead to different types of errors. These errors can occur especially when a website changes its IP address. This can cause an IP address conflict. Therefore, to avoid this problem, the DNS cache of our machine should be flushed regularly. In addition, clearing the DNS cache will help eliminate unnecessary data that occupies the system and solve some technical problems related to the famous error of 'outdated entries'.
In the following lines we will see how flush DNS cache on an Ubuntu operating system in a few simple and clear steps to use in our equipment.
Flush DNS cache on Ubuntu machines
To carry out this task we will have different methods.
Clean up DNS using systemd-resolver
Before flushing the DNS cache, we will be able to check DNS statistics opening the terminal (Ctrl + Alt + T) and typing the following command:
sudo systemd-resolve --statistics
The output that the terminal should show should look something like the following:
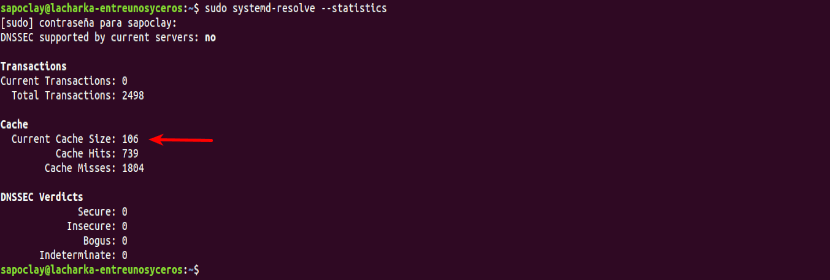
Based on the screenshot above, the current cache size is 106.
Once we know the statistics, we can proceed to flush DNS cache using systemd-resolve. It is a DNS daemon that is built into systemd and that your system already uses for many things. Like the devil systemd-resolve It is running on all Ubuntu systems, we will be able to use it to clear our DNS cache. We will only have to use the following command in the terminal (Ctrl + Alt + T):
sudo systemd-resolve --flush-caches
For verify that the emptying process was successful, we are going to run the command again in the terminal to see the cache statistics as we did before:
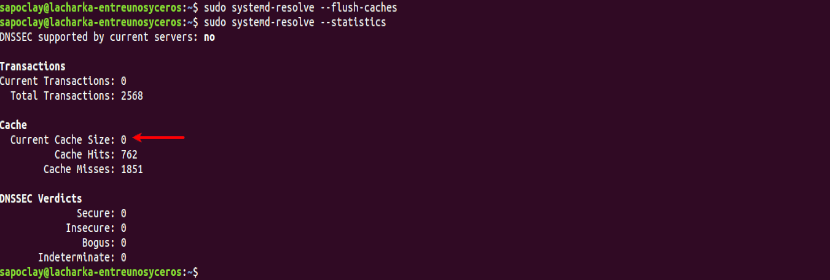
sudo systemd-resolve --statistics
As you can see from the screenshot above, the current cache size parameter is zero. This means that the cache has been cleared successfully, and that is what we need.
Flush cache using the dns-clean command
Another effective method for clear our DNS cache is to use the following command in terminal (Ctrl + Alt + T):
![]()
sudo /etc/init.d/dns-clean start
That's the most basic thing a user needs to know about flushing DNS cache in Ubuntu. In all cases, the process is simple and does not require a reboot of the entire system.
Remember on Ubuntu 16.04, DNS cache is not enabled by default. We will be able to use tools such as bind, dnsmasq, nscd, etc.. to create DNS caches on our computer. Whatever the DNS service If your system is running, it shouldn't be a problem to reboot it to clear the DNS cache.
Good tip, thank you very much.