
In the next article we are going to take a look at GitBook. This is one cross-platform GUI application, whose main function is to bring the GitBook workflow to our desktop in Ubuntu. Taking a look at its interface you can see that it is well thought out for editing text and working with the live preview of the project.
GitBook was created in mid-2014. It was born looking to create a Modern and simple solution to document creation, digital writing and content publishing. The philosophy of the project is to be simple without losing the point of elegance. Distractions and worries for content creators are eliminated, so they can write freely.
Hundreds of thousands of users use GitBook to write documentation (library, API, tools, etc.) or knowledge bases (such as FAQs). People also use this program to publish technical books, teaching materials, and many other things.
GitBook General Features
This is a online platform for writing and hosting documentation. It provides an open source book format and toolchains.
This program will offer us built-in Git controls. We will also have at our disposal a table of contents panel, a file tree panel and quick-format buttons to facilitate the structuring of our documents.
In addition, GitBook offers us the possibility of display our content as a website (customizable and extensible) or like an ebook (PDF, ePub or Mobi).
GitBook.com is the online platform for creating and hosting books created in the application format. Offers hosting, collaboration features, and an easy-to-use editor. This program allows us to use our team to create local books, on GitHub or on the platform to host them.
To start using this program, the creators make available to users the possibility of consulting the installation instructions in the documentation. If any user wants or needs it, they can consult the source code of this application on the page of GitHub of this application.
GitBook Installation
If you want to download the program package, you can download it from your Official Site. There we can download it using the browser. We can also get hold of the package using the wget command opening a terminal (Ctrl + Alt + T) and typing in it the following:
wget http://downloads.editor.gitbook.com/download/linux-64-bit
Once the package is downloaded, we can install it by executing the following command in the same terminal:
dpkg -i linux-64-bit
After finishing the installation, you will be able to use the search field of the Ubuntu Dash and type gitbook. The application icon will be displayed on the screen.
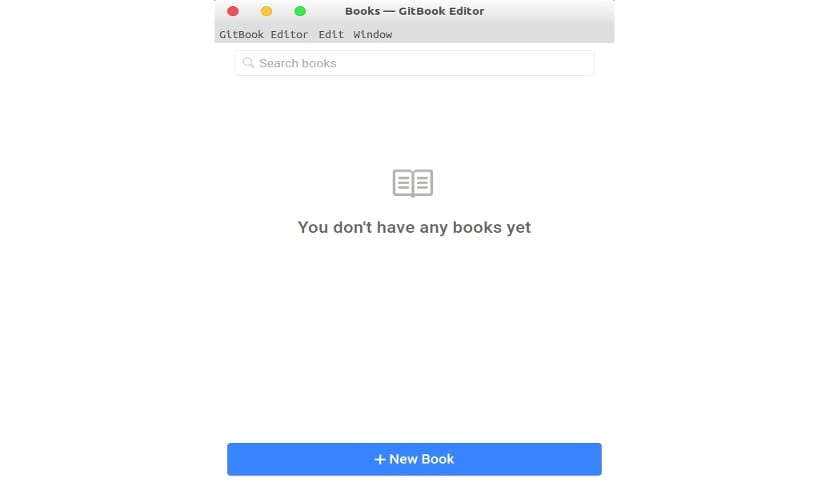
When we have logged in, either with a GitBook account or with our social media account, we can now create a new Book. We can do this by clicking on the New Book option available on the screen.
Now you can start write your own Book in the Editor. Do not forget to select in the editor the repository to which we want to upload the changes.
How to sync Gitbook with Github?
Something very interesting about this program is that it offers us the possibility of working with GitHub. I have read that for some people this has been a problem to sync a Github repository with the GitBook platform.
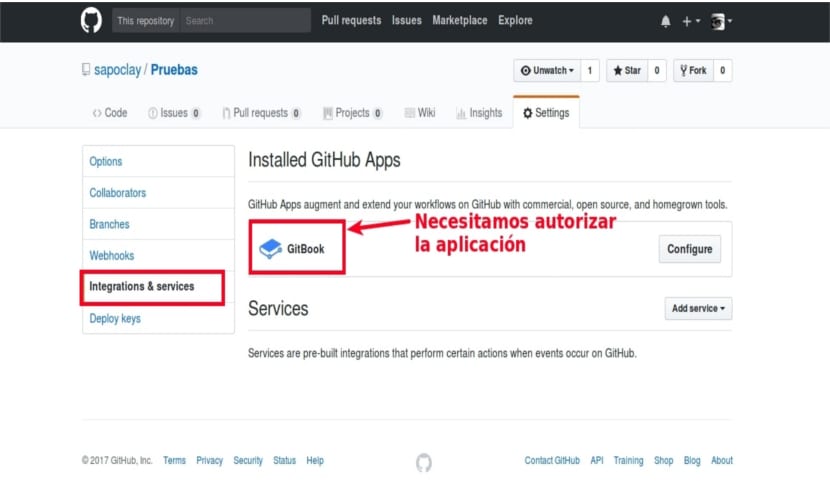
GitHub repository setup
The first thing we will have to do is create a public repository on Github. We will also need create a book on the Gitbook web. It is recommended, although I think it is not essential that both repositories have the same name.
Book settings in GitBook
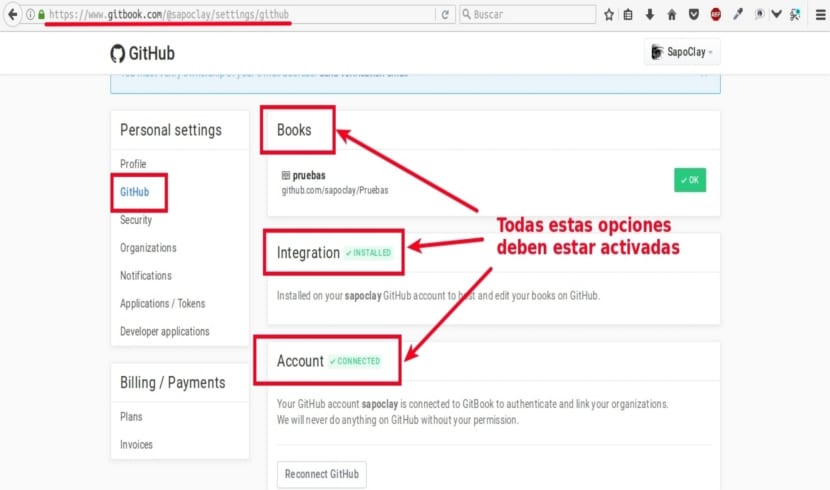
Once the book is created it is important to access the Book Setting tools and go to the Github section. Once inside, you will proceed to choose integration with the GitHub repository with which you want to synchronize. Once the repository has been chosen, we will continue to accept and save the entire process.
Once this operation has been carried out, if everything has gone well, a green message should appear indicating that the integration with Github it's working.
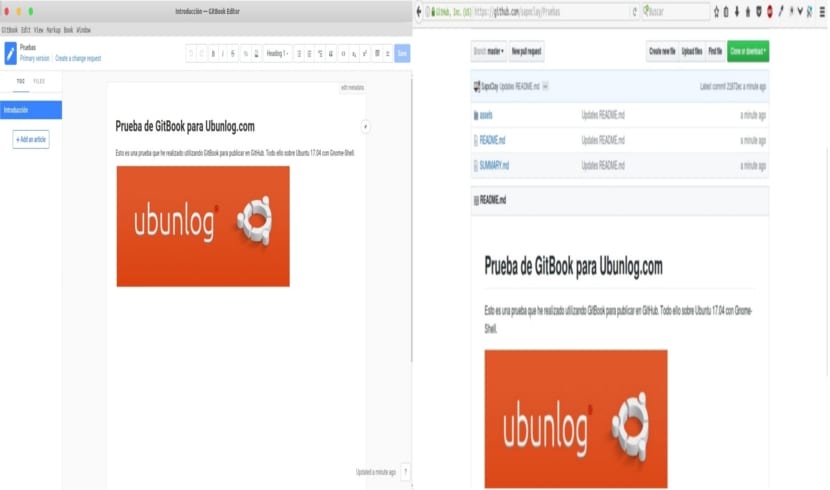
To check that everything works. Now we will start the session with the GitBook client that we have installed in our Ubuntu. When it starts, we can make the changes that we consider pertinent. Now we can upload them to our newly created GitHub repository.
Dani Galicia, Franck Palacios, Jaime Mejía, Titan Fer