
Although there are many more options, the most famous for creating virtual machines in Linux is Virtualbox. With this Oracle software we can create virtual machines of almost any operating system, but there is a problem: what we will see will be an operating system in a square window with very large icons. How can we solve this? "Simply" installing Guest Additions on any virtual machine. In this article we will show you how to do it in Ubuntu.
Installing Guest Additions in a Virtualbox virtual machine is "simple", in quotes. And it is that, if we do it directly as it should be, may give us an error. First, we will have to take a few previous steps and then do a kind of "trick" so that the virtual machine reads the ISO as it should. From what it seems and at least in my case, nothing works if we use the system designed for it. I explain how I have achieved it below.
Installing Guest Additions on Ubuntu
The previous steps and the little trick are the following:
- We install any virtual machine. This can be done after the next two steps. You have a tutorial on how to create a here.
- We check that we have the latest packages of the necessary software. To do this we will open a terminal and write these commands:
sudo apt update
sudo apt upgrade
sudo apt install build-essential dkms linux-headers-$(uname -r)
- Next we install the compatibility packages with this other command:
sudo apt-get install virtualbox-guest-utils virtualbox-guest-x11 virtualbox-guest-dkms
- We restart the computer and then we start the virtual machine.
- Let's go to "Devices / Insert Guest Additions CD Image".
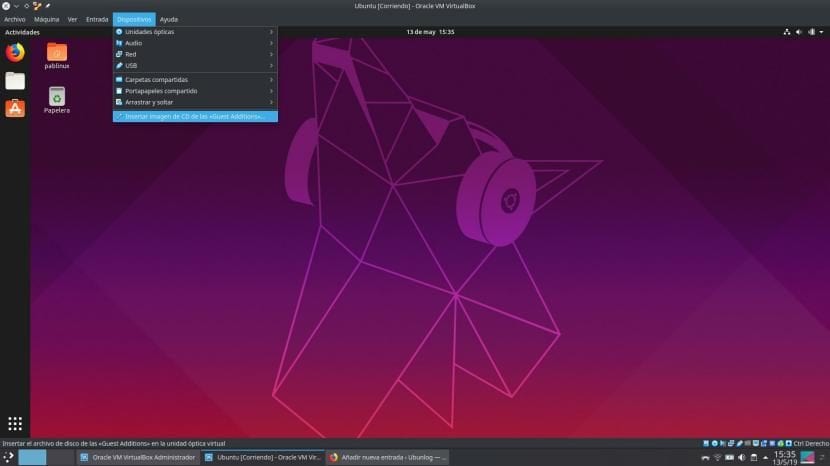
- It will give us an error if we do not have it downloaded and the possibility of downloading it. We accept and download it. If we don't see an error, we follow the instructions and we have it. If we see any failure, we continue.
- We do step 5 again.
- In the window that asks us if we want to download the tools there is a link. We copy it. Alternatively, we can go to your download website, choose the version of Virtualbox that we are using and download the ISO from its source. You have the latest version here. If we do so, we skip step 9.
- We paste the link in a web browser like Firefox and press Enter. The ISO download will begin.
- The trick begins by going to the Machine / Configuration menu in our virtual machine.
- Let's go to Storage / Empty, which is the DVD drive.
- On the right, we click and choose "Select Virtual Optical Disk File."
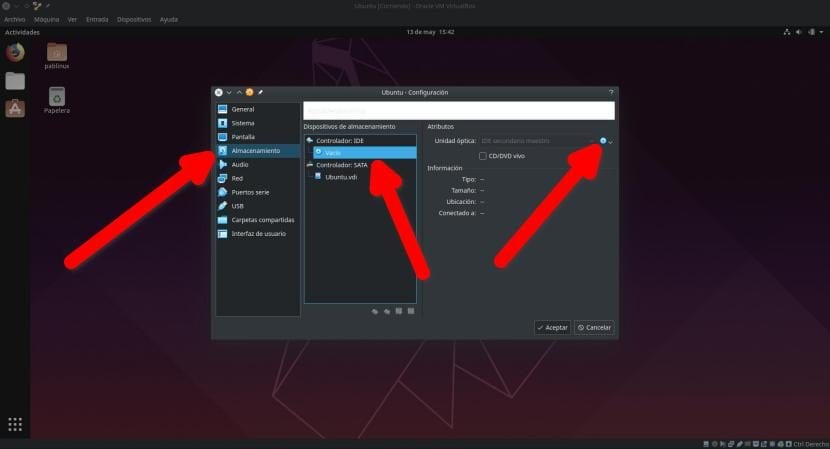
- We choose the ISO that we have downloaded in step 9. The "autorun" of the CD will allow it to start automatically.
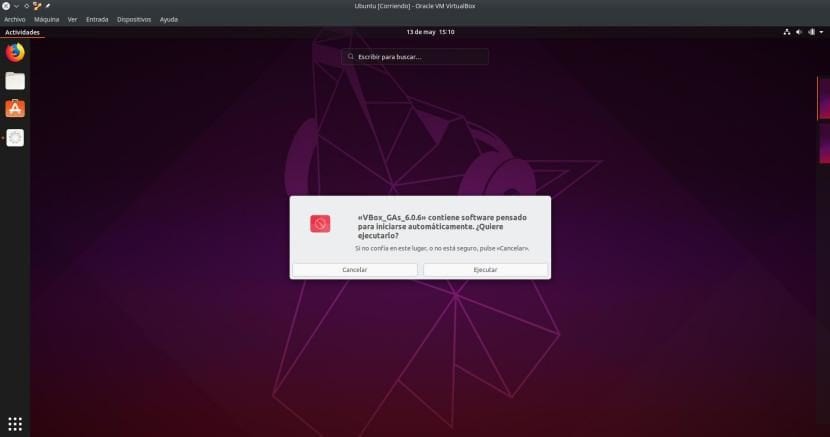
- We click run and wait. When the process is finished, the window will change automatically and we can put it on full screen. We can also go to Machine Settings / General / Advanced and activate "drag and drop" to share files, among other things.
Before ending this article I would like to clarify something that I think I have made clear from the beginning: this method is not the official one, but one that will help us if the official fails us, as it is in my case. Has it worked for you and do you already have a perfect virtual machine on Linux?
I have always done it in the debian-based ones as follows
I do everything inside the virtual machine
1- From the virtual machine we open a terminal and type
$ sudo apt install virtualbox-guest-additions-iso
2 Then I go to the / usr / share / virtualbox / folder and mount the iso that is inside I open this iso and open a terminal at the address where it has been mounted and execute the following command:
$ sudo sh VBoxLinuxAdditions.run
And with this, the guest additions will be installed, if it fails us here, it has ever happened to me, we simply create a folder on the desktop or wherever we want, we give it the name we want, preferably without spaces, and copy the content of the iso inside from this folder, we go to it through the terminal and execute the previous command, and that's it, it will be installed.
Explained perfect works great