
In the next article we are going to take a look at some ways to change hostname in Ubuntu. Bill hostname on a computer is something important, especially today where many computers are connected to the internet. It is the name assigned to a computer or equipment within a network.
This is the name that will be used when we want refer to the team, in order not to have to use a numerical reference provided by the IP address of the network card. This will make it easier for the user to remember.
Some time ago a colleague spoke to us in an article published in this blog about how to change hostname in Ubuntu. In the following lines we are going to see three more methods that can serve the same purpose. Then it is a matter of each one choosing the one that best suits their needs.
Change hostname in Ubuntu
A handy tool called hostnamectl will allow us to manage the hostname of the system easily.
This is the simplest method. As I mentioned before, the colleague already told us about him in the article published some time ago. That is why we will not see it in the following lines. If you want to consult that article, follow this link. Next we will see other options that will basically allow us to do the same.
Using the nmcli command
NMCLI is a command line tool to control NetworkManager that will offer us the state of the network. This command is used to create, display, edit, delete, activate and deactivate network connections, as well as to control and display the status of the network device. Also, it allows us to change the hostname.
For view current hostname using nmcli, in a terminal (Ctrl + Alt + T) we will write:

nmcli general hostname
Using the following command, for this example we are going to change hostname from 18-10 shown in the above screenshot to ubuntu-1810.
nmcli general hostname ubuntu-1810
For the changes to take effect, the simplest is log out and log in again. After doing so, we can now run the same nmcli command to check modified hostname:

nmcli general hostname
Change the hostname using the nmtui command
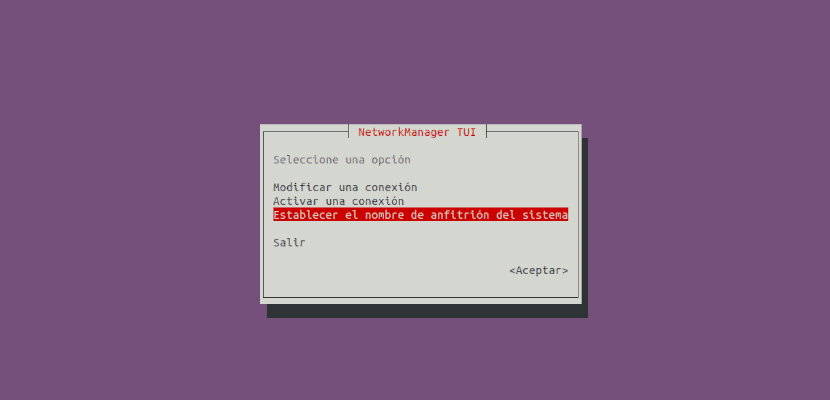
nmtui is a TUI application based on curses to interact with NetworkManager. When starting it, the user will be asked to select the activity to be carried out.
For launch the user interface, we are going to write the following command in the terminal (Ctrl + Alt + T):
nmtui
In the interface we will be able to use the up and down arrows on the keyboard to choose the option "Set the hostname of the system". Then you just have to press Intro.
In the following screenshot you can see the hostname that we are going to change.
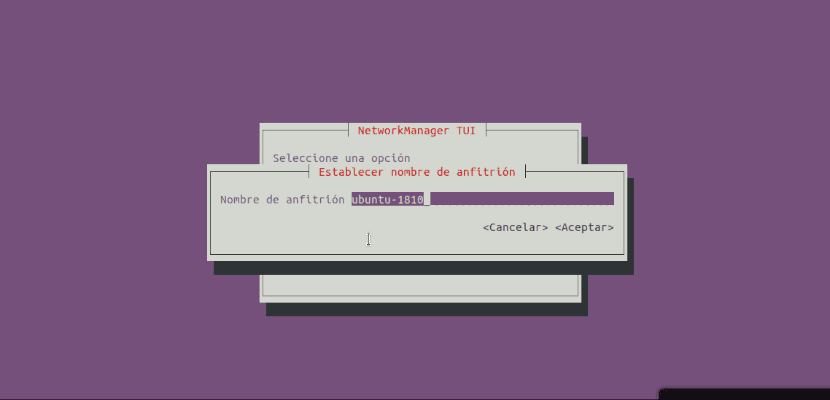
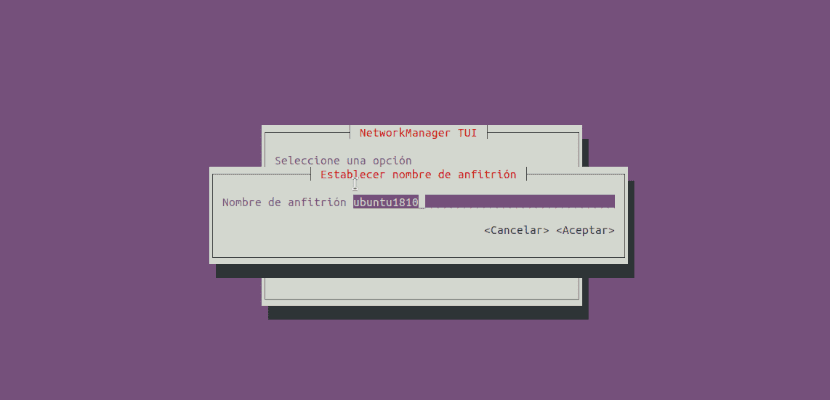
To change the name, you just have to delete name that is seen and write a new one. We will finish by clicking on the option «Accept«.
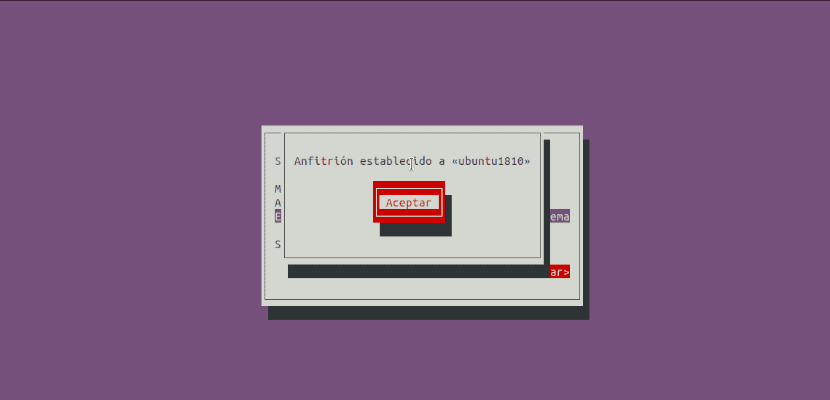
As confirmation it will show us the updated host name on the screen. We will click on «Accept»To complete the action.
Finally, if we click on the option «Logout«, Nmtui will be closed.
We can restart the systemd-hostnamed service for the changes to take effect by typing in the terminal (Ctrl + Alt + T):
sudo systemctl restart systemd-hostnamed
To finish we can check updated hostname executing the following command:

hostnamectl
Change the hostname using the / etc / hostname file
As another possibility, we will be able to change the hostname by modifying the / etc / hostname file.
The name of the current host can be verified by looking at the content of the file / etc / hostname:

cat /etc/hostname
To change the hostname, we are just going to have to overwrite the file because it only contains the hostname. To do this we write in the terminal (Ctrl + Alt + T):
sudo echo "ubuntu-1810" > /etc/hostname
If despite using sudo, the system tells you that you don't have permission, log in as root using:
sudo su
Then run the previous command again, but this view without sudo. After modifying the file we will need reboot the system for the changes to take effect correctly. We can do this by executing the following command:
sudo init 6
To finish, we will check the updated hostname using the file / etc / hostname.

cat /etc/hostname