On some Linux distributions, the Port it only shows two colors, so it is sometimes difficult to distinguish files or lines with the naked eye. In some other layouts, the Terminal does display the information in multiple colors. If we use an operating system or a variant of the first group, how can we activate the colors? Well, following a few simple steps that can be done from the same Terminal to which we want to give some life.
For activate colors from the Terminal we will have to edit the file ~/.bashrc. By default the file does not exist or is empty, but there is a test one in the path / etc / skel. By editing this test file and putting it in the correct path, the terminal colors will display as in the screenshot at the top of this article. Next, I detail the steps to follow to activate the colors of the windows of this widely used tool.
How to activate the Terminal colors where it is not by default
- We will first copy the ~ / bashrc file to the desktop by opening a Terminal and typing the following command:
cp /etc/skel/.bashrc ~/.bashrc
- Next, we write this other command to edit it:
nano ~/.bashrc
- The content of the file will be shown in the same window. We have to find the line that says # force_color_prompt = yes and eliminate the pad (#) that is in front of the line, which would force_color_prompt = yes. To move forward, you can use the shortcut Ctrl + W, enter the text "force" and press Enter.
- Next, we save with Crtl + O and exit with Ctrl + X.
- And finally, we reload the profile with the following command:
source ~/.bashrc
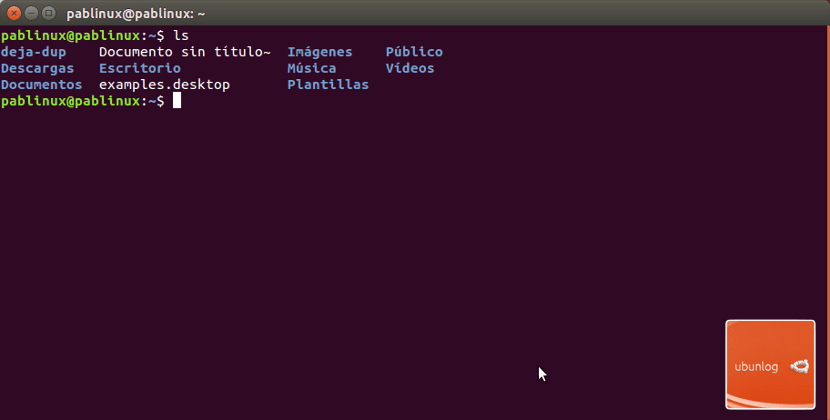
If everything has gone well, you can check that the colors have been activated by closing the current window, reopening a new one and typing "ls". It should show you an image like the one at the top of this little tutorial, with the user in one color, what we write in another and the folders in another. What do you think?
It was the first thing I did, put the Amstrad colors on it, I love GEDIT
I liked it. Thank you pablo.
NICE
Very good, I did not know you could! Thanks
Very good. Super simple. It should come by default. Thanks
Thanks Pablo, it has been very simple especially with your explanations step by step. Cheers and thank you again.
Thank you very much, the tutorial was very useful and easy to do
This that seems like a silly thing to me helps me a lot. Now I can see where I put the last command when I am installing packages. The terminal blink I was using before but this is better. Thank you.
Great!! Thank you very much, it works with Terminator too!
Thank you very much, it has worked perfectly and my eyes will thank you infinitely.
It helped me. Really useful. Thank you so much ^. ^
Hello! thanks for your time and these instructions !! Unfortunately I am not able to get to the content of the file 🙁 I can't get to # force_color_prompt = yes to remove the hash mark (#). when typing nano ~ / .bashrc in terminal the response is as follows:
GNU nano 2.9.3 /home/patricuismart/.bashrc
# ~ / .bashrc: executed by bash (1) for non-login shells.
# see / usr / share / doc / bash / examples / startup-files (in the package bash-doc)
# for examples
# If not running interactively, don't do anything
case $ - in
* i *) ;;
*) return ;;
esac
[Read 117 lines]
^ G Get Help ^ O Write Out ^ W Where Is ^ K Cut Text ^ J Justify ^ C Cur Pos MU Undo
^ X Exit ^ R Read File ^ \ Replace ^ U Uncut Text ^ T To Spell ^ _ Go To Line ME Redo
any ideas? Thank you!!!
Thanks bro