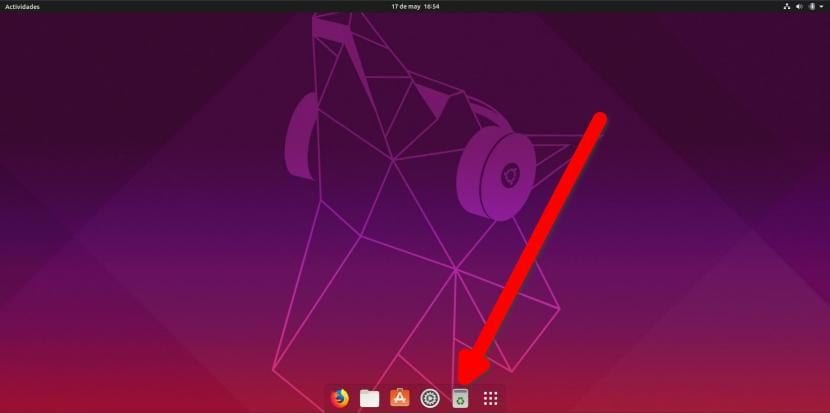
At the end of last month, we publish an article in which we explained how to turn the Ubuntu dock into a "real" dock. A real dock does not occupy the entire lower part of a screen, but has fixed applications and grows every time we open a new one. What also usually includes a full dock is the trash can, which means that we can access it quickly without having it on the desktop.
In this article we will show you how to add the trash can to the Ubuntu dock. The system explained in this article is supposed to be for Ubuntu 18.04 LTS, but works perfectly on Disco Dingo. To do so, you have to write things exactly as they are explained below. As we explain in the steps to follow, if we make changes we have to make sure that we do it correctly. For example, in the lines where "Name" appears, we can change "Trash" to another word, but the rest of "trash" must be left as is.
Add the trash can to the Ubuntu dock with these simple steps
- We open a terminal, which we can do with the shortcut Ctrl + Alt + T.
- We write the following:
gedit ~/Documentos/trash.sh
- In the file that opens, we paste this:
#!/bin/bash
icon=$HOME/.local/share/applications/trash.desktop

while getopts "red" opt; do
case $opt in
r)
if [ "$(gio list trash://)" ]; then
echo -e '[Desktop Entry]\nType=Application\nName=Papelera\nComment=Papelera\nIcon=user-trash-full\nExec=nautilus trash://\nCategories=Utility;\nActions=trash;\n\n[Desktop Action trash]\nName=Vaciar Papelera\nExec='$HOME/Documentos/trash.sh -e'\n' > $icon
fi
;;
e)
gio trash --empty && echo -e '[Desktop Entry]\nType=Application\nName=Papelera\nComment=Papelera\nIcon=user-trash\nExec=nautilus trash://\nCategories=Utility;\nActions=trash;\n\n[Desktop Action trash]\nName=Vaciar Papelera\nExec='$HOME/Documentos/trash.sh -e'\n' > $icon
;;
d)
while sleep 5; do ($HOME/Documentos/trash.sh -r &) ; done
;;
esac
done
- Once the text is pasted, we save. It will be saved in the route that we indicated in step 2. It is important not to change the route. If we do, we must search the script created for the word and replace it. For example, if we wanted to save it in a folder called "Scripts", we should search for "Documents" and put "Scripts" instead.
- We make the script executable with these two commands:
chmod +x ~/Documentos/trash.sh
./Documentos/trash.sh -e
- Another option to make sure it works is, in the first case, to put chmod + x and drag the file to the terminal and in the second case drag it directly and add -e behind. It is important to remove the quotation marks in both cases.
- The new icon will appear in our applications. To add it to the dock we go to the applications menu, right click and add the trash can to the favorites.
- It remains to make it there when you start. To do this, we search for "Home applications" in the applications and create a new one with these fields:
- Name: Trash.
- Command: /home/Your_user_name/Documents/trash.sh -d
- Comment: whatever you want to explain what it is.
- Important: in the previous path, put the path to the created file. In the example it is in the Documents folder.
- We restart the computer to verify that the icon is there.
If everything has gone well, the trash will appear and the icon will be different depending on whether it is full or empty. In the script we have also created a new action with the name "Empty Trash" so that by right clicking on the dock icon we can empty the pallet, just as we would if the trash was on the desktop or as we can do it from the explorer of files.
The operation will be as you see in the previous GIF: what does not appear is that the option says "Empty Trash". What you can see is that the icon changes, something that it does in a way that is not the most natural in the world. A lesser evil to have what for me is a complete dock with its variable size, with a more transparent color, which I think is better than the dark one that comes by default, and the trash can, which allows me to have a clean desktop from icons. Personally, I like to have my desk only full when I am doing a task; when I finish my work, I like to have an empty desk and what is explained in this tutorial allows me to do so.
Has this tutorial been useful or do you prefer to have the trash as it comes by default in Ubuntu?

Trash works but does not change the icon from empty to full and vice versa. Surely there must be some error in the script
No, it does not work. I have restarted, I have pasted the script again, I have changed the icons etc etc ... No idea why, but the icon does not change although the trash can works perfectly. Thanks for the inconvenience anyway. All the best
I have finally found the error. In the login command after the path to the script I had set the command "trash.sh -e" and the correct thing is "trash.sh -d". Now it works correctly. Thank you very much for the indications and for the inconvenience. A tender greeting.
It has worked for me the first time, I have been looking for this for a long time, thanks.