I have only recently started using Kodi to listen to music. If I'm not doing heavy tasks, and considering that my computer has a lot of RAM, I don't know, I like it. But the problem that Kodi and many other music players have is that they don't have an equalizer. This can be fixed with PulseEffects, which is a software with which we can manage PressAudio. This article is about the second, although there may be room to also talk about the first.
PulseAudio is a sound server that is available on Linux and macOS. Although now everything revolves around Pipe Wire, a lot of software continues to depend on or be based on PulseAudio, and in this article we are going to talk about how to set it up in ubuntu.
Configure PulseAudio in Ubuntu step by step
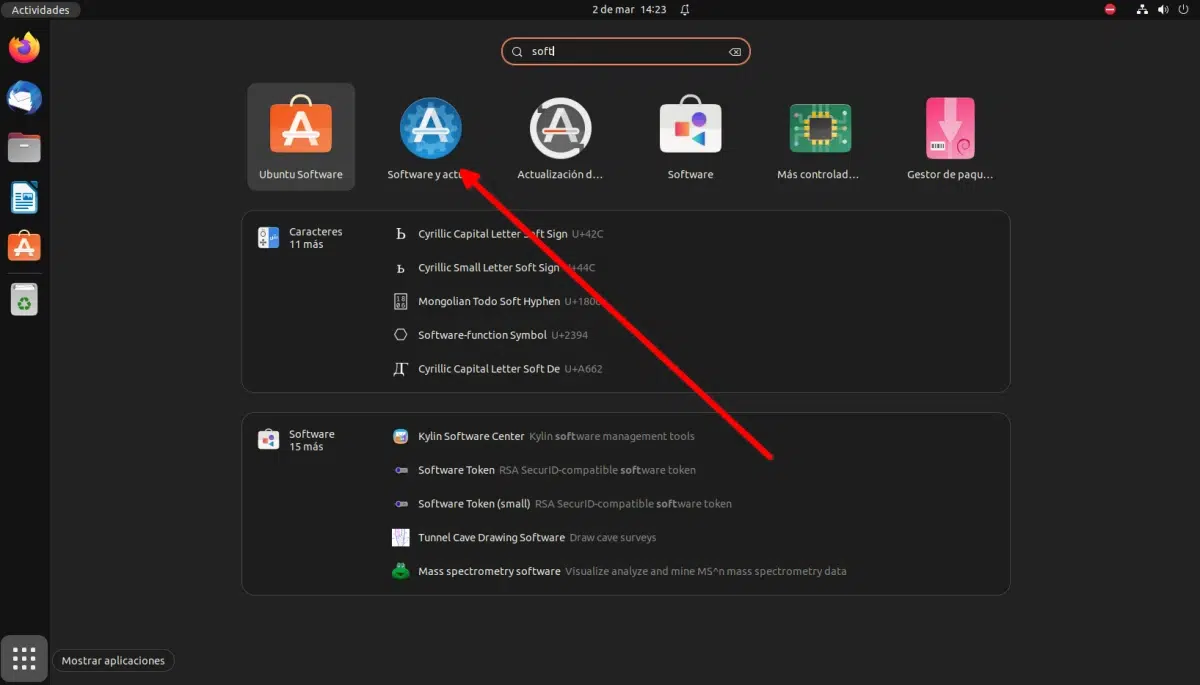
The first thing we have to do, if we haven't done it before, is to activate all the available software sources, namely main, restricted, universe and multiverse. This can be done from the app drawer, searching for "software" to find "Software and Updates":
Inside, in the first section, we should have something like this:
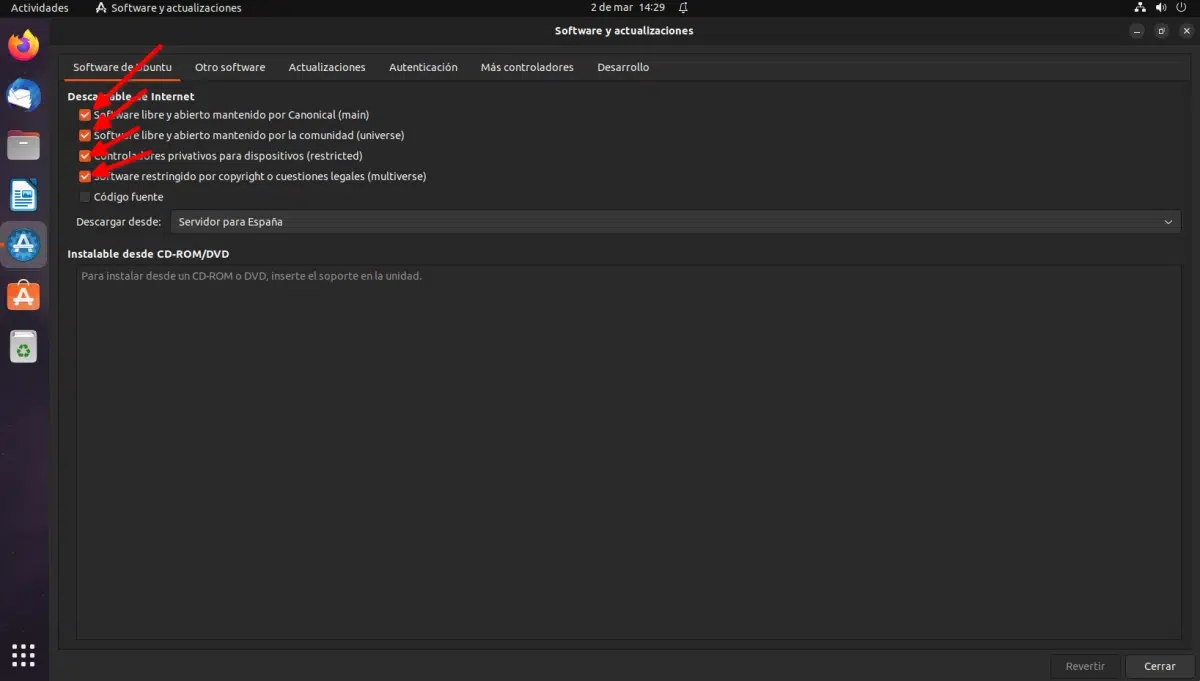
When closing the window, it asks us if we want to reload the repositories, and it's something that doesn't hurt. If you are not told yes, in the terminal you have to write "sudo apt update" so that the packages from the new sources appear as an option to install.
Install PulseAudio on Ubuntu
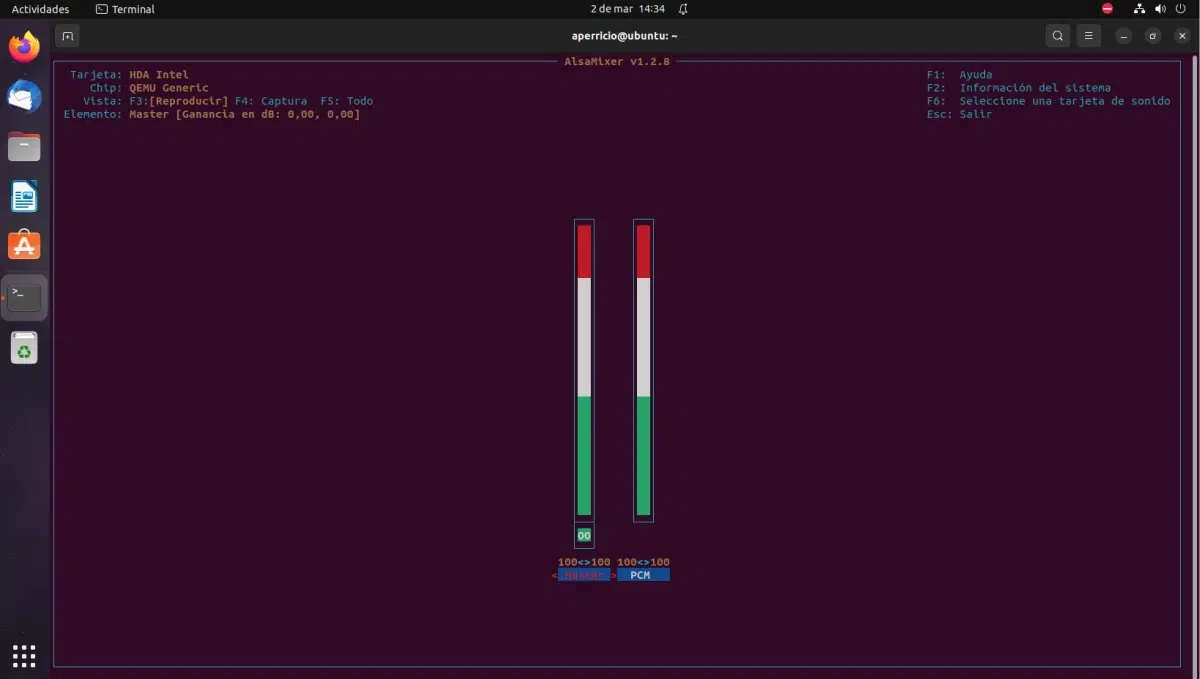
By default, Ubuntu uses (or relies on) ALSA for audio management. If we want to check or take a look at it, we can open a terminal and type “alsamixer” (without the quotes), which will give us something like the following:
But this article is about PulseAudio, and what we have to do if we want to manage the sound with it, we will have to do it by following these steps:
- We open a terminal and write:
sudo apt install pulseaudio
- Next, we restart the computer for the changes to take effect.
- PulseAudio has a graphical tool that will allow us to manage it, and its name is PulseAudio Volume Control, but it is not installed by default. In order to use it, we have to open another terminal (or in the same one) and write:
sudo apt install pavucontrol
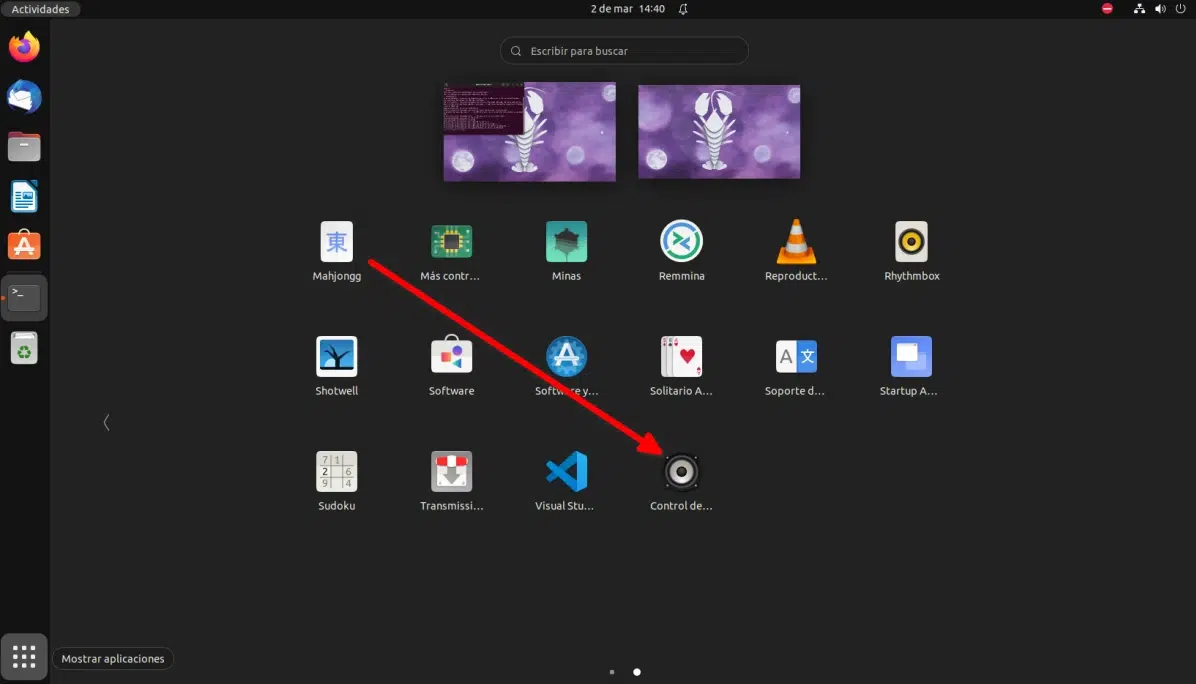
- Once installed, we open the app drawer and go to the end, since an application called "PulseAudio Volume Control" will have appeared:
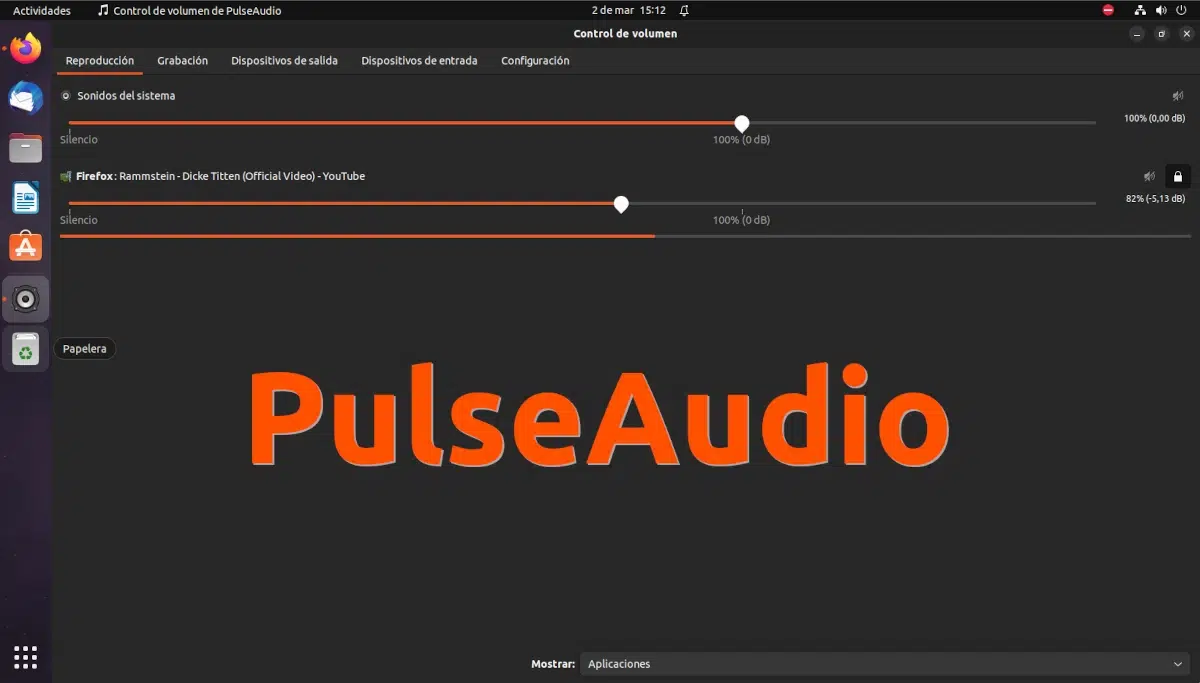
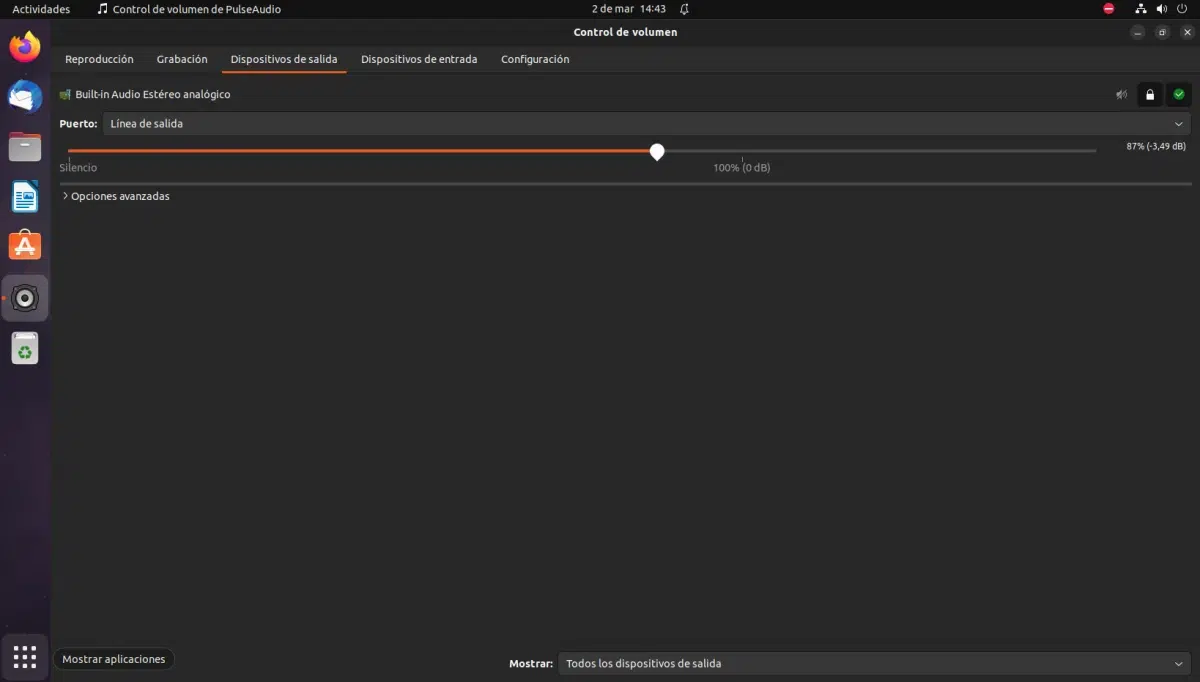
And the graphical tool is like this:
Controlling the sound with "PulseAudio Volume Control"
PulseAudio's volume control graphical interface has five tabs at the time of writing:
- Reproduction: from here we will see bars with what is playing audio. If we have nothing, we will only see "System sounds", and we can give it more or less volume. If there are apps playing something, they will appear here.
- Recording: from here we will control the sound of the applications that are recording it, if any.
- Output devices: this is similar to the first one, but in reality it is totally different. Here the output devices that we have connected will appear, such as the computer speakers, headphones connected to a jack port or Bluetooth devices.
- Input devices: the same as the previous one, but for the input. Your laptop's microphone will appear, if it has one, as well as others that can capture audio through other means, such as USB or HDMI ports.
- Configuration: from this tab we can change the sound profiles. The default is duplex analog stereo.
What will appear in this window will depend on what we are playing or recording at any given time. If we open the browser and start listening to music from Spotify, it will appear in the playback tab. The same if we use Kodi or Rythmbox. And from here we can also silence the programs that we do not want to sound, among other things.
For example, in the following image you can see what happens if we open Firefox and play a video:
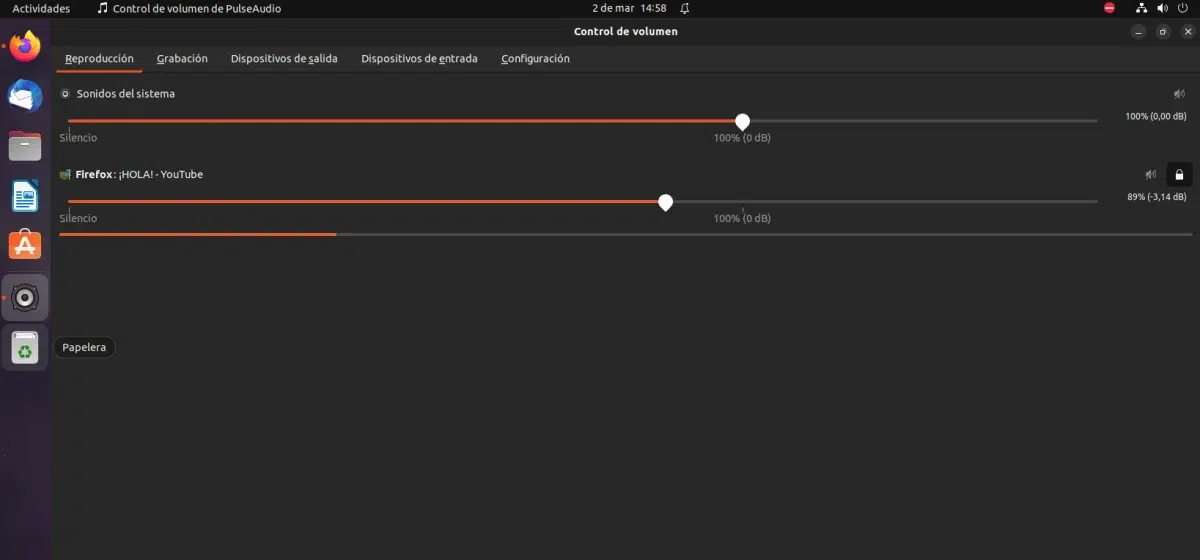
This GUI for PulseAudio shows us above the system sounds, which are at 100%, and below a program, in this case Firefox, that is playing something, specifically a video called HELLO! on the YouTube video platform. From here we could give it more or less volume, and also silence what is being played. And not only that: this application separate playback by tabs, so from here we can raise the volume to one tab and lower it to another, or even silence it. Silencing tabs is something that most browsers already offer, but it is an example so that you understand that you have more control over what is being played on your computer, and all from the same application.
Other options
I know that many are interested in the subject of PulseAudio in Ubuntu, but I I would not recommend its use unless it was necessary because a specific program asks us for it. Everything explained above can also be seen in the Sound section of the Settings application, and GNOME improves its settings application more and more with each release it delivers. In addition, we will not be, well, let's say "playing too much", with which we could spoil something.
Now, if we want an equalizer to be able to modify the sound of any program that is playing audio, I would recommend the PulseEffects previously mentioned. With it we can configure an equalizer for Kodi or any sound program that does not have one. If it can't be installed as we explained now about four years ago, right now it's also available on Flathub (here). And practically the same, but for the PipeWire that we have also mentioned in this article, we have EasyEffects, whose objective is more or less the same: to be able to control how whatever is being played on our computer sounds, be it with Ubuntu or with any other compatible Linux distribution.
Also keep in mind that what is described here is valid at the time this article was written. If everything goes as expected, it will all be unified in PipeWire soon, so talking about Jack, PulseAudio, ALSA and how to set up sound won't make much sense because things will be different. For now, we hope this article has helped you install, use, and better understand PulseAudio.