
Continuing with the series of posts about virtual machines, today we will talk about a third option: how to create a virtual machine with VMware Workstation. If memory does not fail me, and I think it does not, this software was responsible for my using Linux on my laptops right now, since I tried Ubuntu 6.06 LTS and its performance was so good (within Windows) that I fell in love . After several months of making contact, I ended up installing it as a native one on my old and now retired PC.
The first thing we have to say about VMware is that it is a payment software. What have I been using? Virtualbox I've realized for a long time that it shows, that VMware Workstation is more powerful and capable than Oracle's free tool, but to be able to enjoy its full potential we will have to pay more than € 160. This is where we have to think about how important that virtual machine is to us: if we only need some program from an operating system, it is best to use a free option.
How to install VMware Workstation on Ubuntu
We will first have to install the software. To make it compatible with more operating systems, the installer for Linux comes in a .bundle file that we will install by following these steps:
- We right click on the downloaded file. We can download a trial version of Player from here or the Pro version from here.
- We go to the "Permissions" section.
- We mark the box "is executable" or "allow the file to run as a program" and accept.
- Next, we open a terminal and type "sudo", without the quotes, since we need administrator privileges to open the installer.
- We drag the .bundle file to the terminal. If we use a version of Linux in which when dragging a file to the terminal it puts the quotes, we remove them.
- We press Enter.
- We put our password. This will finally open the installer.
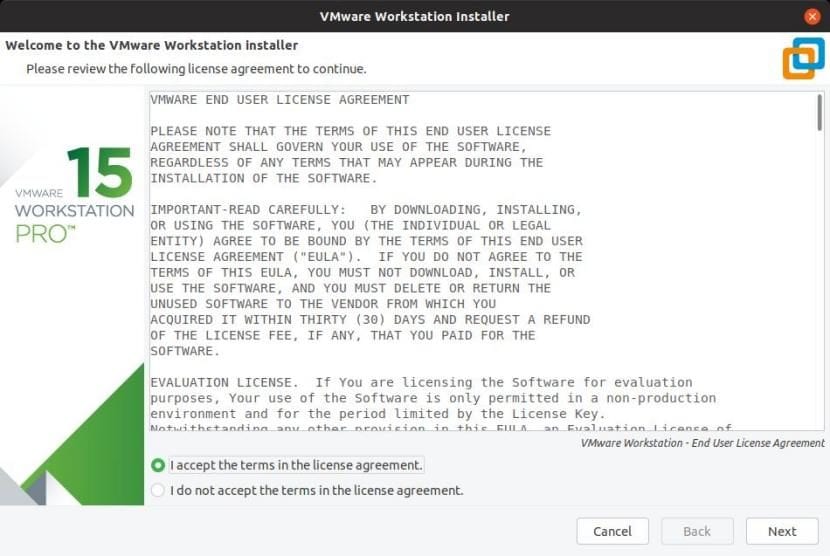
- In the first and second windows, we mark the box "I accept the terms in the license agreements" and click on "Next".
- In the third we leave it as it is and click on «Next».
- Then, in the next window, the same: «Next».

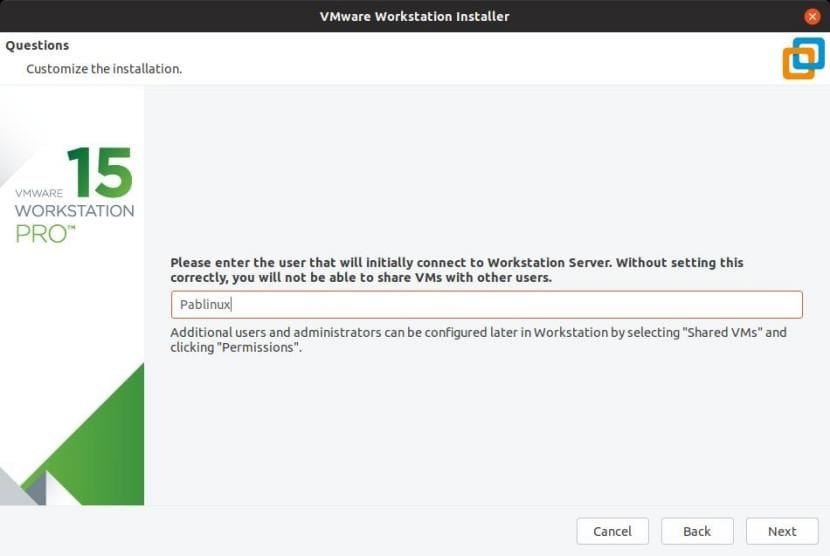
- Next, we put the name of our workstation and click on «Next».
- In the next window we can choose where the virtual machines will be saved. I would leave it by default and click "Next".

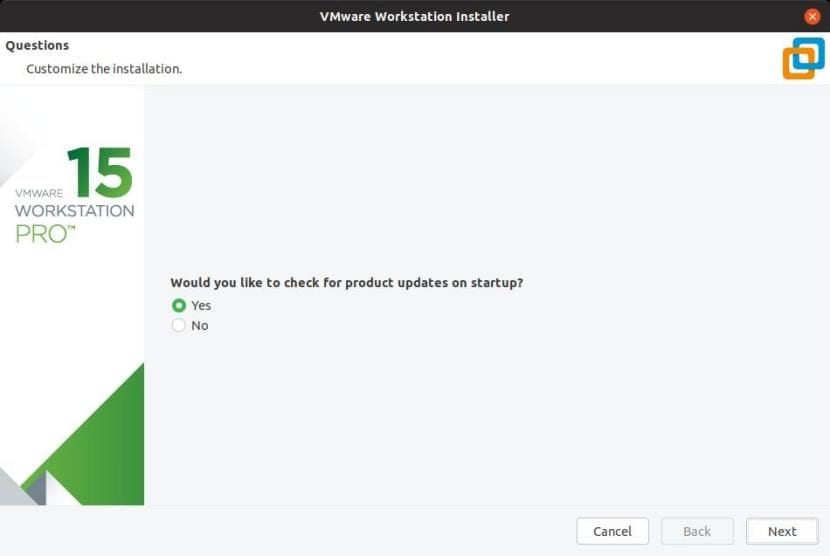
- The same in the next step: we can choose a port to connect, but I leave it by default and click «Next».

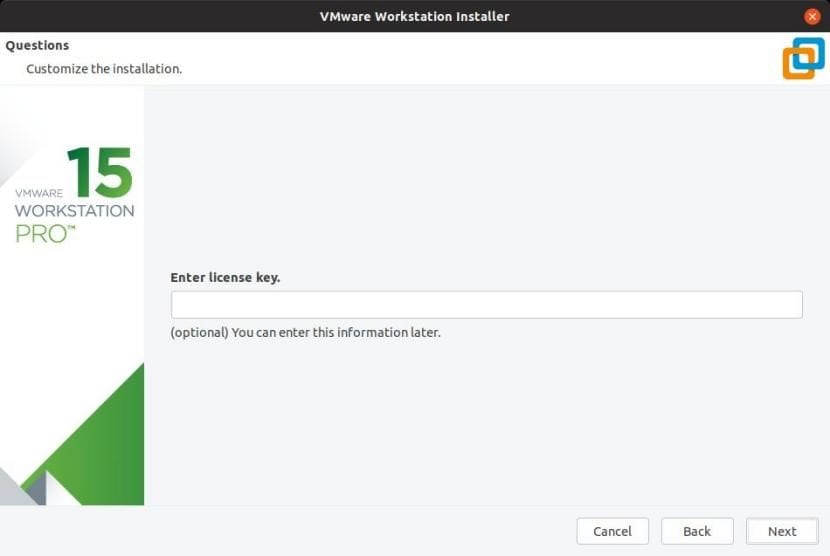
- If we have already purchased the software, in the next window we enter our serial number. If not, we leave it empty and click «Next».
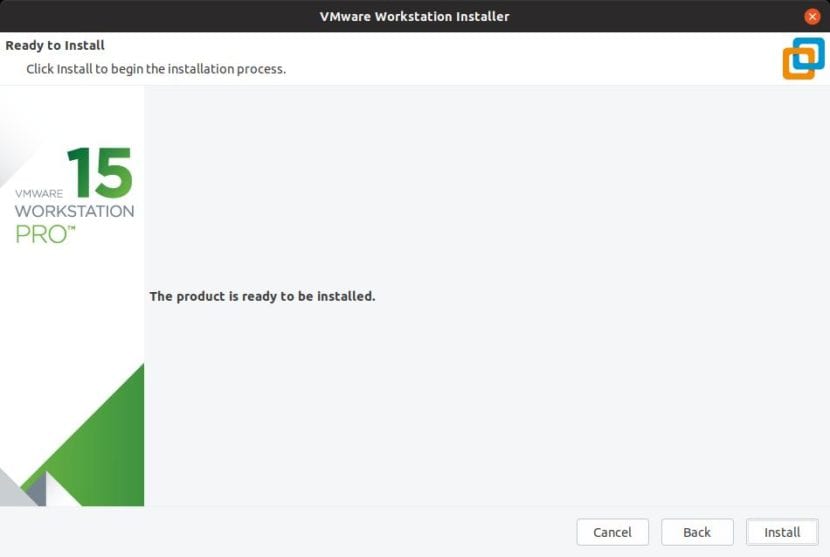
- With everything configured, we click on «Install».
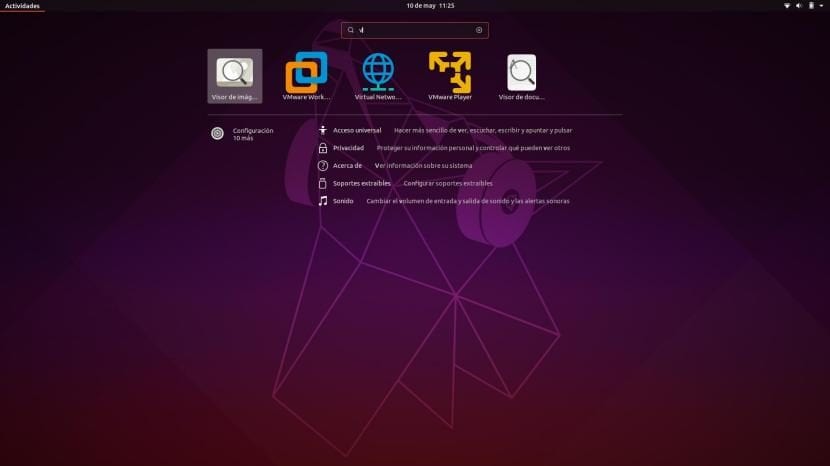
- VMware will appear in our application menu. We look for it and launch it.
- The installation will not be complete until we start the application for the first time and install the necessary modules.
How to create a virtual machine in Workstation
Once installed and rebooted the computer, the program is similar on Windows and Linux:
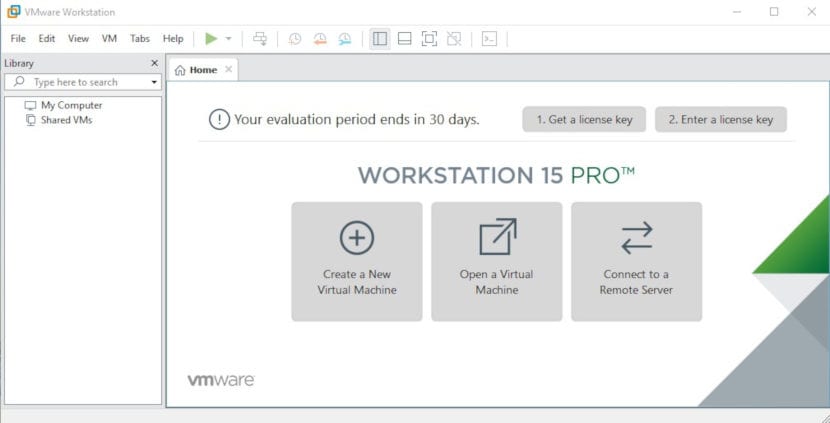
- We open VMware.
- We click on «Create a New Virtual Machine».
- We choose the «Typical» option.
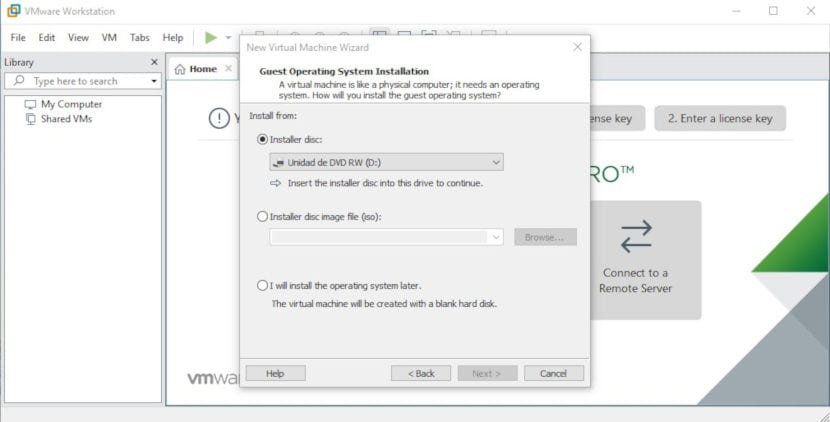
- Next, we choose if we are going to install it from an ISO or from a CD. I have a CD, so I choose the first option. If you have an ISO, you have to choose the second option and tell it where we have it.
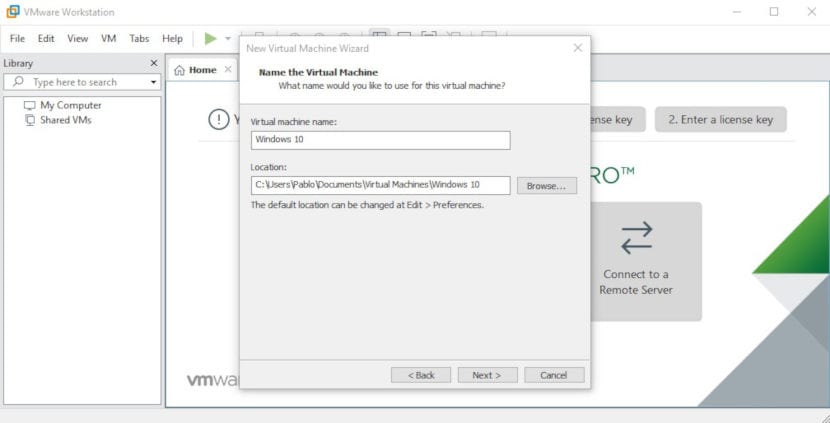
- We indicate a name and a route. It can be left by default, but I have eliminated the "x64" that appeared to me. I prefer it just say "Windows 10".
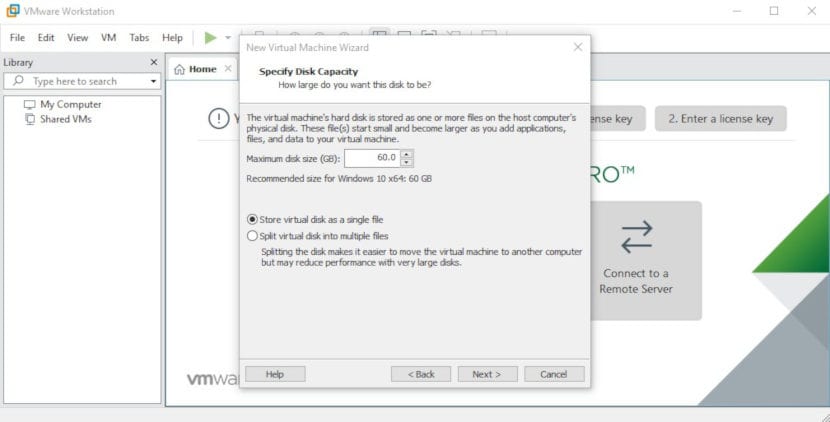
- In the next step we will configure the type of storage:
- The size of the hard drive. 60GB is recommended, but it can be reduced if our equipment does not have much storage.
- The type of storage: if we are only going to use it on one computer, we choose the first option.
- The next window will show us a summary of what we are going to create. There is a marked option that indicates that the virtual machine will be started when it is created. We can do it or start it manually later. We click on «Finish».
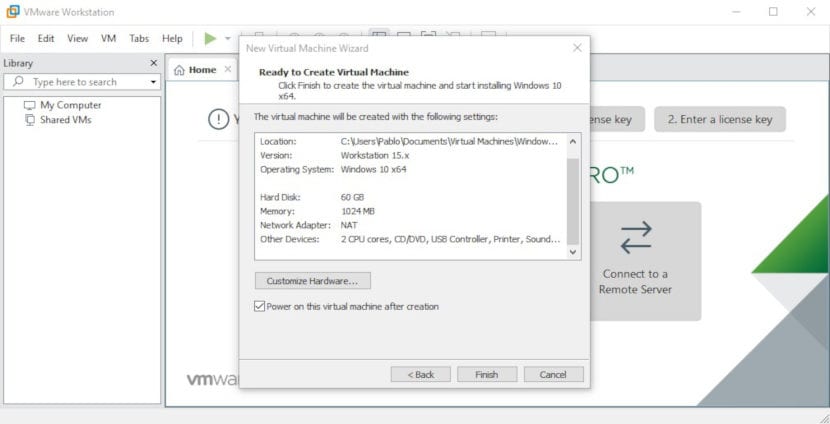
- At this point, the virtual machine will be created. We wait.
- Once created and started, the Windows installation process will be the same as if we did it natively.
Install the tools or «Tools»
Once everything is installed, we will be able to run the Windows 10 virtual machine, but for everything to work correctly there will still be one step: with the virtual machine open, We will go to the VM menu and choose the option «Install VMware Tools ...». This will allow the virtual machine to be more compatible and everything to work better. Among other things, it will allow the window to be resized so that the operating system does not remain in a smaller square.
Another thing we can do is choose the virtual machine, click on "Memory" and increase RAM memory, which by default is 1GB. We can also make other (virtual) hardware changes in this section.
Have you managed to run a virtual machine on VMware Workstation?
Removing VMware Workstation Player: sudo vmware-installer -u vmware-player, Removing VMware Workstation Pro sudo vmware-installer -u vmware-workstation