![]()
Those readers who are Windows users or who have been migrating of this system they will know that, for a long time In Windows, it was possible to use a wireless network adapter to share an Internet connection with other computers.
Generally, This is done by creating a "Hotspot", or an "ad-hoc", which is issued directly from the wireless network adapter. It's very easy to do, and it's a feature that many Windows users like.
On Linux, streaming from an access point has not always been easy. Until recently, users had to manually enter on the command line, bridged adapters together, set IPtables, and so on.
El Being able to create a Hotspot is the easiest way to share the Internet connection through Ethernet connection from computer to wireless devices such as smartphones and tablets.
En the new versions of Ubuntu (and network manager), make connections can be shared through access points it can be done just as easily as it can be done on other operating systems.
To enable this option you need to convert the first wireless network of your laptop into a Wi-Fi Hotspot or even with a USB or PCI Wi-Fi card in your computer and then connect the devices to the WiFi access point that they have created.
Steps to create a Hotspot (WiFi access point) in Ubuntu 18.04 LTS
With GNOME 3.28 as the desktop environment in Ubuntu 18.04 LTS, WiFi tethering on the system is really easy to do.
The first step in creating a new wireless network is go to the network icon on the Ubuntu taskbar and click on it:
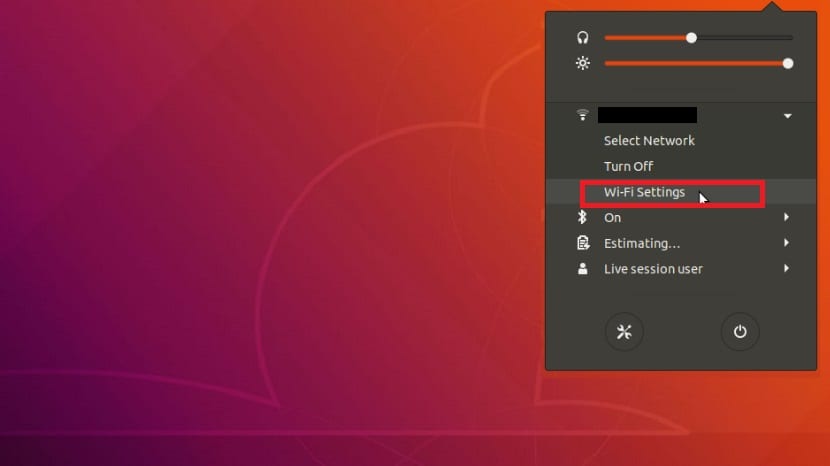
Here we are going to click on "Wifi options"
Esto takes us to the "Network Connections" window
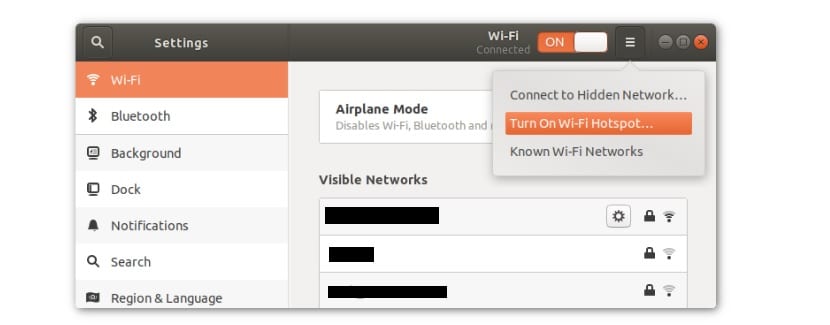
Here we are going to click on create the new connection by clicking on the winged icon of the cone that we see in the image and we are going to click on "Activate Wifi Hotspot".
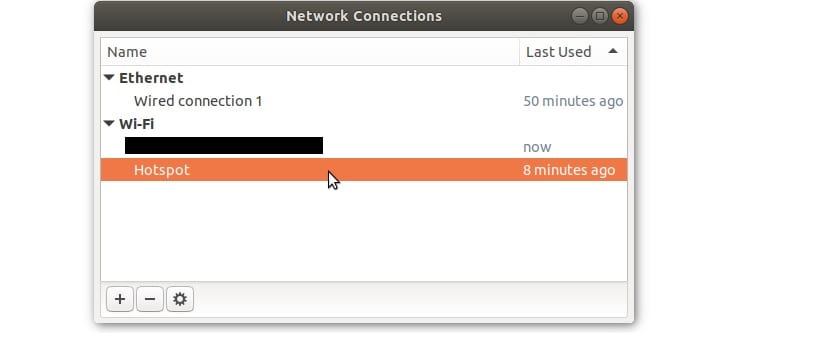
Si you want to change the name (SSID) and password from the access point, open the Network Connections editing tool, to do this, just open a terminal on the system with Ctrl + Alt + T and run in it:
nm-connection-editor
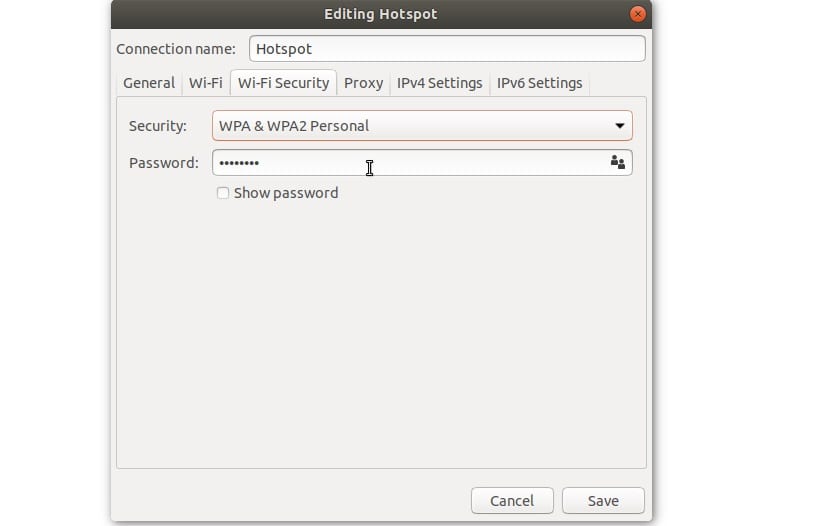
Here A new sale will open where we must double click in hotspot and we will be allowed to change the name of the access point, as well as the password.
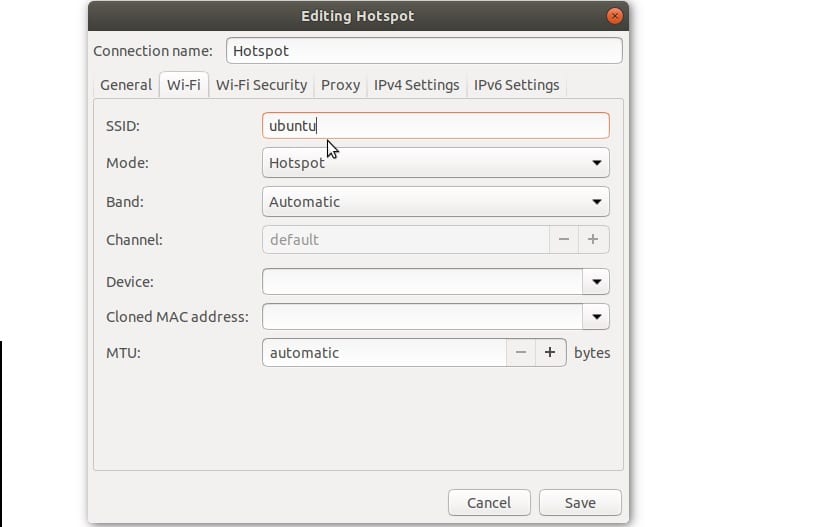
Followed by "band" mode. This setting enables wireless network broadcasting on different frequencies.
There are two options from which we can choose if we know what to do, which are 5 GHz and 2 GHz mode.
The 5 Ghz (A) connection mode allows faster download speeds, but with a shorter connecting range.
Here you should select this option if you already know that it is possible to connect to the 5 GHz connections on the computer that is used to establish this access point.
If not, select the 2 GHz (B / G) mode in band mode, although the recommended option if you do not know what to do is to leave it on automatic.
The last setting that has to be adjusted so that this access point can be accessed is "device".
This zone counts the hotspot network and which device should be used to transmit.
Using the drop down menu, select your wireless chip. Also here we can assign some custom values, either way we want it to use a static or dynamic IP or use a proxy.
To start streaming, click the "Save" button.
It should be noted that the access point will not work unless you have a cable connection that has the Internet to share over the network.
The access point tool automatically detects a wired connection and shares it through the WiFi access point.
Without further ado, I hope this little tutorial is useful for you.
I just upgraded to Ubuntu 18 but I am using MATE and the damn network icon does not appear, I realize it is now that I read this article, any suggestions other than using Unity?
I can make the access point correctly and I can connect to the internet from my android device, but… I get a network start error with the description: Error resolving “gateway.2wire.net”: Name or service not known.
After this, many web pages are no longer visible unless you reset the modem.
Is there a way to fix this?
I WANT TO CREATE AN ACCESS POINT BUT USING A SMARTPHONE AS PROVIDER, CONNECTED TO MY PC WITH THE CHARGING CABLE AND DEFINING IN SHARED CONNECTION AND MODEM ENABLING THE USB MODEM. DOES NOT RECOGNIZE THIS CONNECTION AS AN INTERNET ENTRY SIGNAL. IF IT WORKS IF I CONNECT THE INTERNET BY UTP CABLE. HOW CAN I DO??.
THANK YOU SO MUCH
Hello good! I would like to know how I eliminate them.
Very badly I tried to change it to wep key but it did not work for me instead it was only put in wap that I do not like at all I do not recommend> :(
Thanks! It served me well!
I have a Ubuntu 18.04.5 lts system just installed on a computer and I am unable to connect it to the adsl at home, how is this done? Thanks