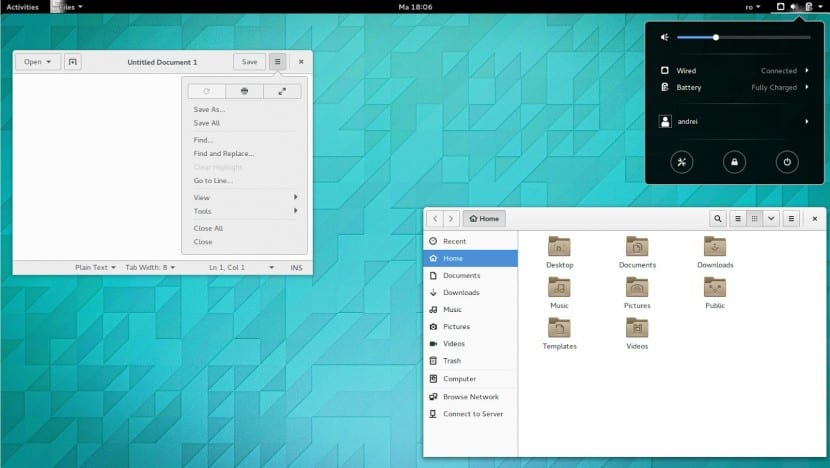
In recent years the development cycle of several GNU / Linux distros, as well as that of some essential apps like Firefox, Chrome and others, has been accelerated a lot. And that requires a lot of coordination and a schedule that must be very strict since a poorly updated library can create enormous instability, that's why sometimes developers they have to make unpleasant decisions in pursuit of the best option for all, even if that includes leaving out a version highly anticipated by users.
That has been the case with GNOME 3.16, which was released towards the end of March and therefore did not become part of Ubuntu 15.04 Vivid Version, but as we know it is not difficult to update once we have the operating system installed and with everything configured. It is not a revolutionary version but it certainly brings several interesting new features, for example its greatly improved notification center, with interactive notifications that are now displayed at the top of the screen.
The essential applications of this desktop were also updated, for example the file explorer (Files, previously known as Nautilus), the image viewer, the Boxes virtual image management tool or the map and calendar tools among others, for this reason clearly this is an interesting version for what it offers in terms of productivity and workflow improvements.
Before continuing we want to advise that the procedure that we are going to show involves modifying central issues in the operation of Ubuntu 15.04 Vivid Version and therefore the result, although stable and safe, can give some other failure as many times happens when we test test versions or 'testing' in the case of other distros like Debian. Many prefer or need the stable, but there are also the most daring who are always looking for novelty, so this mini-tutorial is aimed at them to upgrade to GNOME 3.16 on Ubuntu GNOME 15.04.
The first thing we have to do is install the GNOME 3 Staging PPA, an experimental code repository that has most of the 3.16 packages (some of which are in nightly versions and therefore still quite experimental). This is not like the regular GNOME 3 repository, where there is software tested and compatible with production environments, but as we said we are just going to show this procedure for those who like to test new versions all the time.
First we update and verify the arrival of new packages:
# apt-get update && apt-get dist-upgrade -y
# add-apt-repository ppa: gnome3-team / gnome3-staging
# add-apt-repository ppa: gnome3-team / gnome3
Now we have to update GNOME:
# apt-get update && apt-get install gnome-shell gnome-session
Now this tutorial is aimed at users of the flavor Ubuntu GNOME, but as we well know in GNU / Linux we can install desktops in a simple way so if we are using some other flavor, for example Lubuntu and we want to test this we can also do it, although in that case the installation process will ask us to select a login manager, which can be gdm or lighdm.
Then we can install apps that are part of the GNOME desktop:
# apt-get install epiphany-browser gnome-music gnome-photos polari gnome-weather gnome-maps
Once that is done, we restart the computer to finish the installation and we will already be using GNOME 3.16 with all its improvements. We can try it and see how it goes, and although we should not have major inconveniences if that is the case we can always go back. To downgrade from GNOME 3.16 to GNOME 3.14, which is the one we had before we started:
# apt-get install ppa-purge
# ppa-purge ppa: gnome3-team / gnome3-staging
# ppa-purge ppa: gnome3-team / gnome3
We restart the computer and we will be as before we started reading this post.
The explanation is fantastic, but I followed the step by step and nothing ... I never change my desk.
What am I doing wrong ???
I wait your answer.
Thank you very much
Clever. Already solved!!
How did you solve it
?
At the beginning, after restarting the pc, alongside your user it gives you the option (in the configuration nut) to choose the desktop you want to use.
http://linuxzone.es/app/uploads/2011/12/ubuntu11.10_inicio-281×300.png
so that you see the image at the beginning.
At the beginning, after restarting the pc, alongside your user it gives you the option (in the configuration nut) to choose the desktop you want to use.
http://linuxzone.es/app/uploads/2011/12/ubuntu11.10_inicio-281×300.png
so that you see the image at the beginning.