If you're thinking about build your own cloud storage platform fast, reliable and scalable, using a VPS and Nextcloud may be the best idea. That will allow you to go from somewhat limited projects like using a Raspberry Pi, NAS, etc. It will be the closest, in terms of performance, to using services such as Dropbox, GDrive, Mega, etc., but managed by yourself.
In addition, you can use several open source and free software projects to be able to create the infrastructure, avoiding proprietary processes that you do not know with certainty what they are really doing. And, if that seems little to you, in this tutorial you will be able to check how to host all this on servers in European territory, going from GAFAM / BATX, with what this implies ...
Do i need cloud storage?
Dispense with certain services cloud storage From third parties can be positive to save on expensive subscription fees or to have greater control of your data for privacy and security reasons. But, beyond that, this type of service is very practical, even more so in times of pandemic and with teleworking.
Some of the benefits of having your own cloud storage system are:
- Overcome the barriers of local storage, being able to have an extra and scalable space to store all your data.
- Protection of your data, since it is a more reliable storage, with redundant systems (RAID) so that they are not lost. Something that you cannot secure in your local storage, since a problem with your hard drive or theft could leave you without them.
- Possibility of having your data where you need it. You will not have to carry your PC with you, you will be able to access them from anywhere and from any device with an Internet connection.
- Lower storage costs by not having to pay for high-capacity hardware or extra disks for backups.
- Ease of information exchange.
- Very flexible storage to store what you need and with possibilities to scale if you need more space at any given time.
What is Nextcloud?
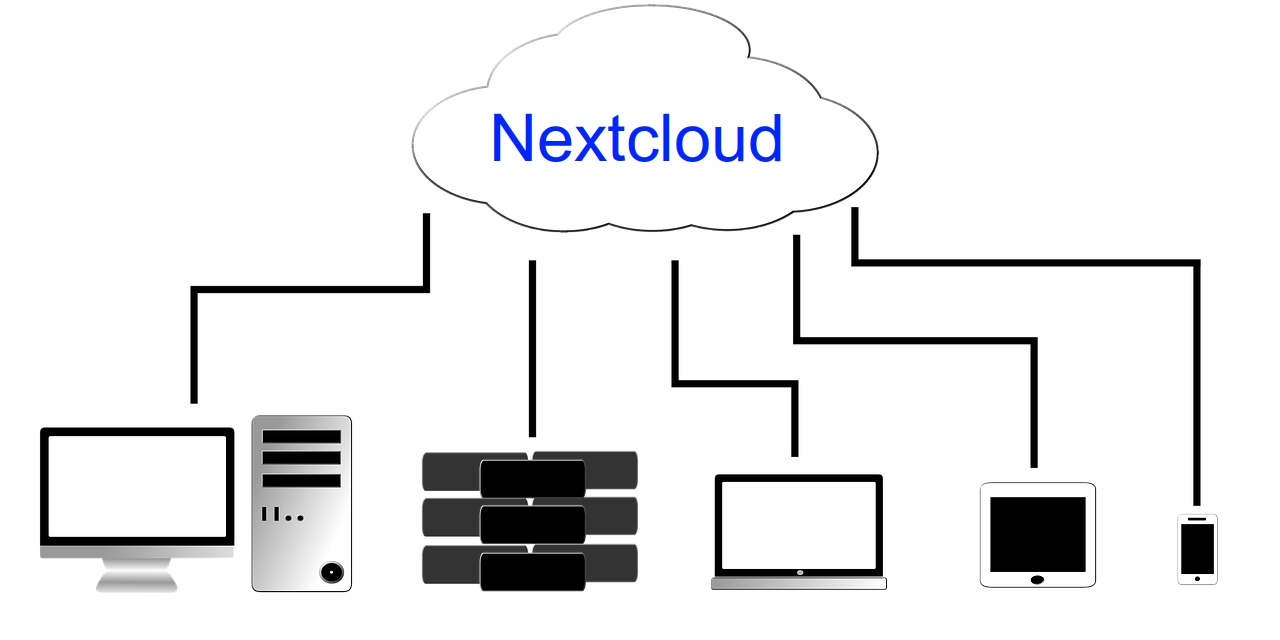
Nextcloud It is the software that I am going to use as an example to set up your own file hosting service in the cloud. It is a set of free software programs, under the AGPLv3 license, and that has functionality similar to Dropbox.
For this, it has the server part, for the management of the accommodation, and the client's part, to install locally to access stored data or upload new ones. Additionally, the client is available for various platforms, such as GNU / Linux, Android, macOS, iOS, and Windows.
Nextcloud allows you to store structured data in conventional directories, as you would locally. Also allows encryption in transmissions and / or for storage, for greater security. You can even use other extra functions to create users and groups with access, calendars, or integrate other applications such as ONLYOFFICE to have your own "Google Docs".
What is a VPS?

To use Nextcloud you could use it in a team of your own that you use as a server, but this has major drawbacks:
- Need to always have the server equipment and the router on, consuming electricity. Otherwise it could not be accessed.
- Limitations of the bandwidth of your line. A problem that becomes greater if more users access it, who will be occupying bandwidth, limiting the transfer speed and weighing down the connection speed of your office or home.
- You will have to take care of hardware repairs and expansion if necessary.
- Need for more complex configurations to create RAID systems to give greater reliability, which will also imply buying storage media in greater quantity.
- Being at the expense of the energy supply in your area. If there are cuts, the service will fall, while in data centers there are UPSs to minimize these problems.
All of this should make you aware that it is better to use a VPS (Virtual Private Server), that is, a virtual private server. Basically a "parcel" of a large physical server in a data center that will be exclusively dedicated to you. In it you can do whatever you want, from using it to set up a web server, such as cloud storage with Nextcloud, to other possibilities.
This is possible because each VPS will work as a standalone machine, with its own operating system, being able to manage it separately, without affecting the rest, etc. For the user, it will be as if you had your own data center, but without the costs that this implies.
El supplier It will take care of administration, hardware repairs, pay energy rates, as well as offer you a powerful team, scalability, and a bandwidth far superior to that of any conventional network. You only need to pay a small subscription that entitles you to the service and forget about the rest of the worries.
Install Nextcloud step by step
Now i will show a step-by-step example of how to mount a cloud storage. For this, I will use the VPS service of clouding.io, with Ubuntu as the operating system, along with the Nextcloud software that will be used to install it on this virtual server.
The reasons to use Clouding there are several. On the one hand, it is a platform that provides comfort with its panel. On the other hand, it has quite competitive rates, high availability (it won't drop every two by three like other free services), 24/7 support in Spanish, and a data center in Barcelona. Therefore, the data remains in Spain, under European laws.
Create the account and prepare the Clouding platform
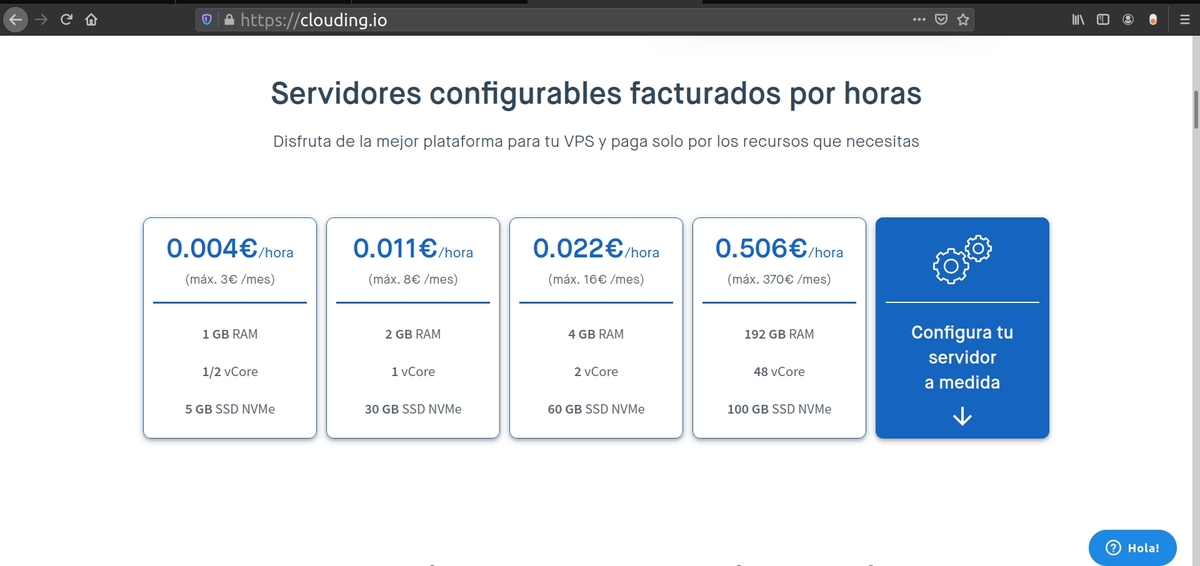
The first thing to do is register. Once the registration is completed, you will be able to access the panel and enjoy the € 5 credit that Clouding gives you for testing. The next thing will be to choose the server configuration. This will be according to your needs, or the budget you have available, since the rate will depend on the RAM capacity, the amount of vCores (virtual CPU cores) and the storage space on the NVMe SSDs of the server that you need to have. .
Once you have registered, the following will be log in to Clouding entering your username and password:
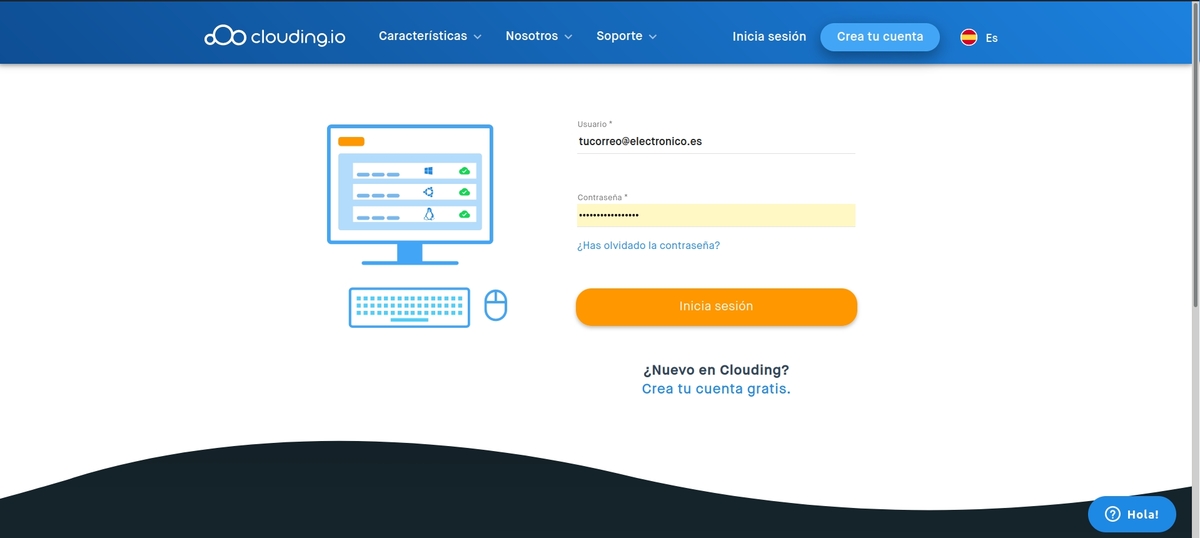
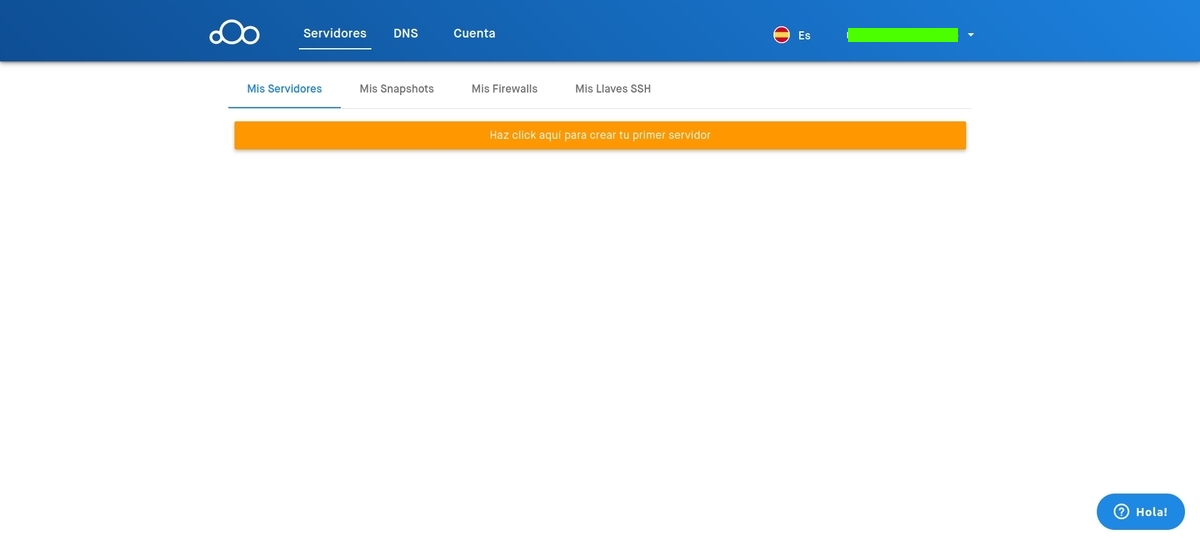
Once inside, the first thing you will see is the control Panel from which you can manage your service very easily. To start, you must click on Click here to create your first server:
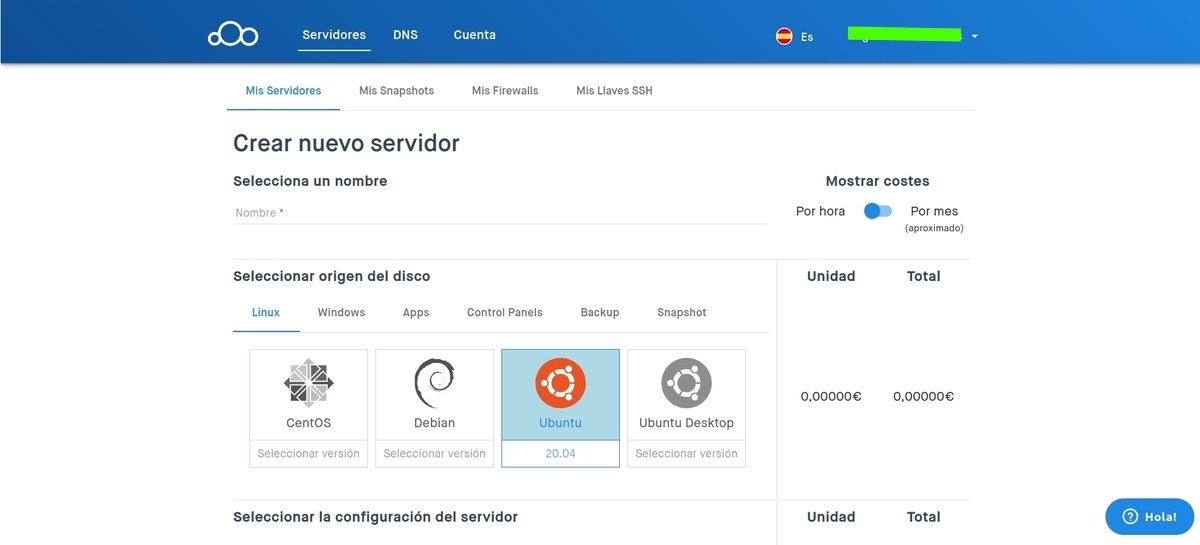
Now you can see the screen of configuration of your VPS server. In this case, we are going to select Linux, since we want to install this system as the basis for our server. Specifically, Ubuntu in its version 20.04:
If you scroll on that same page, you will also see other configuration options regarding hardware and security. In that section you will have to choose the amount of RAM you want to use for your VPS, the number of CPU cores, and the SSD storage space you need.
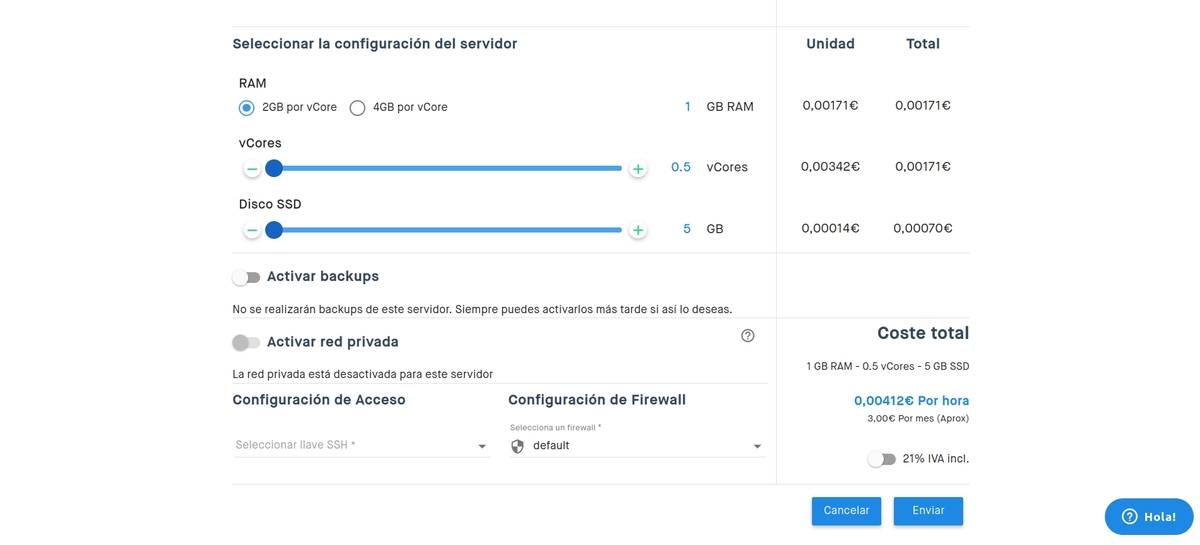
At the end of that same page, you can also create SSH key with the name you want to access your server remotely for its management. You even have firewall or backup functions if you need them.
Once you have it all hit Send. After that, this other screen appears where your VPS appears. You must wait a few moments while it installs and configures. It won't take too long, it's very fast:
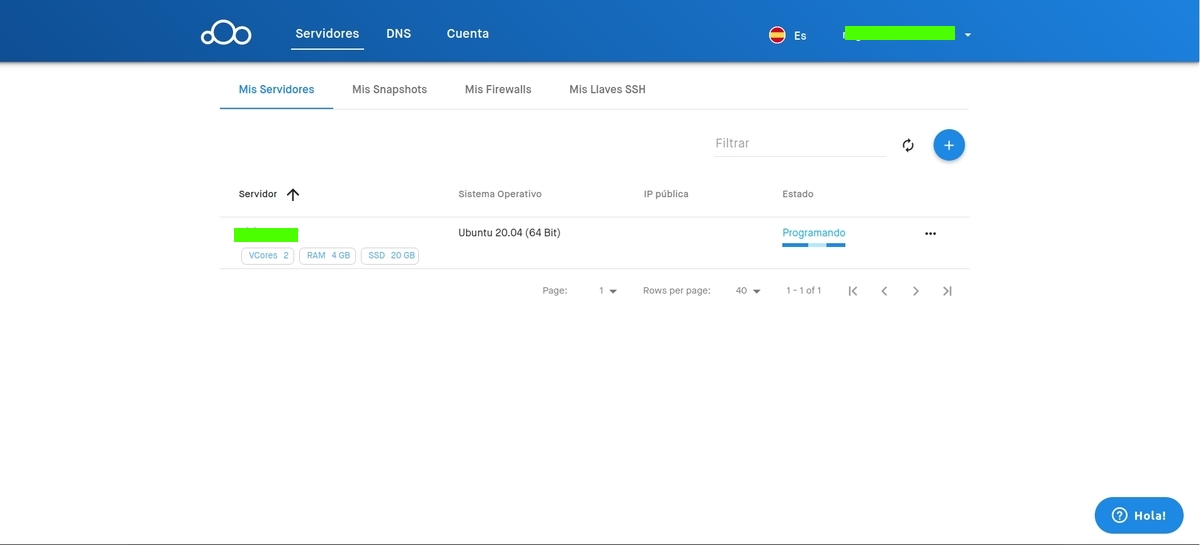
Once the process is complete, the status will appear as Assets. And you can already use it.
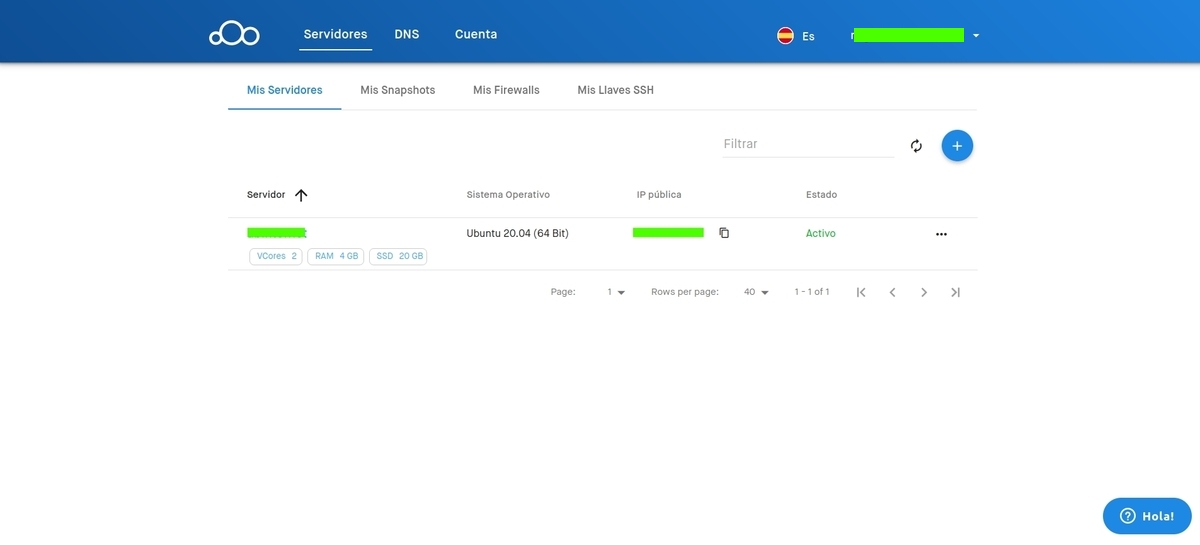
If you click on the name of your server, it will take you to another screen with information about it:
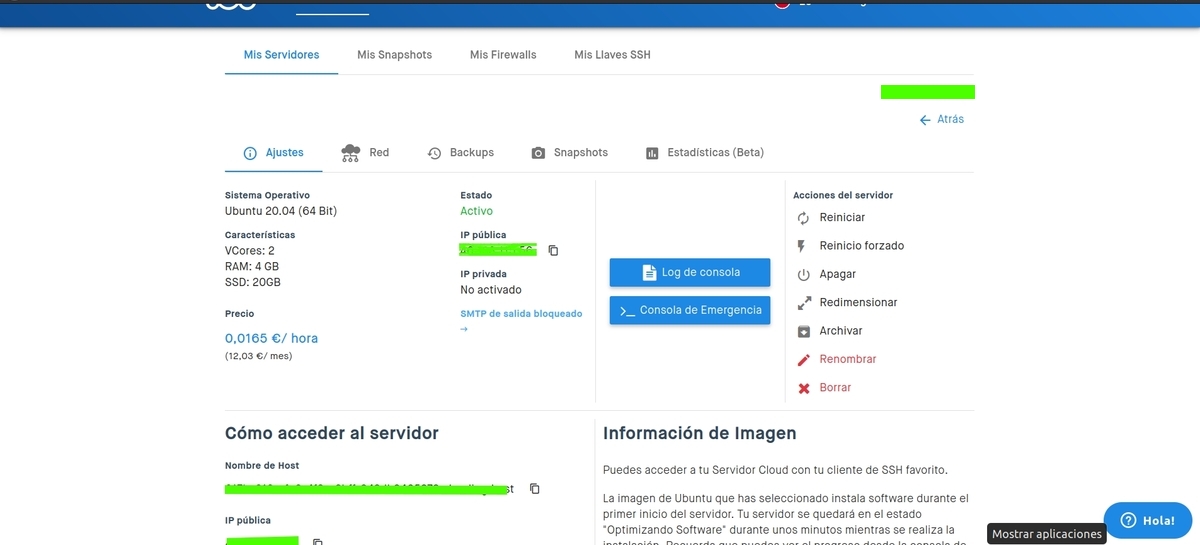
In the area below you can find a section called How to access the server. There you will see the name assigned to your host, your public IP, SSH key created to download and that you do not have to ask for a password for the remote control, the username (root), and your password:
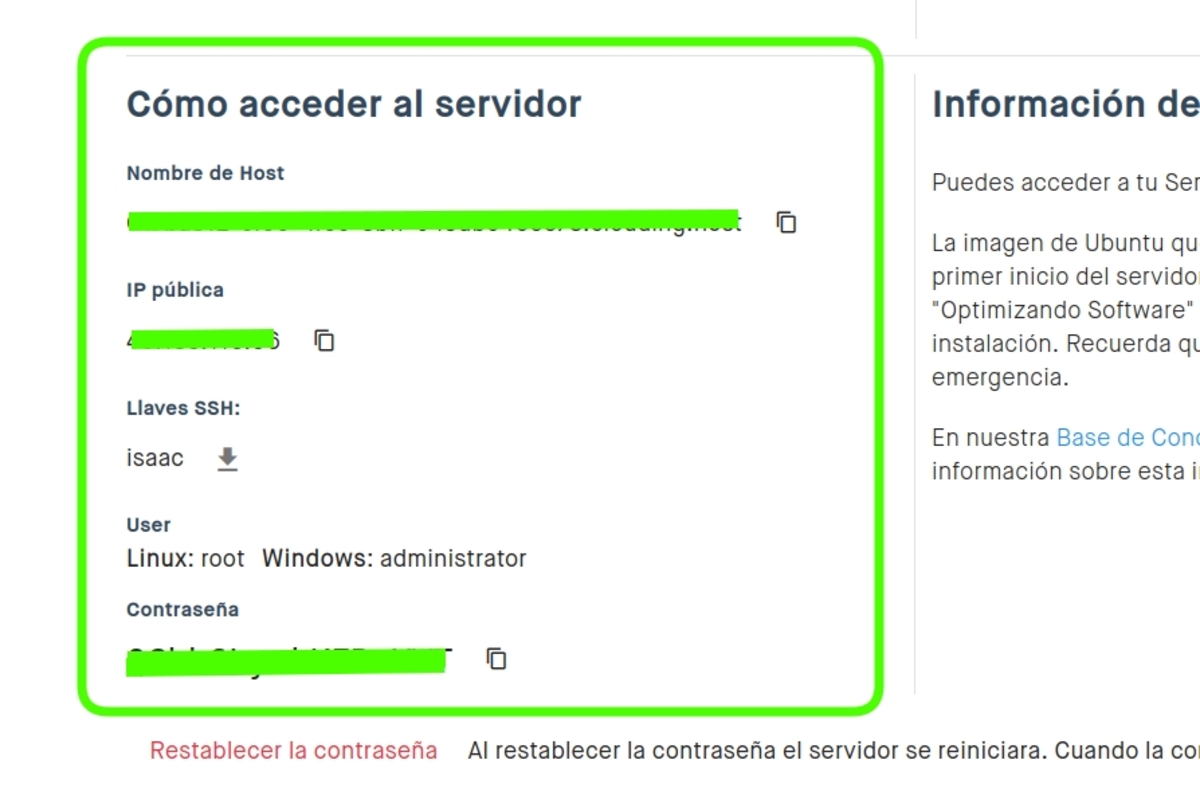
These data are key so that you can continue with the following steps, since you will have to access the server from your distro by SSH for administration. To do this, you can use the server's IP, the root user and the password they give you ...
From the server side
Once you have configured your VPS, it already has the base operating system and you can access it remotely for administration. I mean, now is when the process begins to mount the cloud storage service with Nextcloud.
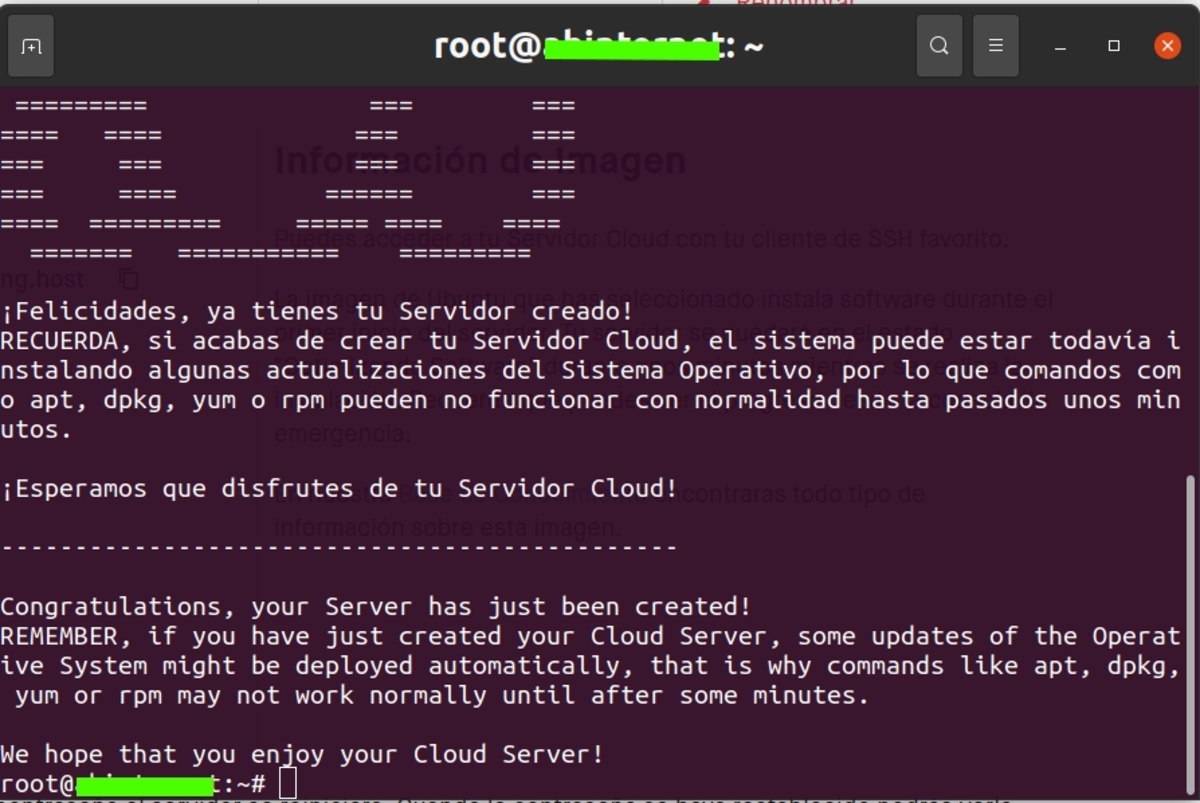
The steps you are going to follow are exactly the same as you would to install the service on your local system, only that you will be doing it within the VPS. To get started, open the terminal and connect to the VPS by SSH:
ssh root@direccion-ip-servidor

It will ask you for the password if you have not used the key pair, and once entered you will access your server as root. You will see that the prompt no longer refers to your local user, but you are superuser on the VPS:
Now that you have access, the first thing you should do is start installing all the necessary packages to compose the web server (LAMP = Linux + Apache + MySQL / MariaDB + PHP) that will serve as the basis for building the cloud with Nextcloud. To do this, you should start updating and installing the necessary packages:
apt-get update -y
apt-get upgrade -y
apt-get install apache2 php mariadb-server -y
After installing the necessary packages for the web server, the following is activate and start Apache server:
systemctl enable apache2
systemctl start apache2
It would also be advisable to install the package APCu for PHP cache and Redis for the database. In order to install these projects, it is as simple as executing the following commands:
apt-get install php-apcu php-redis redis-server
systemctl enable redis-server
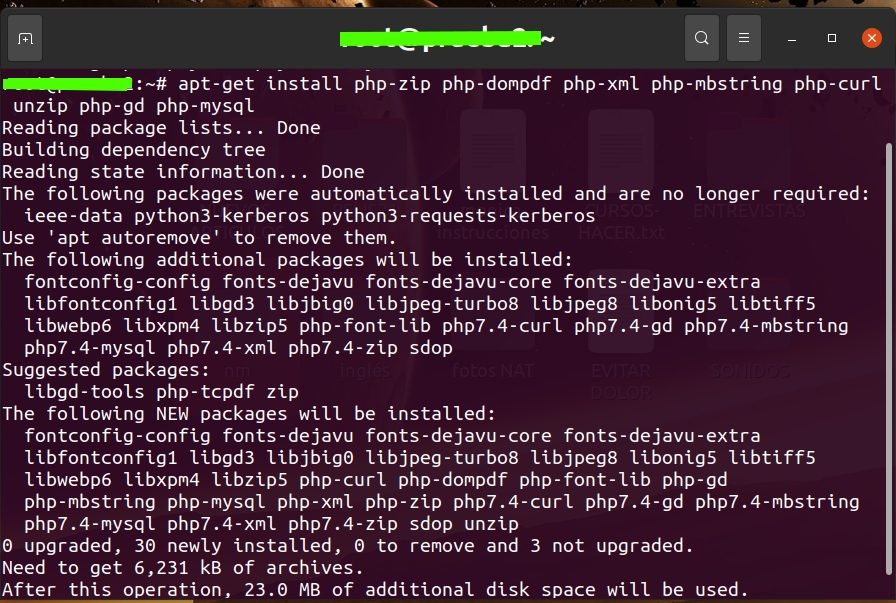
The next thing is to install some auxiliary packages which PHP will need to be complete and work with NextCloud:
apt-get install php-zip php-dompdf php-xml php-mbstring php-curl unzip php-gd php-mysql php-intl php-bcmath php-gmp php-imagick -y
The next step is enable modules for web server and reboot for it to take effect:
a2enmod rewrite headers env dir mime
systemctl restart apache2
The next thing to do is perform the web server settings and activate the SSL certificate. To do this, you can copy the default configuration file and rename it with another name in the same path:
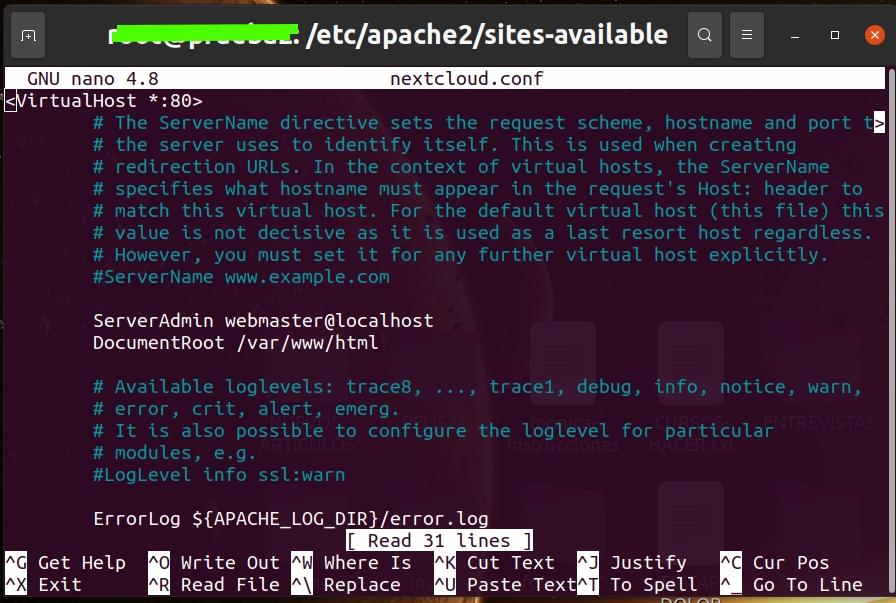
cp /etc/apache2/sites-available/000-default.conf /etc/apache2/sites-available/nextcloud.conf
nano /etc/apache2/sites-available/nextcloud.conf
And inside the configuration file for create the VirtualHost you can edit it so that the content is as follows (remember to replace “yourdomainname.es”By the IP of your Clouding server or by your domain name if you have it. You must also change "user" for the one you have used in your case):
<VirtualHost *:80>

ServerName tunombrededominio.es
ServerAdmin usuario@localhost
DocumentRoot /var/www/html/vhost/tunombrededominio.es/www
<Directory />
Options FollowSymLinks
AllowOverride All
</Directory>
<Directory /var/www/html/vhost/tunombrededominio.es/www>
Options Indexes FollowSymLinks MultiViews
AllowOverride FileInfo
#AuthConfig
Order allow,deny
allow from all
</Directory>
ErrorLog /var/www/html/vhost/tunombrededominio.es/logs/error.log
LogLevel warn
CustomLog /var/www/html/vhost/tunombrededominio.es/logs/access.log combined
<IfModule mod_headers.c>
Header always set Strict-Transport-Security «max-age=15768000; includeSubDomains; preload»
</IfModule>
</VirtualHost>
Once you are done, remember to save the configuration pressing Ctrl + O and Ctrl + X to exit.
You should also create the necessary subdirectories that must match the paths specified in the previous file. For example:
mkdir -p /var/www/html/vhost/tunombrededominio.es/{www,logs}
Do not forget enable web space created with that configuration and restart Apache for the configuration to take effect:
cd /etc/apache2/sites-available/
a2ensite nextcloud.conf
systemctl restart apache2
Now we go with the SSL security certificates. To do this, you can use Let's Encrypt and Certbot, which will help you automate the configuration so you don't have to bother too much. And that happens by installing some essential packages such as:
apt-get install letsencrypt certbot python3-certbot-apache
The next is create the certificate executing the following command (use your domain or server address corresponding to your case):
certbot --authenticator standalone --installer apache -d tunombredomini.es –pre-hook “systemctl stop apache2" --post-hook "systemctl start apache2"
The next thing, when asked, is to add a Valid Email Address for the certificate. It is important that it is an address that you can consult, and is not made up.
The next question will be to ask the access type for the HTTPS protocol you want for your server. Two options appear, 1-Easy and 2-Secure, it is advisable to choose the second, that is, press the number 2 and ENTER.
With that you should see a message of certificate creation successfully and you will already have your web server ready with the VirtualHost to be able to have a subdomain in your domainname.es for access to your private storage cloud ...
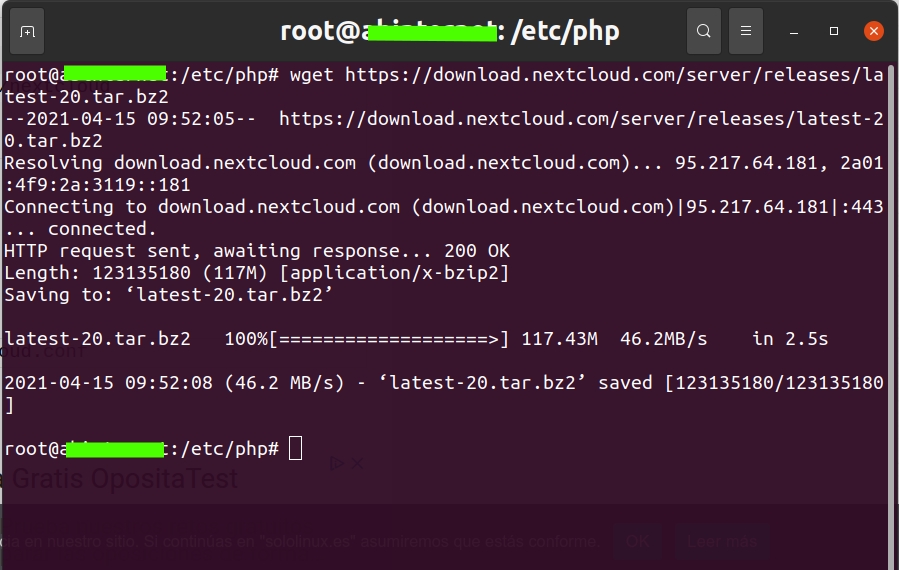
The next thing to do is install NextCloud as such and configure the necessary permissions. To do this, start by downloading and installing the latest version of Nextcloud with (again, remember to replace the names with the version you have downloaded in your case and the path for your particular domain):
cd ~
wget https://download.nextcloud.com/server/releases/latest-20.tar.bz2
tar -jxvf latest-20.tar.bz2
cp -a nextcloud/. /var/www/html/vhost/tunombrededominio.es/www/
chown -R www-data:www-data /var/www/html/vhost/tunombrededominio.es/www/
chmod -R 775 /var/www/html/vhost/tunombrededominio.es/www/
What follows is to create the necessary database for the users of your service. To do this you must start by starting the MySQL prompt or, failing that, MariaDB, as is the case here. However, for both it will be the same:
mysql -u root -p
It will ask you for a password, by the way. And once it is, you will have the prompt in order to execute the appropriate commands to create the database called nextclouddb in this case. You can call it whatever you like. But remember to replace your username and password. It would be as simple as:
CREATE DATABASE nextclouddb;
CREATE USER ‘usuario’@‘localhost’ IDENTIFIED BY ‘contraseña’;
GRANT ALL PRIVILEGES ON nextclouddb . * TO ‘usuario’@‘localhost’;
FLUSH PRIVILEGES;
And with this you would have it ...
The next is open your web browser, the one you prefer, and there enter your URL, the one you have configured for access in the previous steps, that is, the subdomain with your domainname.es or with the server IP if you do not have a domain. It does not have to be from the Clouding VPS server, it can be from your local operating system. If you have recently created your domain name, it is probably not available yet, so you will have to wait a while for it to propagate. It usually doesn't take long.
If available, that will make you enter the Nextcloud page to login.
For login with credentials, the first thing is to create the username (administrator) and password. From your remote server execute (you can replace the "user" with the name you want):
useradd -m -d /bin/nologin usuario
mkdir -p /home/usuario/cloud/
chown www-data.usuario -R /home/usuario
Remember to replace user and routes with yours. Preferably, don't use "admin" as the name for the administrator, as it is less secure. You should also choose a strong password, of at least 8 characters and that mixes uppercase, lowercase, numbers and symbols, with no words found in the dictionary. You must also specify a path where the files that are uploaded to the cloud will be stored, preferably outside the Apache web path that you configured before.
Now, in your web browser where you had the URL open, enter that user data that you just used to access:
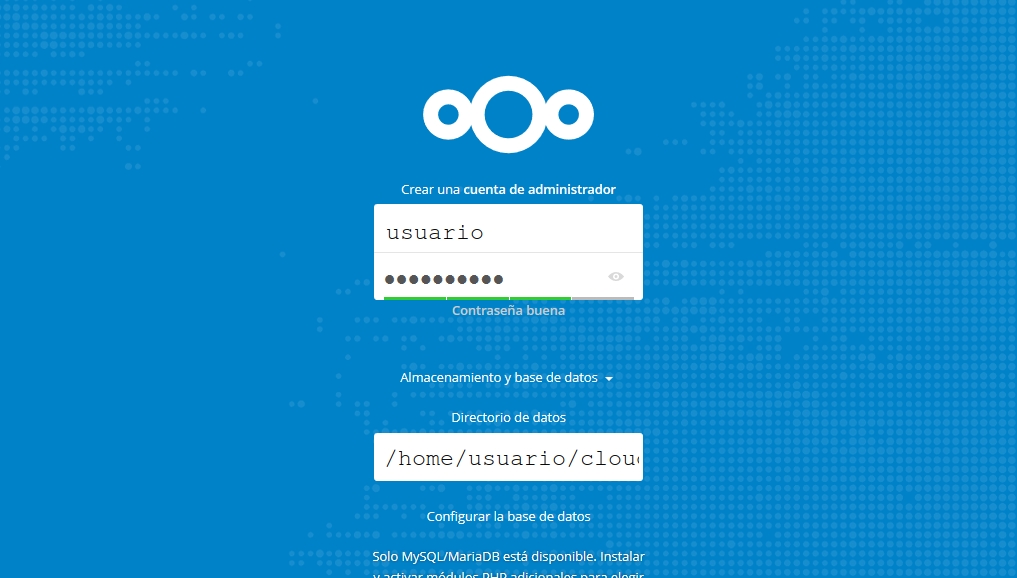
The following data it asks for corresponds to the data you used when you created the database with MariaDB, that is, you must enter your username created in the database (user), the password you entered (password), the database name (nextclouddb), and the server (localhost). Once entered, press the button Complete installation.
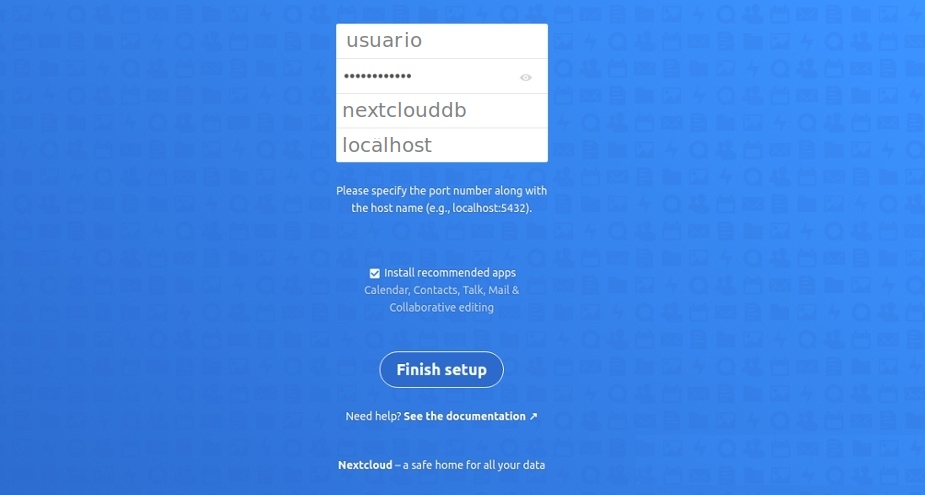
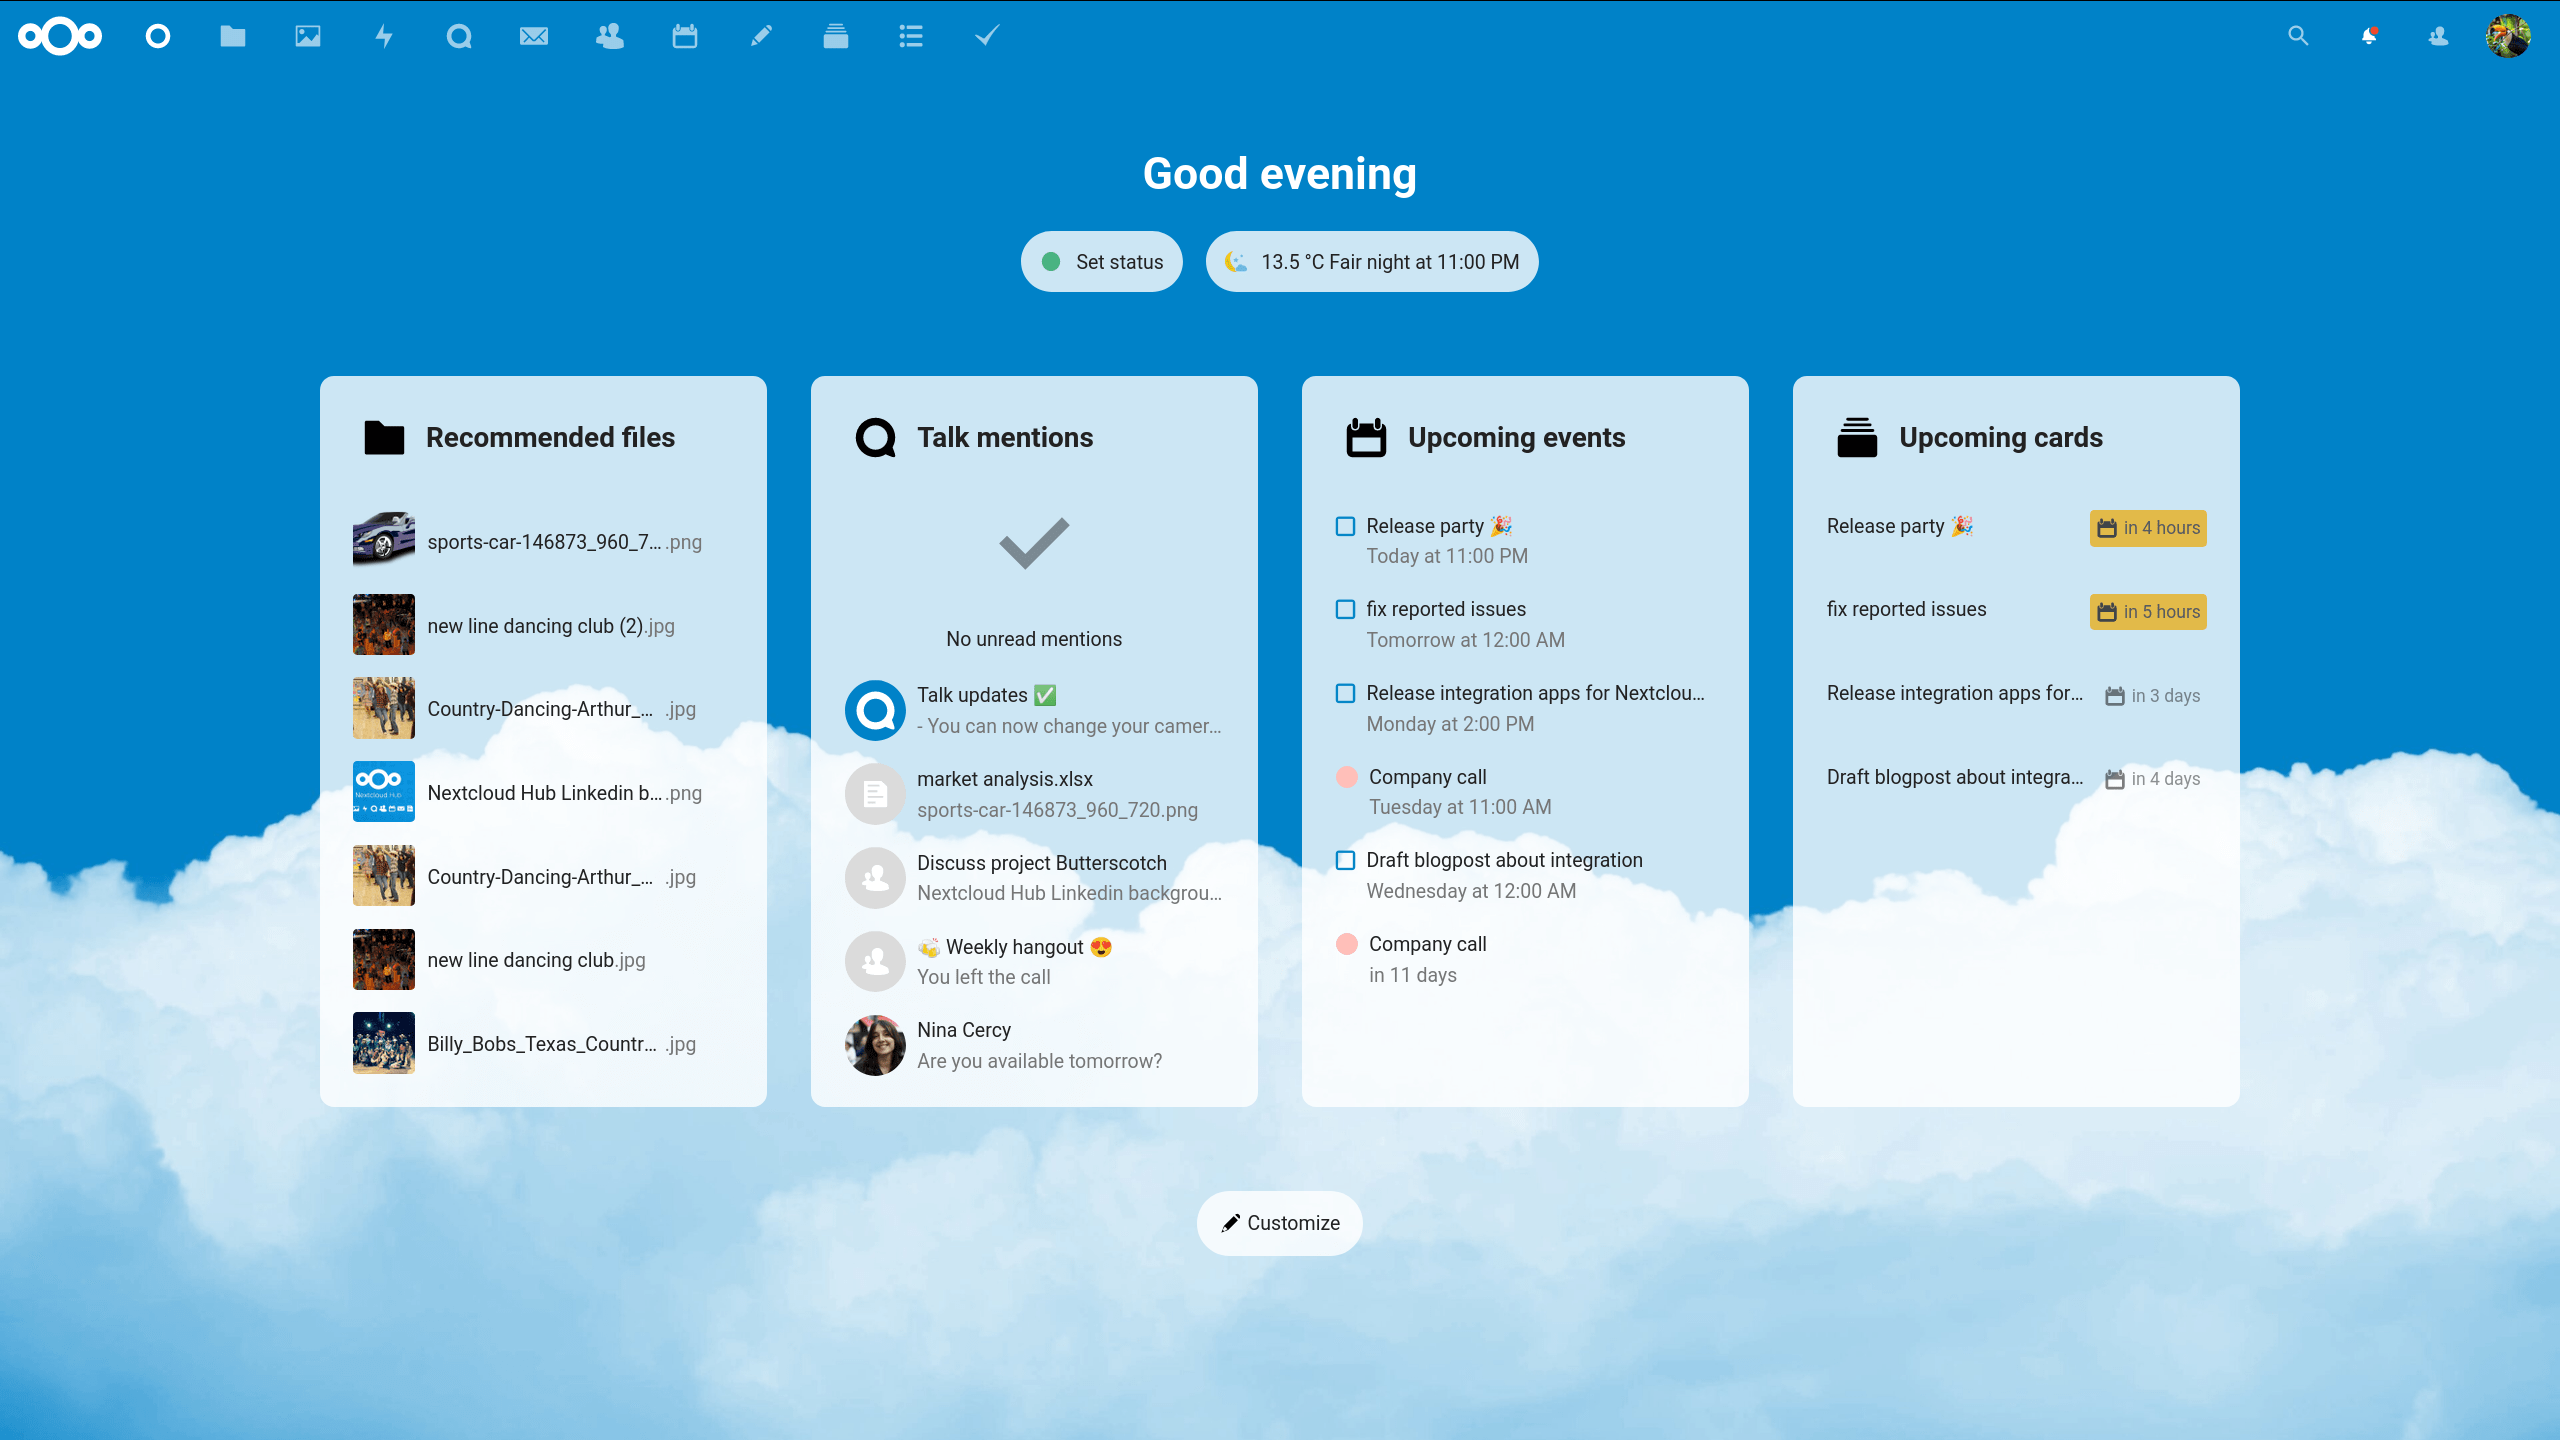
If everything went well, you will see the Nextcloud welcome screen and the installation will have been successful.
The following will be continue configuring Nextcloud, since it is a functional installation, but it will give some alerts and recommendations if you go to Configuration> Basic Settings. All those mistakes should be taken care of. In order to solve them, we start by configuring the server cache with Redis:
nano /etc/redis/redis.conf
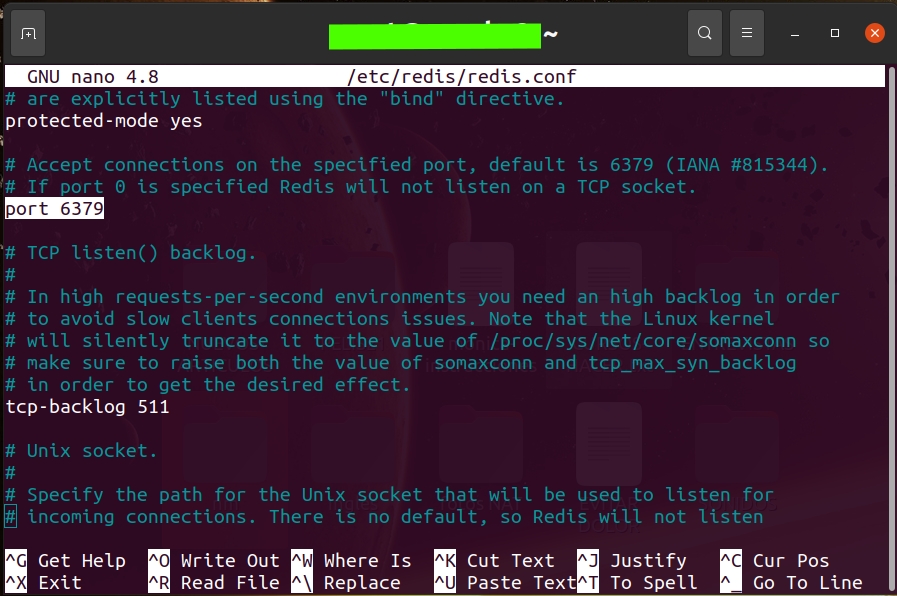
Inside you must make the following changes:
- Replace the value port 6379 with port 0
- Uncomment the line unixsocket /var/run/redis/redis.sock
- Uncomment also unixsocketperm 700, but change 700 to 770
Finally, do not forget to save the changes with Ctrl + O and exit with Ctrl + X in your Nano editor.
Once done, the following is create a user for Redis and make it a member of the Apache group and then restart the services for it to take effect. Namely:
usermod -a -G redis www-data
systemctl restart apache2
systemctl restart redis-server
After completing this step, you must configure Nextcloud so it can use Redis. To do this, you have to modify the Nextcloud configuration file (remember to change your domain name to yours or your server):
nano /var/www/html/vhost/tunombredominio.es/www/config/config.php
Allí tendrás que agregar lo siguiente:
‘memcache.local’ => ‘\OC\Memcache\APCu’,
‘memcache.locking’ => ‘\\OC\\Memcache\\Redis’,
‘filelocking.enabled’ => ‘true’,
‘redis’ =>
array (
‘host’ => ‘/var/run/redis/redis.sock’,
‘port’ => 0,
‘timeout’ => 0.0,
),
Then save the changes as you already know and restart the server:
systemctl enable redis-server
Once you're done, you have to configure Opcache for PHP, since as of Nextcloud 12 you must follow these steps so that you do not give the error message that it throws. In this case, a more recent version has been used, so it will be necessary to do the following (replace the version number with the one that corresponds to the PHP you have installed, in this case it is 7.4):
nano /etc/php/7.4/apache2/php.ini
In this file you must uncomment these lines (and you can modify the default values as you need):
; Nextcloud Opcache settings
opcache.enable=1
opcache.enable_cli=1
opcache.interned_strings_buffer=8
opcache.max_accelerated_files=10000
opcache.memory_consumption=128
opcache.save_comments=1
opcache.revalidate_freq=1
You should also locate the parameter upload_max_filesize and post_max_size that you can modify to give it a somewhat more reasonable value. By default they are 2MB, so it will not let you upload files that are too heavy or posts that are too long. You can specify another value, such as 2048M.
Then remember save changes before exiting the text editor. You will then need to restart Apache for it to take effect:
systemctl restart apache2
The next step will be configure friendly links so that the URLs are shorter and more intuitive. To do this, the following file must be edited (remember to replace the domain with the one that corresponds to you or your server):
nano /var/www/html/vhost/tunombrededominio.es/www/config/config.php
In it you must add the line:
‘htaccess.RewriteBase’ => ‘/’,
And then you save. And the following would be modify the .htaccess:
nano /var/www/html/vhost/tudominio.com/www/.htaccess
There you have to comment the following lines:
#php_value mbstring.func_overload 0
#php_value default_charset 'UTF-8'
#php_value output_buffering 0
#Options -Indexes
#DirectoryIndex index.php index.html”
Then you have to update the web server .htaccess file:
sudo -u www-data php occ maintenance:update:htaccess
Newly restart the server Apache:
systemctl restart apache2
Now, you will see that your url will have been shortened de yourdomainname.es/index.php/apps/gallery to yourdomainname.es/apps/gallery.
The configuration has not yet been completed to solve the errors and warnings that Nextcloud launched, the next step is activate file encryption for added security. It is recommended, although not essential. But remember that if you do, on the one hand the performance will be compromised by having to encrypt / decrypt, and on the other hand, if you lose the key, your data will be inaccessible.
In order to activate encryption, go to your web browser where you had the Nextcloud access session and go to the icon or image of your user in the upper right corner. In the drop-down menu press Applications > Apps disabled> and enable Default Encryption Module. Now you can go to Settings> Encryption> Enable encryption on the server that you must dial to start it up.
With this it would have concluded the whole process from the server side ... You can exit your session in the web browser and also the remote server session by SSH with:
exit
From the client side
Obviously, once you have your Clouding VPS server with Nextcloud active, it will be of little use to you if you don't install a client. That is, the other piece of Nextcloud with which you can download or synchronize your local data so that it can be uploaded to the cloud.
This client is available for various operating systems, even for mobile devices if you need to use it on your mobile. But, in this case, since we are on an Ubuntu blog, I am going to explain how to install it on this operating system.
You can go to the easy procedure, access the Ubuntu Software, search for Nextcloud client and install. Or you can also do it from the terminal (this time it is not from the remote SSH session, but locally, on your system):
sudo apt-get install software-properties-common gnupg2 -y
sudo add-apt-repository ppa:nextcloud-devs/client
sudo apt-get update -y
sudo apt-get install nextcloud-client -y
Now, you have it installed on your computer. Go to your apps and open Nextcloud:
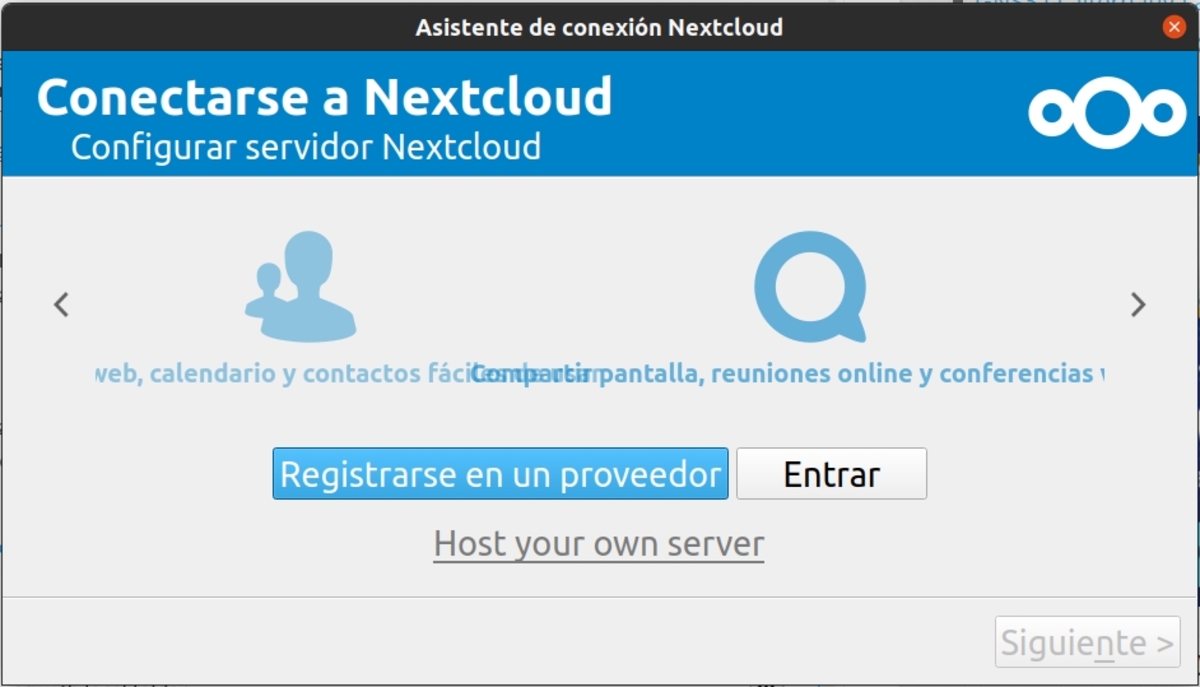
Once you start the app, you must insert the URL or IP of the VPS server that you have configured in Clouding in this case:
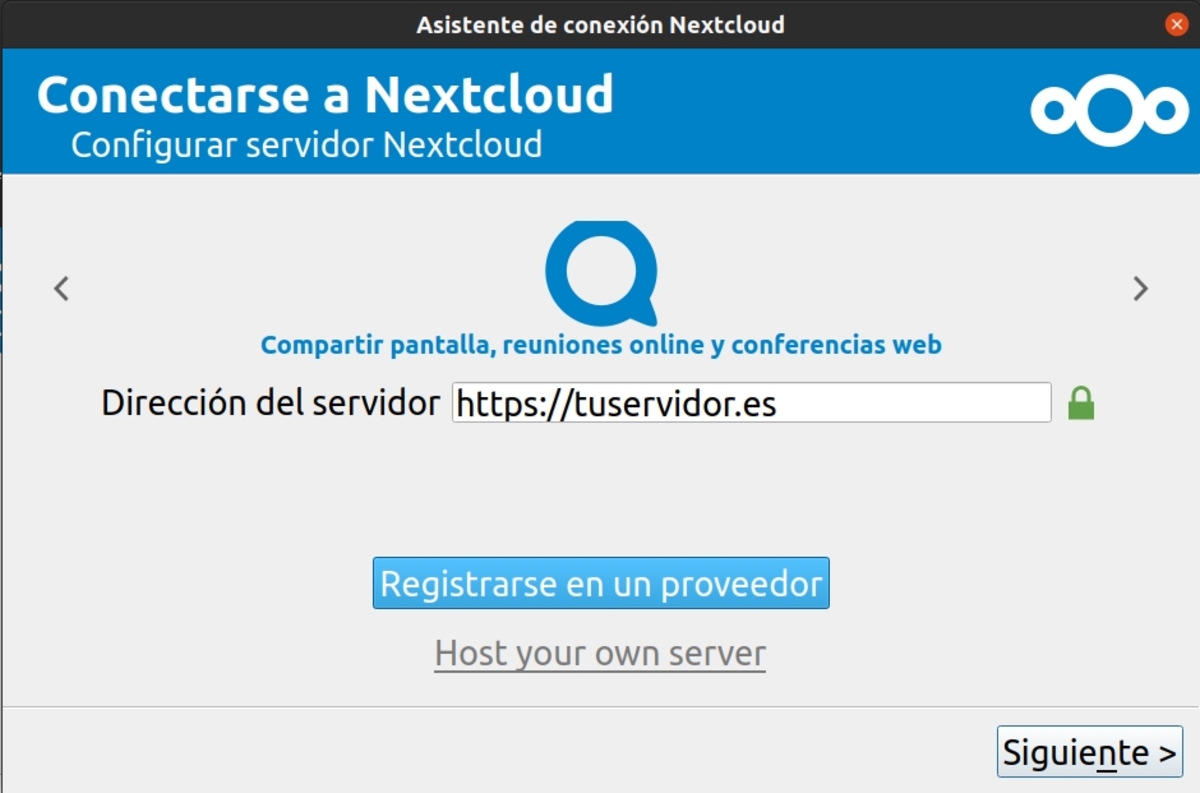
It will ask you for the login username and password. The one you created in the last steps on the server side. And then it asks you to configure the client, if you want it to ask before synchronizing the data, etc.
Once done, you will have access to your storage space to download or upload what you want in your own storage service ...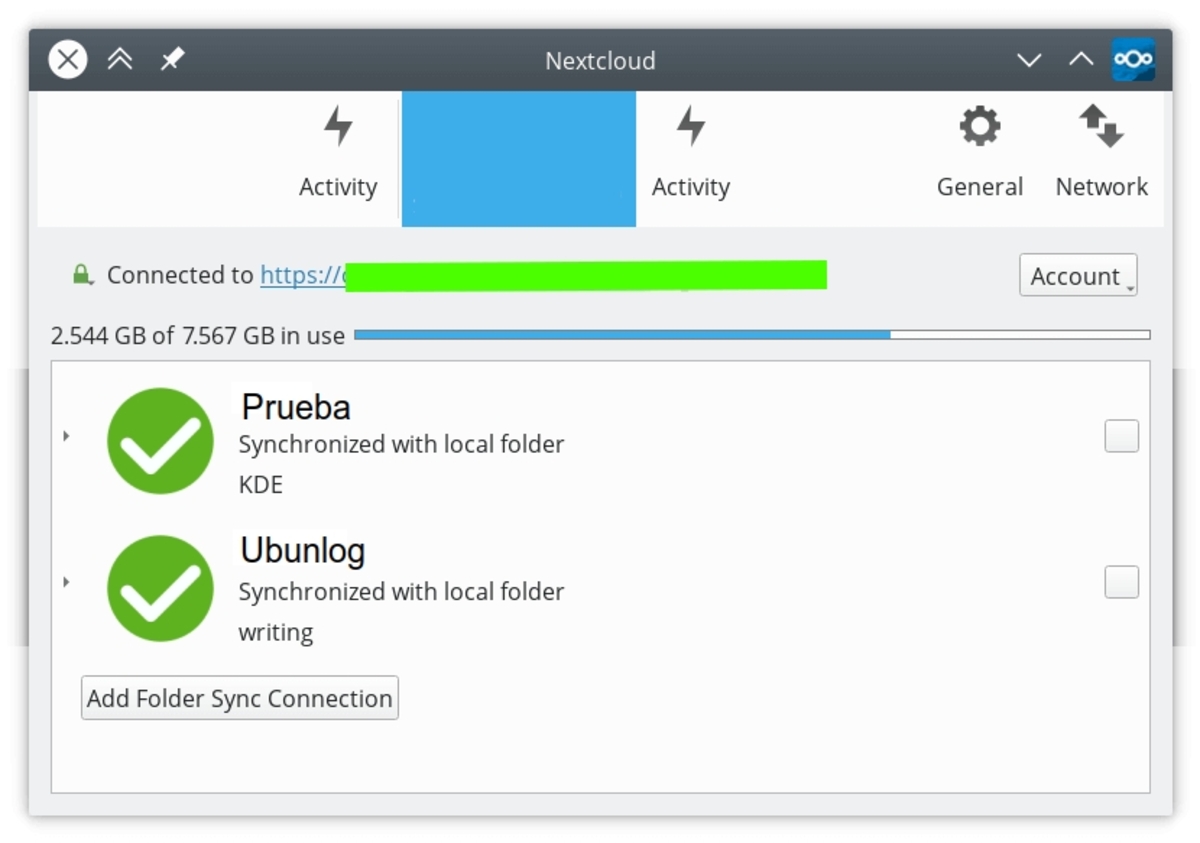
Now that we have everything installed and working, you have been able to verify the power and versatility that a VPS hosting like Clouding offers. Nextcloud is just one of the wide variety of applications and tools that you can install and use. Not everything comes down to creating websites. There are many more options you can use a VPS for
Excellent, thanks for the tutorial 🙂
very good tutorial
I have the doubt, why do I want a "cheap" vps that barely has storage
I would like to be able to use one of those cheap vps and use the storage of another service such as uptobox that for little money you have "unlimited" storage