When I started using Ubuntu, the installation of the operating system was very different. That of the live sessions or Live Sessions was something exclusive to distributions like Knoppix, and the process was, although comparisons tend to be obnoxious, something like Windows. You had to create an installation CD, put it in, start from it, something that was like this by default on almost any computer, and do what the wizard told you. Later, the use of Live Sessions and flash drives began to become popular, and here we are going to teach you how to install ubuntu from usb.
The truth is that, right now, it's hard for me to think of another way to install an operating system, to the point that when I want to install Windows I also do it like this (with tools like WinToFlash, although other more modern ones are also valid). Flash drives are reusable, and we can use them for anything else after installing the operating system. What I think is the most difficult or most important information we need to know is how to "burn" the ISO image, if you can still say "burn" when what you want to do is create a Live USB.
How to install Ubuntu from USB: download
There are tools that allow you to download the ISO images from themselves, but I don't trust them because Lili (Linux Live) USB Creator and others like UNetBootin usually take their time adding new versions. So for me it's best to go to the official website and descargar las images from the browser. Or if not, and they offer the possibility, from the torrent that we see each other there.
The Ubuntu ISO is available at this link, but also from cdimage.ubuntu.com. On the old server we can download the main version of Ubuntu and all the official flavors, and even some that are discontinued like Ubuntu GNOME or MythBuntu. In the versions that still exist, we can download everything that still enjoys support, which at the time of writing this article is from Ubuntu 14.04 onwards. The bad thing is that the 32bit images have disappeared from there, but you can find 32bit images of some flavors in the Ubuntu forum.
How to install Ubuntu from USB: creating the installation media
And who says "installation medium" says USB. This section can be very long if you try to cover all the available options. I usually use Etcher on Linux, or (Raspberry Pi) Imager, or even Ventoy, so I wouldn't know where to start. Although I do have something in mind, since Ubuntu does allow us to have the Secure Boot and it doesn't usually cause problems, so the first thing I will comment on is the use of Ventoy.
windy
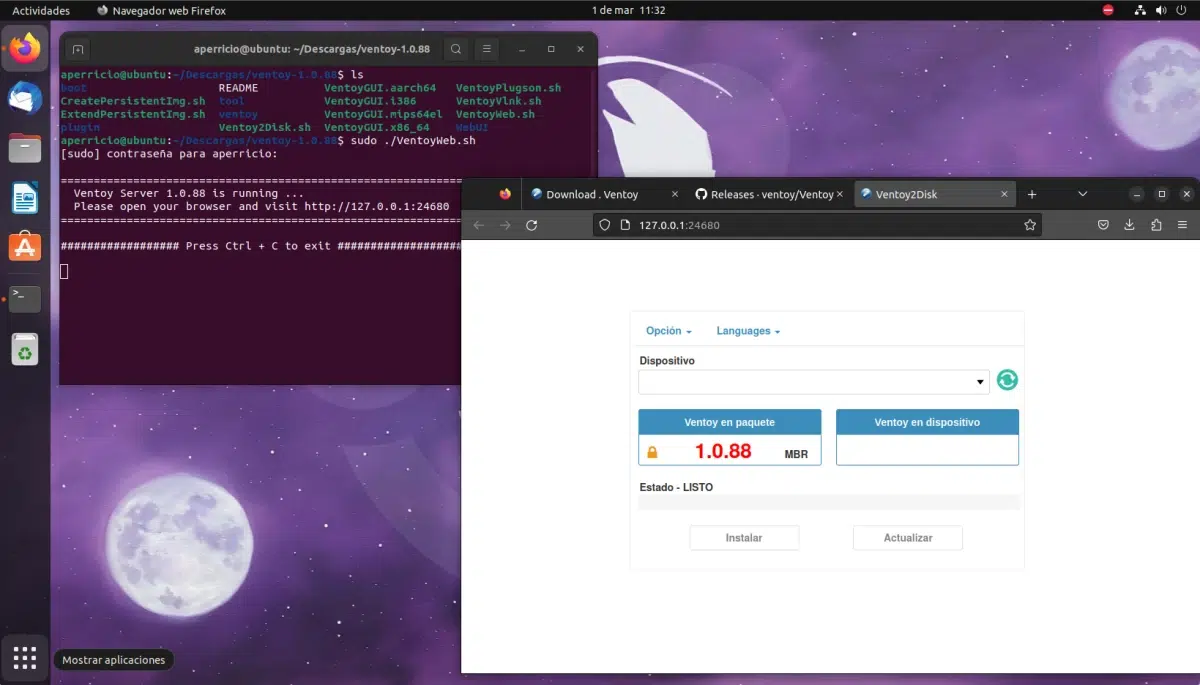
The worst thing about Ventoy is its installation, at least if we use a system like Ubuntu; the good thing is that it can be used from its binaries. If we are in Windows no; if this is your case, download the latest version from this link and congratulations if you have decided to join us. In systems like Manjaro it is available from its official repositories, but in Ubuntu we have to take a walk through the terminal, albeit short and pleasant. The steps would be these:
- We download the software from the link that we have provided above.
- We extract the compressed file, which can be done with a graphical tool or with the command (the "x" will vary depending on the downloaded version):
sudo tar -xf ventoy-1.x.xx-linux.tar.gz
- Next, we move to the directory created with this command, and it's worth doing from the terminal because the process of using the web tool is also started with the command line in Ubuntu:
cd ventoy-1.x.xx
- Once inside, we will have to execute this command.
sudo ./VentoyWeb.sh
- As we see in the terminal, in order to access the graphical interface we will have to open a web browser and enter the link that it indicates, for which it can be useful to click on it.
NOTE: : It usually starts in English, but it can be changed by choosing another language from the “Languages” menu.
- Now that the web version is open, we just have to display the "Device" menu, choose the flash drive where Ventoy will be installed and click "Install".
As extra information, for those who do not know it and understand why I recommend Ventoy first, what it will do is install what is necessary so that ISOs can be added to the USB and start from them. Therefore, we can use it as a storage unit, and "burning" the images will not be necessary. It will be enough to drag the ISO inside the USB with Ventoy.
Whale Etcher
Etcher it's a more direct and easy-to-use tool, but you have to erase everything on the USB before creating the installation media. The good thing is that available as AppImage, so it would not be necessary to install anything on the operating system.
Although that of not having to install anything is a half lie. The AppImage on Ubuntu (GNOME, at least) they are not opened by default until the libfuse2 package is installed (sudo apt install libfuse2). Once we have that package installed, what we have to do is right click on the AppImage/Properties and check that it can be executed as a program. When you start it, it will look something like the following:
As we have mentioned, the process is a bit "to' p'alante" or, as the Anglo-Saxons say, "straight forward":
- In the first section you choose the ISO to record.
- In the second, the drive to install it. It usually notifies us when we are going to install it on a very large flash drive, since there could be important data and during creation everything has to be deleted.
- With those two selections made, click on Flash and wait for the process to finish.
- Although nobody has to take my bad example, I usually avoid the verification that it does after the creation of the Live USB, since it takes a while longer and it has never failed me nor have I seen any error messages from the verification
Imager
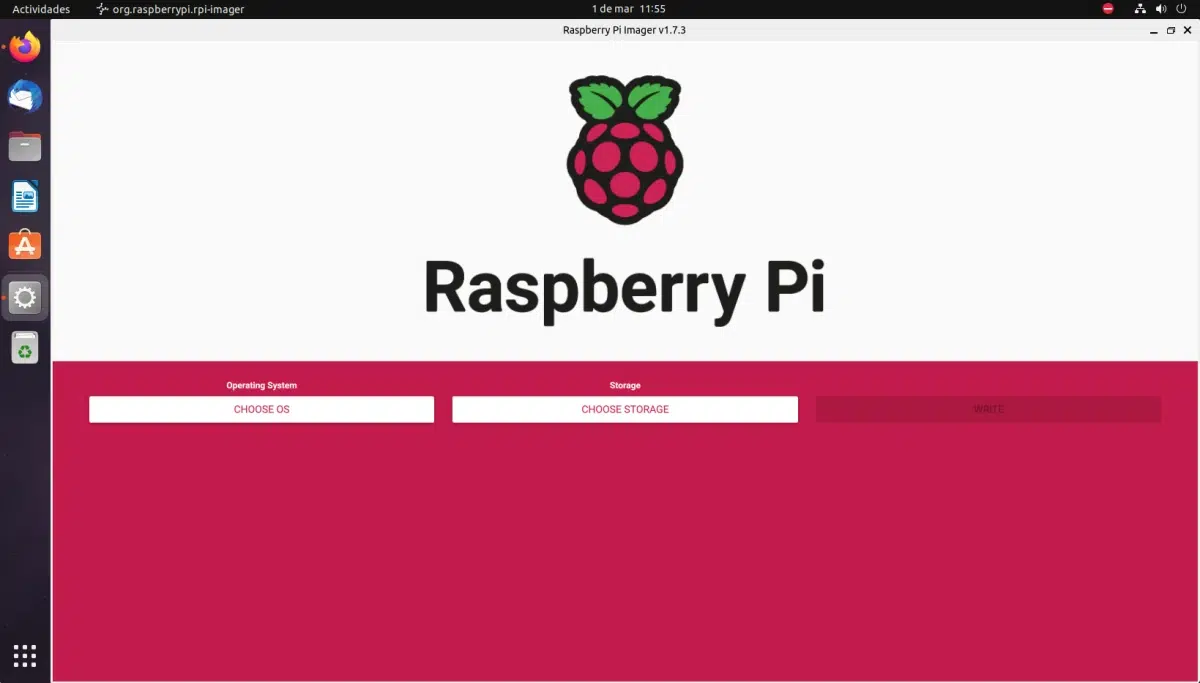
The last of my proposals works almost exactly the same as Etcher, but is available in the official Ubuntu repositories, so it can be searched for and installed with Ubuntu Software. It's called Imager, or Raspberry Pi Imager, since it is the tool that the Raspberry Pi offers to burn images that will be used on its motherboard. But it's not just for your motherboard and you can create Ubuntu Live USBs with this tool.
The only difference is that the "CHOOSE OS" option can mess us up a bit. As we say, it is a software prepared mainly to record images for the Raspberry Pi, and that menu offers us to download systems like Ubuntu Desktop, Raspberry Pi OS or LibreELEC, but the versions for your board. If we want to create a Live USB with Ubuntu, we must choose the "Use Custom" option, browse and choose the Ubuntu ISO, and the rest is as with Etcher, verification included.
How to install Ubuntu from USB: previous step
Once we have the installation medium, how to install Ubuntu from USB is already much closer, although there is also something important to do/know. How to do it depends on the computer and its most basic memory, also known as BIOS. What we have to do first of all is turn off the equipment, turn it on and enter your settings (setup). In some devices it is with (Fn)F2, in others with the «Del» or «Del» key and in others with some other; You have to find out what it is to be able to enter this configuration.
Once in it, and since each one is different, it is difficult to explain the specific steps, but you have to scroll to the boot options and change the order so that first read the usb. By the way, it wouldn't hurt to change the whole order so that the last thing you try to boot from is the hard drive; if there is nothing, then start the hard drive; Otherwise, start from whatever there is, either a CD or a USB, which we will have put in for something. But everyone knows his equipment and will know what to do here.
Another option if you don't want to change the boot order is to find and activate the option, if it exists, of enter drive selection during boot. On my laptop it's pressing F12 at startup, and it allows me to choose the hard drive or a USB if I have it in a port.
Ubuntu installation
At this point, what we have left is to start from the USB and install Ubuntu. In this article of our guide is explained step by step, and here we are going to do a little the same thing, but the screenshots will be those of the installer that will be available from 23.04, since the release date is getting closer and we hope that this article help install Ubuntu both at the time of writing this article and for years to come.
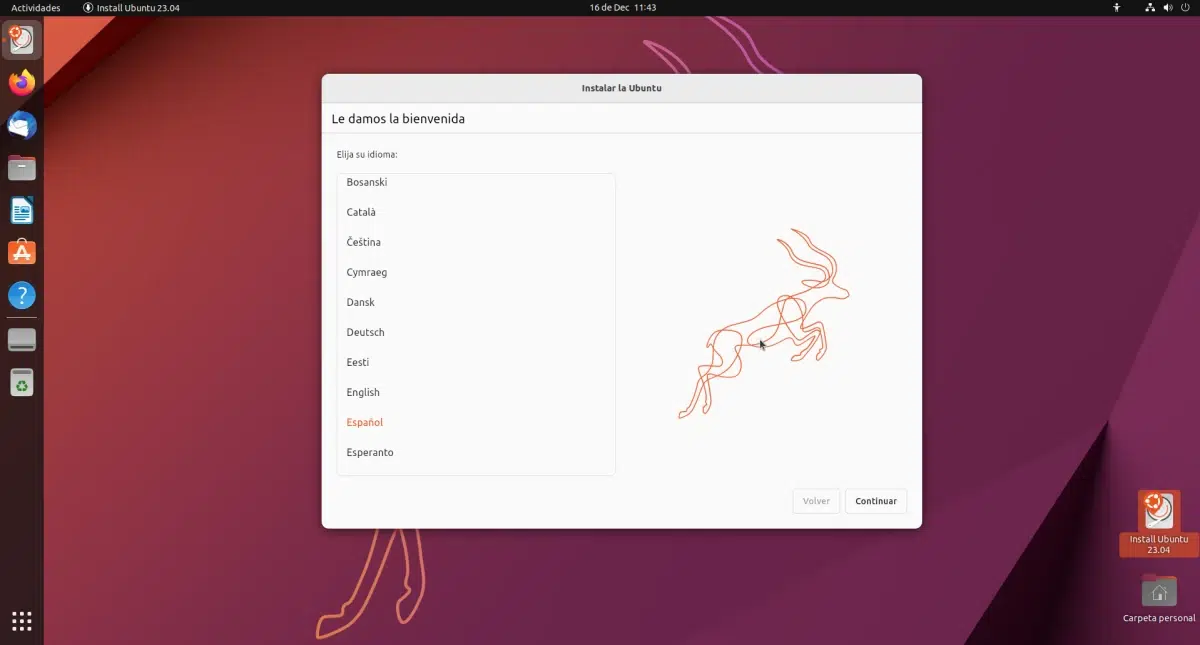
In the first window, and this is new, it will ask us to choose the language. Well, nothing: we choose it and click Continue.
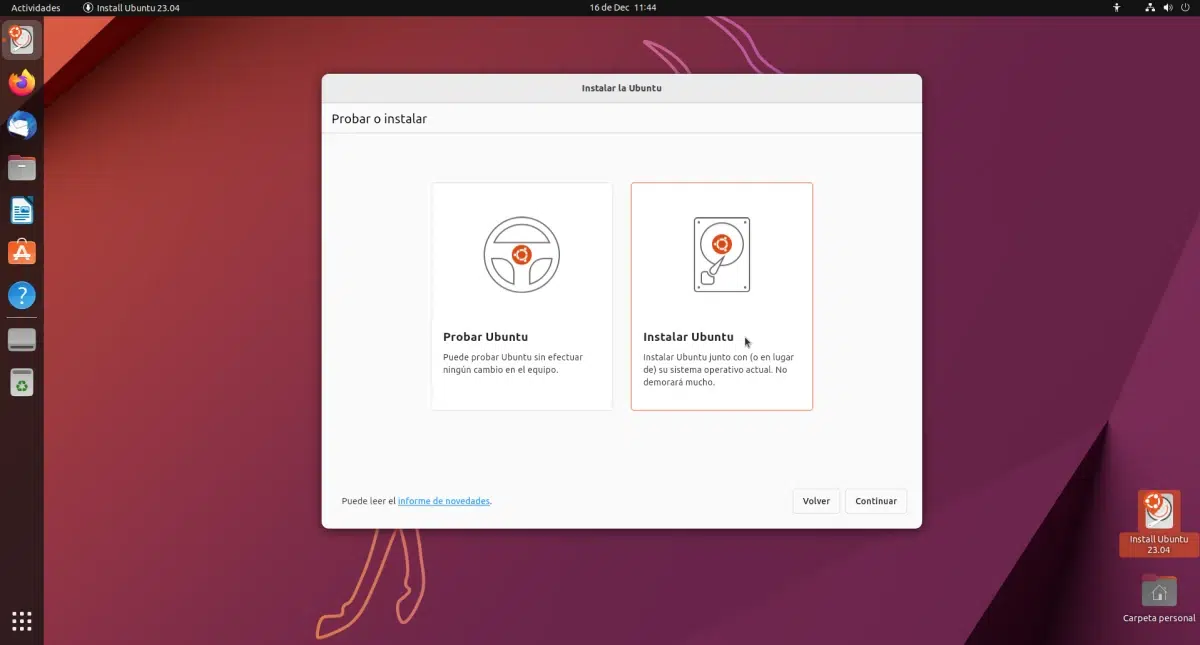
Next, and this order is also new, it will be when it asks us if we want to test or install the operating system. If what we want is to work in a Live Session, we will have to choose “Try Ubuntu”. If we want to install it, then “Install Ubuntu”. There is no difference, but I usually choose the option to try because it allows me to use the operating system, in case I want to do something with my computer and the installation does not force me to wait.
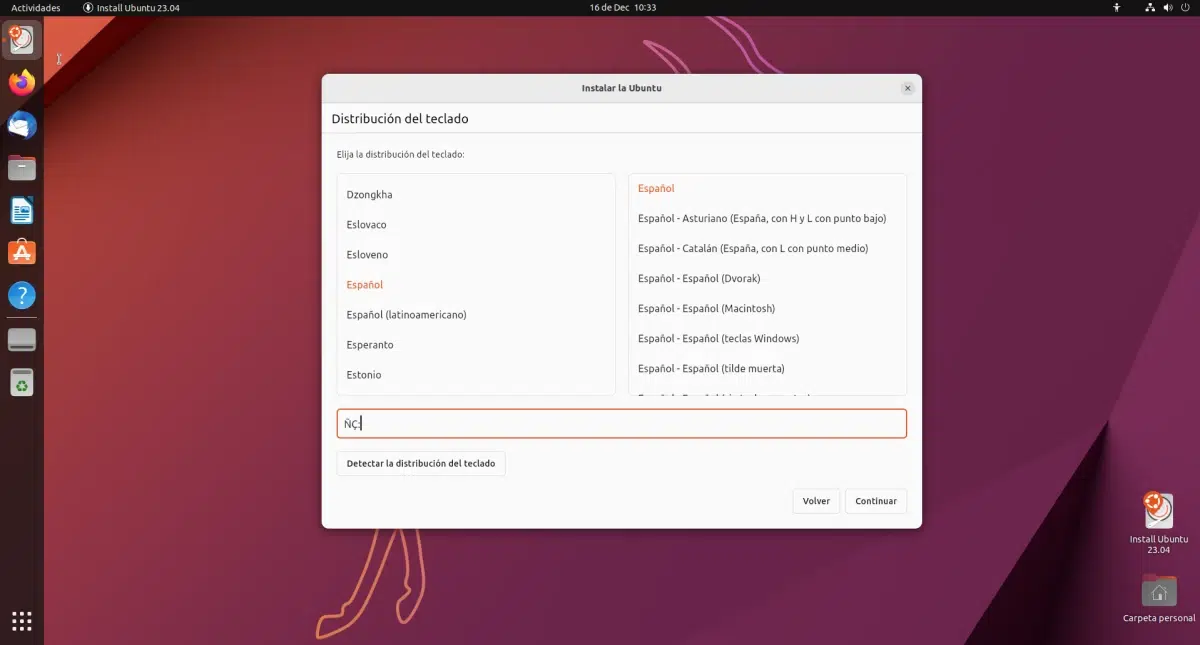
On the next screen we will have to choose the keyboard layout. We choose our language and click on Continue. If we are not sure of a choice, after marking a language we can check that everything is correct in the text box below. For Spanish speakers, it's worth checking that the Ñ is there.
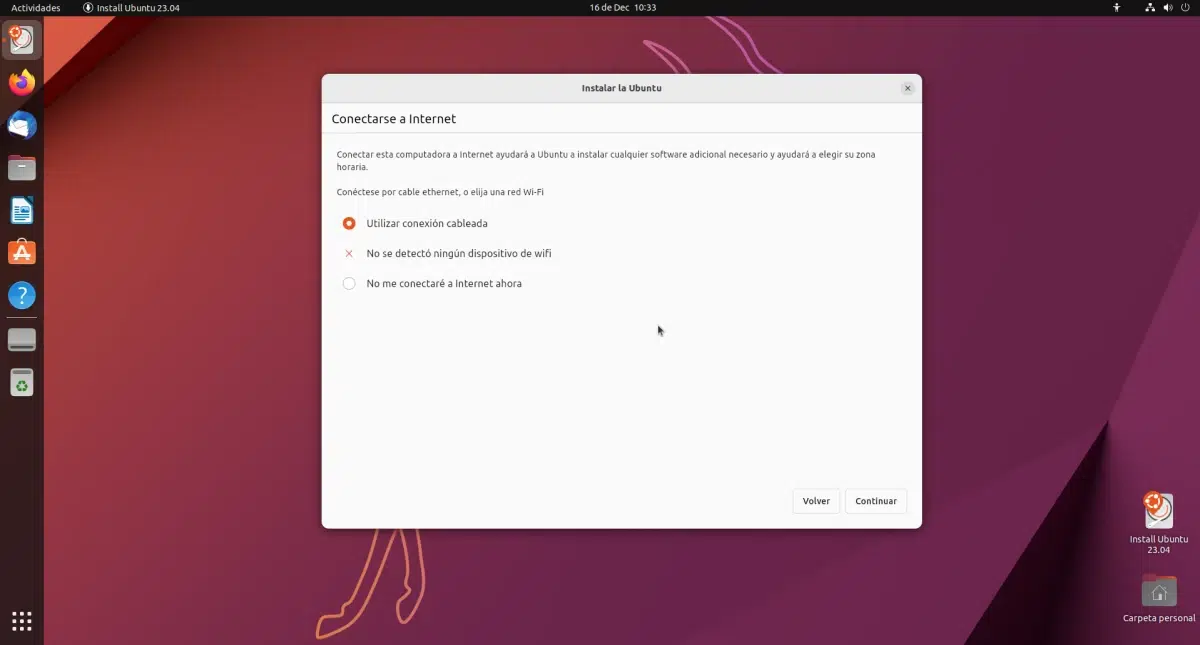
With the keyboard already in our language, it is time to connect to the Internet. This step is not very important, but if we connect we can download software and some updates during the installation. If we don't connect, all updates will have to be applied afterwards.
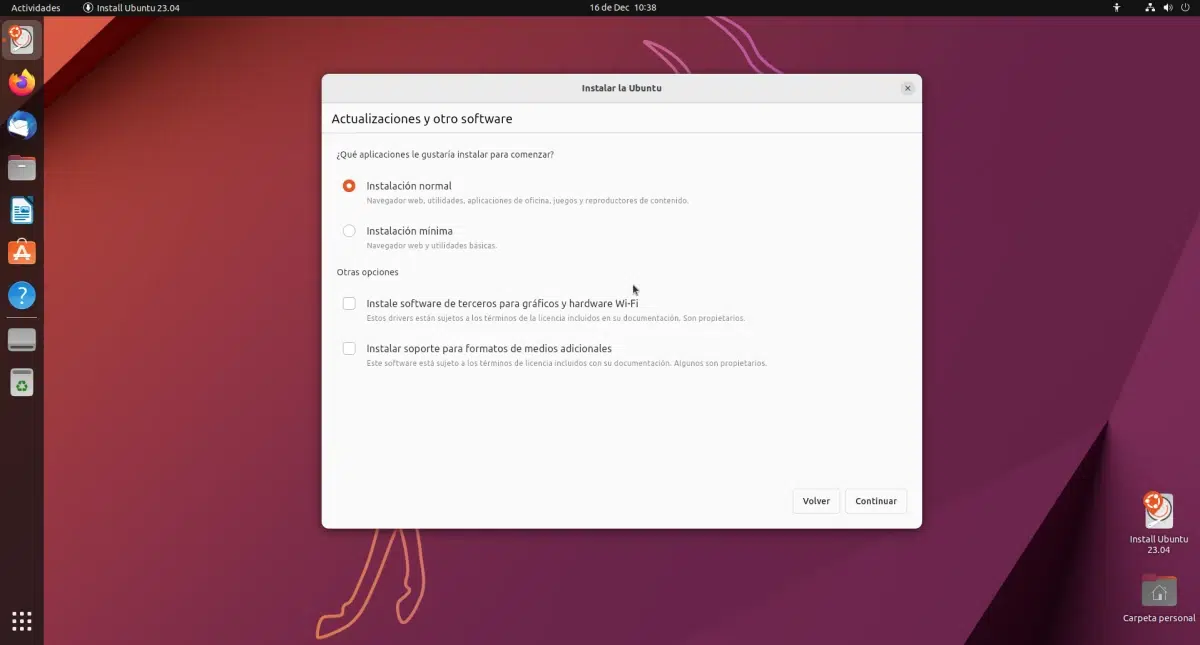
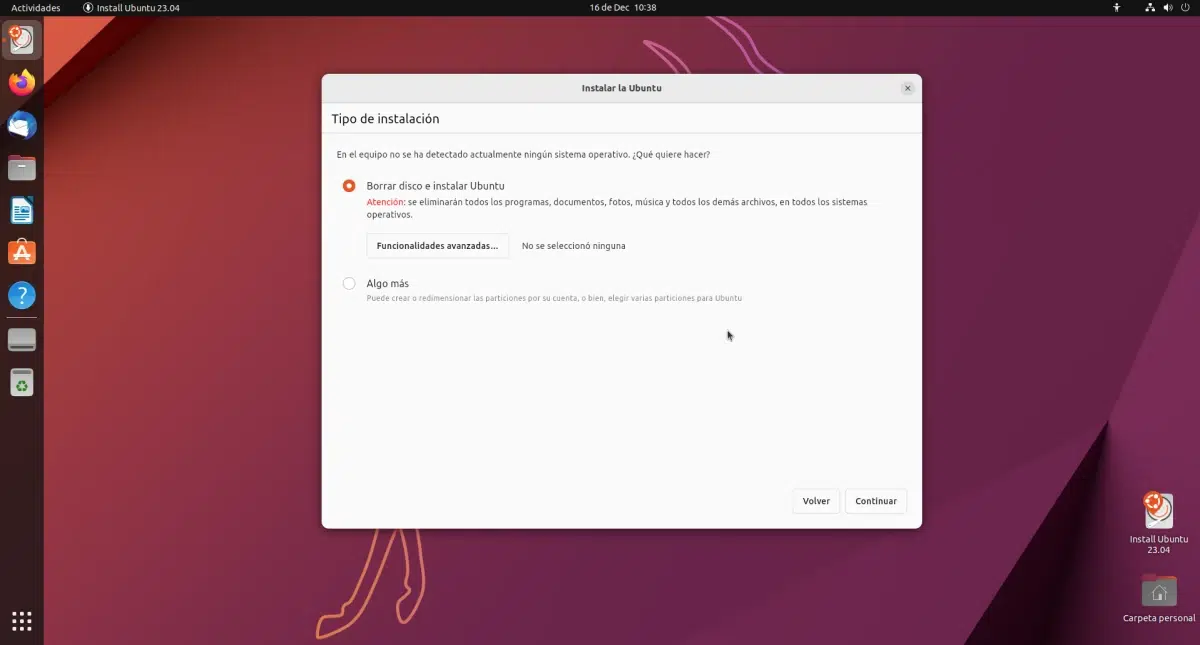
The next step is one of the most important, since we will have to choose the type of installation we want to do. We can choose between normal and minimal, which will do the same as normal but will install fewer packages by default (just enough to work). Also if we want to install third-party software, such as proprietary drivers and multimedia formats.
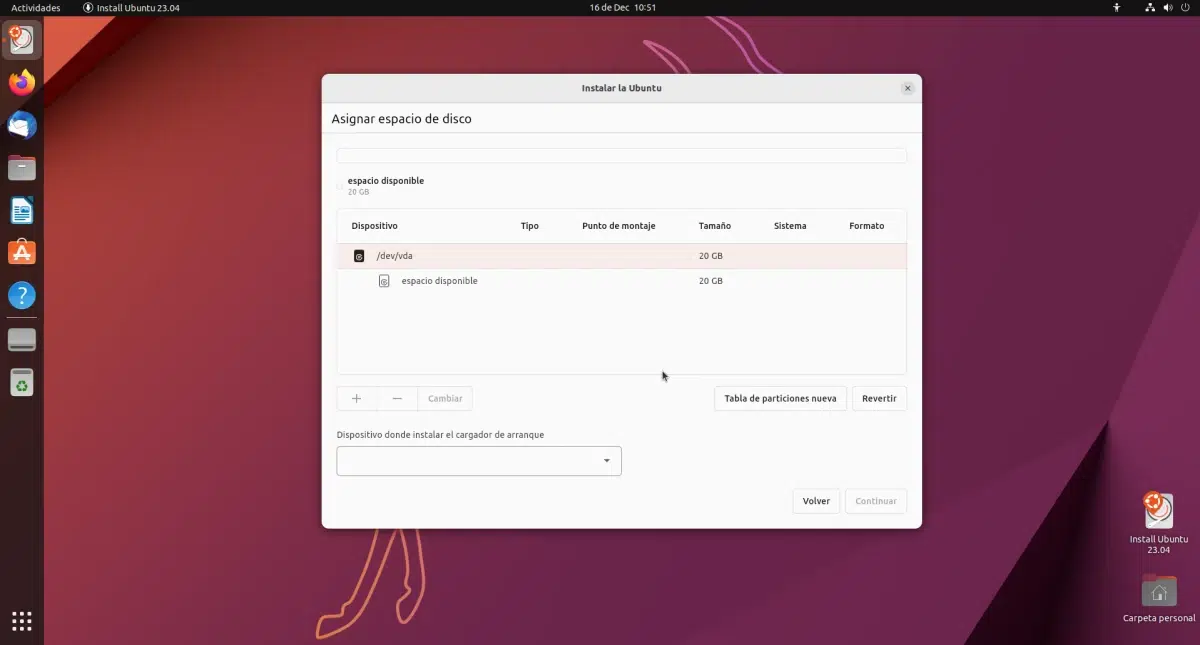
Continuing with the type of installation, now we have to choose how we will treat the partitions. If we choose the one that is checked by default, it will install Ubuntu using the entire hard drive. We can also choose some advanced features, and “Something else”…
... which is where we can create, delete, choose, etc, the partitions. This section is for advanced users, although soon we will write a guide on the partitions that Ubuntu needs to work and which ones it would be advisable to have.
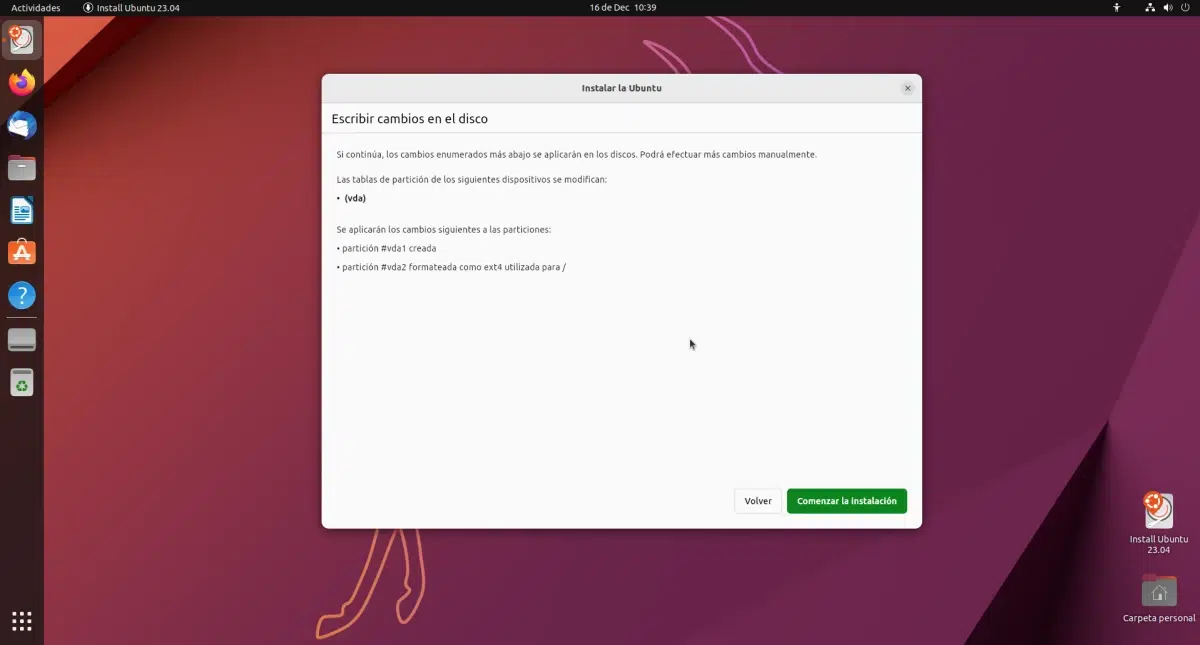
In the next window we will see a summary of what we are going to do. If it is what we want, we continue. If not, you have to go back to modify what is not right.
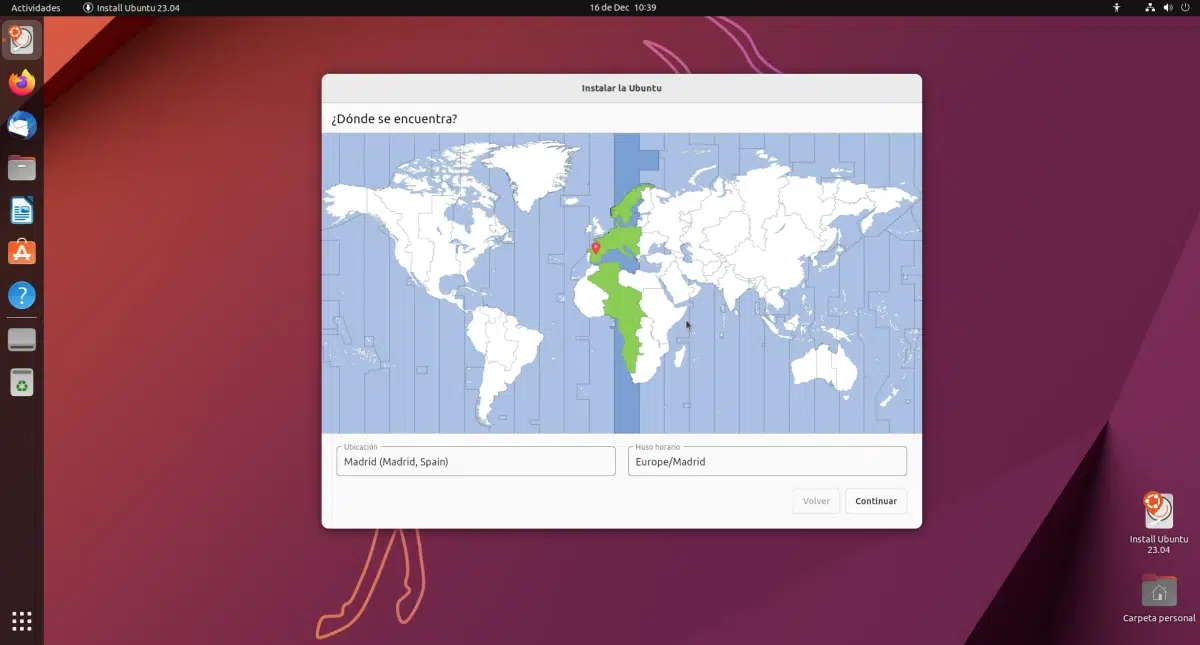
The installation has already started, but there are a few more things to configure. The first of them, our location.
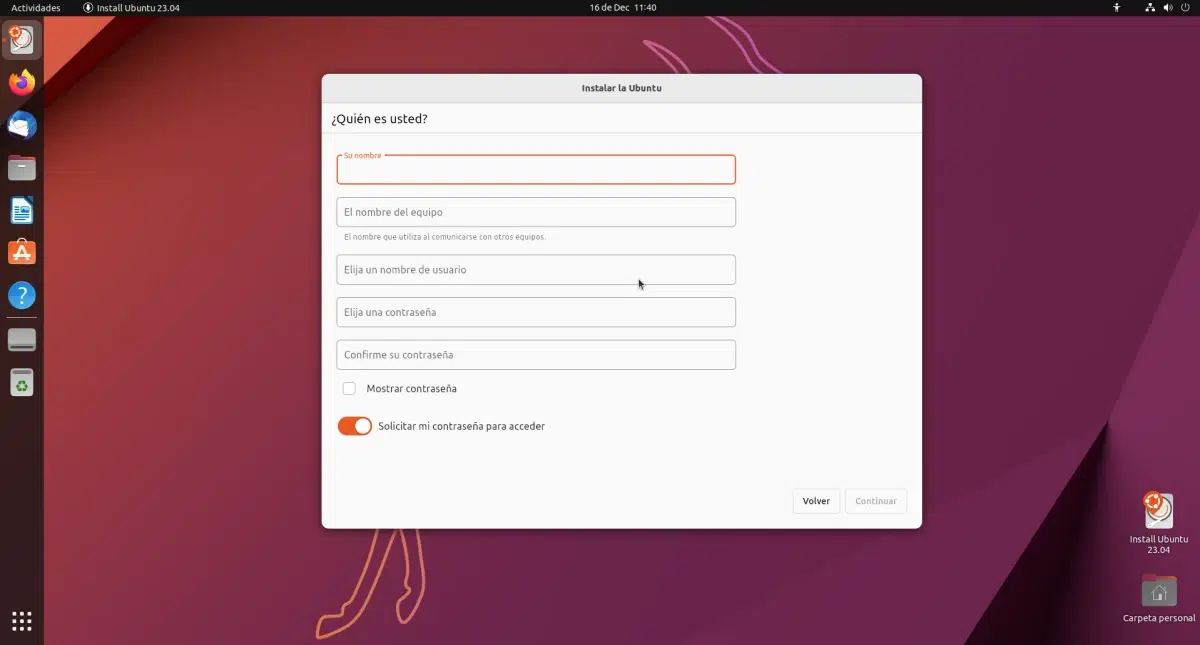
Then we will create our user:
- Our full name goes in the first box, if we want to use it that way.
- In the second, the name of the team. I usually simply put the name of the operating system, in this case "ubuntu" (I like to use lower case for this). And again with this installer, "ubuntu" is not caught and can be used.
- In the third box goes the name of the user, which has to be in lowercase and will appear in /home.
- The last two are for the password, to put it once and confirm that we have not made a mistake.
- The "checkbox" or verification box would be to see the password, so that the letters appear and not the symbols that hide them.
- And the switch is to ask us for the password when starting the computer or not. Unless it is used for non-important things, like I have an old laptop that only uses as a media center, it is better to leave it active.
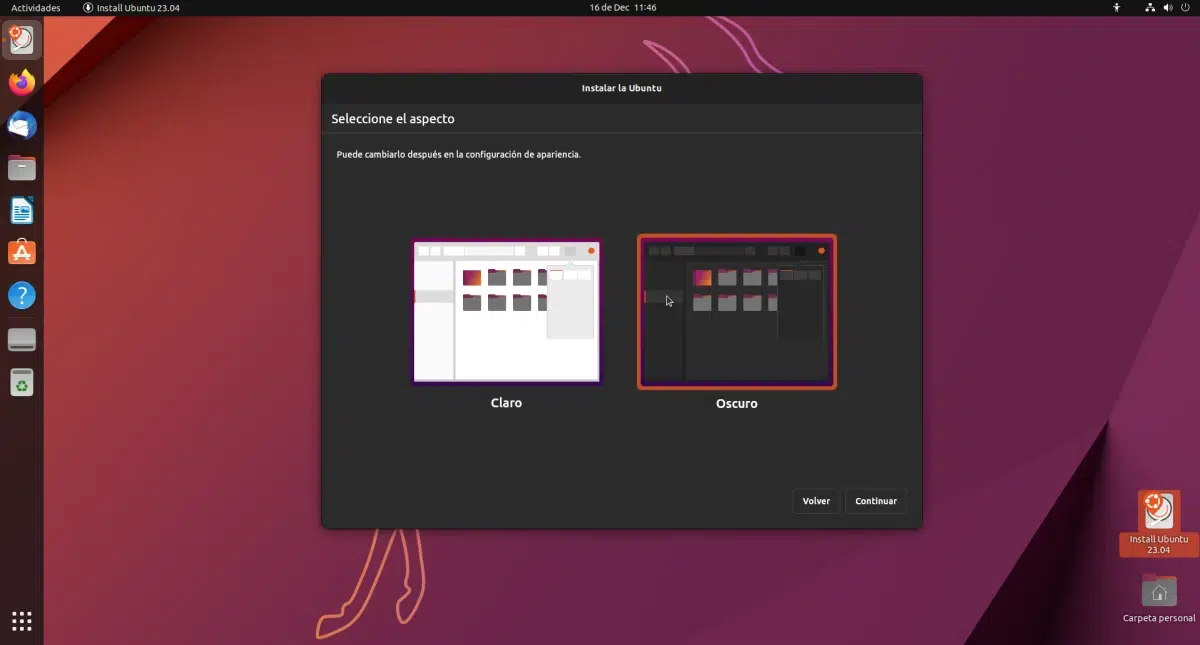
I don't know if many will think like me, but I like this. An extra step has been introduced in which we will have to choose the light or dark theme. It's one more step, but the installation is already being done in the background and we don't waste time. On the other hand, after starting the operating system we will have it as we like.
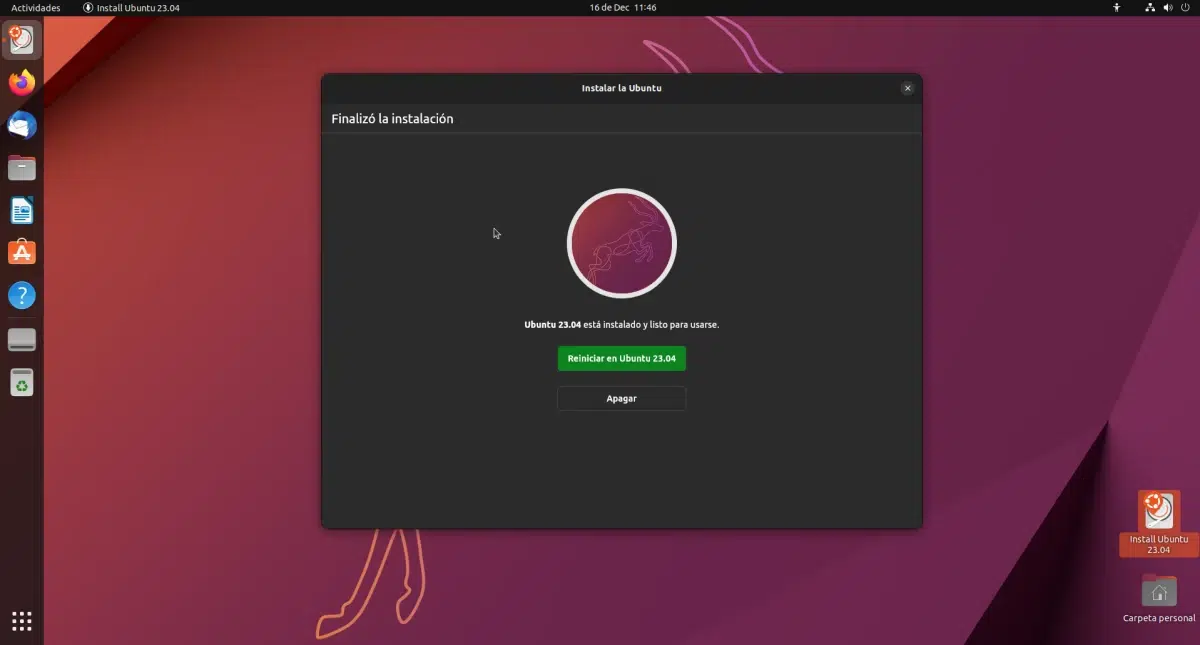
We wait for the process to finish, we can entertain ourselves by looking at the slides if we want, until we see an image like the following:
And that would be all. Now just need to reboot. The operating system reminds us that we have to remove the USB before rebooting; a message appears, at which point we have to remove it and press “Enter”. When restarting we will be in our new Ubuntu. We hope this guide on how to install Ubuntu from usb has helped you.

From the first moment I open the option to install UBuntu from a USB, the instructions are in English. I can not go on.
Then later there are options to configure the language, but not before, therefore I cannot install it