For several years now, after a certain new security feature was introduced for APT repositories, it is somewhat more difficult to install third-party software. On the other hand, sometimes it is Canonical who decides to remove some software from its repositories, such as UNetbootin, a small application to create Live USB that some time ago we could install from any software center or via "apt install". The software was still available from its website, but here we will show you how to install it via repository.
Explained here it is tested on Ubuntu 20.04 and 18.04, although we will explain two systems. The simplest works in Bionic Beaver, which means that it should not present problems on 19.10 either, which will continue to enjoy support until July of this year. In any case, at the time of writing, a little more work has to be done to install it on Focal Fossa, an operating system that will be officially launched next Thursday, April 23. We go on to explain the steps to install UNetbootin in Ubuntu via the repository and from its binaries.
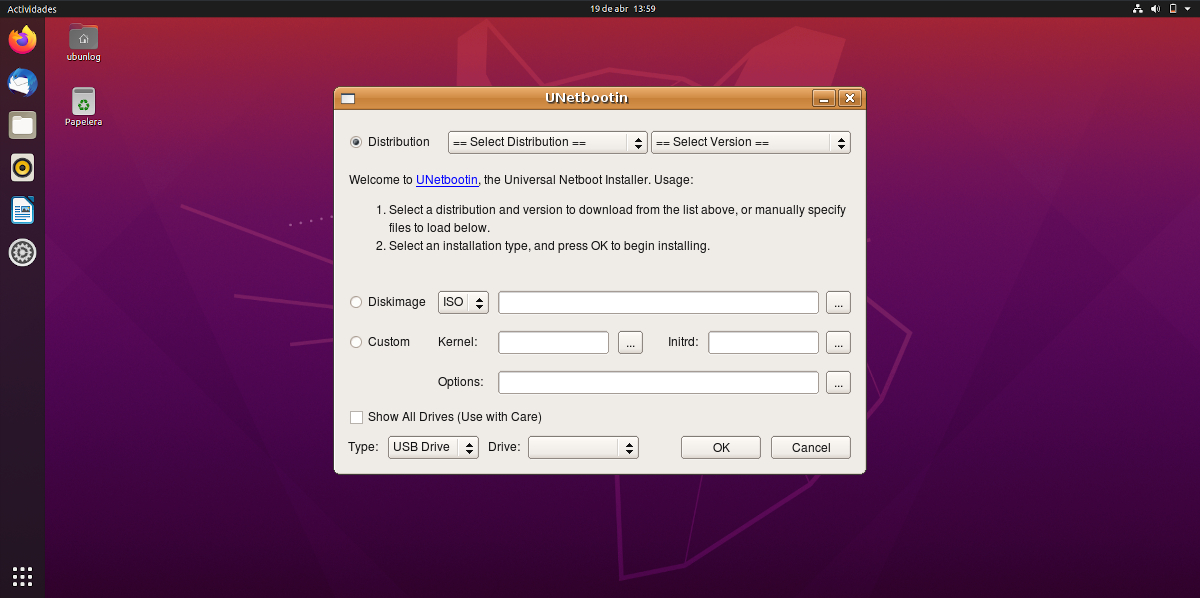
UNetbootin on Focal Fossa and Bionic Beaver, two different systems
The first and only thing in Bionic Beaver that we have to do is write the commands to add the repository, update the packages and install the software, which are the following:
sudo add-apt-repository ppa:gezakovacs/ppa
sudo apt-get update
sudo apt-get install unetbootin
Right now Ubuntu 20.04 shows a dependencies error when trying to use this repository to install UNetbootin, and this is something we don't know if it will change in the future, and if it does, when it will work properly. It may be when the system is officially launched, after a few weeks, months or never, but there is another way to install UNetbootin from the binaries which is the following:
- With Firefox, Chrome or any browser that allows you to download files, we go to the official page of the project, which we can access from this link.
- Next, we open a terminal window and go to the download path, which by default is usually Downloads (you have to change the command if we have changed this setting):
cd Downloads
- We write "ls" without the quotes to see the available files. We will see the Bin file for UNetbootin.
- Modify the file permissions with the following command, changing "filename" for the downloaded file, which will depend on the version:
sudo chmod +x ./nombredelarchivo
- Finally, we execute the software with the following command, changing "filename" again to the name of the file that we have:
sudo ./nombredelarchivo
And that would be all. The use of the software has not changed in years and you have a simple example in this article archive.
I get the following error,
7z not found. Any installation mode is required.
Install the package or the equivalent in your distribution. »
I can use it, but it doesn't scan my PC to raise the ISO to use on the pendrive,
I await your comments
The buttons for back, forward and other options are not visible because they are the same color as the toolbar, you can only see a box, but if you click on the side there are buttons and you can explore your directories.
Hi,
This is an alternative debian package to install on focal fossa:
https://github.com/winunix/unetbootin-focal
I followed the instructions and fortunately it did not give me problems, it was installed and it is working correctly, thanks for the contribution.