Java
Java without a doubt is a programming language which is used for various purposes and it is an almost essential complement for the execution and operation of various tools, java installation is practically an essential task after you have done the java installation.
It is because of that this time I will share with you a simple tutorial on how to install Java in our system with the JDK which is a development environment and the JRE execution environment.
We have two installation methods for our system one of them is using the packages that they offer us from the official Ubuntu repositories and the other is through el use of a third-party repository.
How to install Java on Ubuntu 18.04 from repositories?
To install Java and its plugins We can do it by supporting ourselves with Synaptic or also from the terminal.
With Synaptic we only use the search engine to select the packages we want to install.
While, with the terminal, we must open it and execute the following commands.
First we must update the system with:
sudo apt-get update

sudo apt-get upgrade
Y finally we install Java with this command:
sudo apt-get install default-jdk
While to install the execution environment we execute:
sudo apt-get install default-jre
For check that we have Java installed in our system we only have to execute:
java --version
Which will return a response with our java version installed.
How to install free Java alternatives on Ubuntu 18.04?
It is also important to know that we have free alternatives to Java which we can install directly from the official Ubuntu repositories.
Ubuntu containing an open source version Java binaries at runtime called Open JDK.
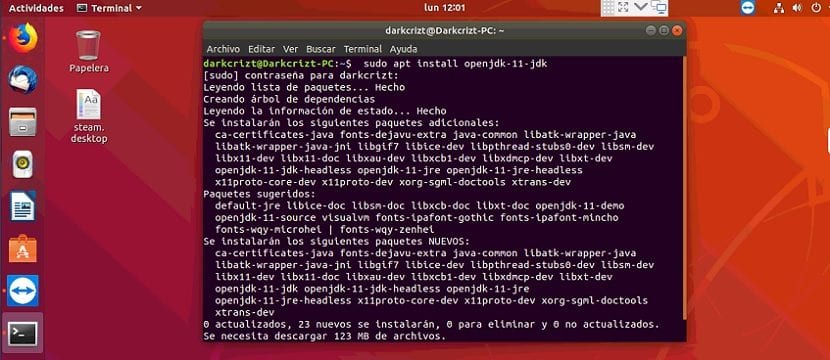
To install Ubuntu Java Open JDK version 11 we must open a terminal and execute:
sudo apt install openjdk-11-jdk
To install Ubuntu Java Open JDK version 9 run:
sudo apt install openjdk-9-jdk
And for Java Open JDK 8 run:
sudo apt install openjdk-8-jdk
How to install Java on Ubuntu 18.04 from PPA?
The other method mentioned was through a third-party PPA, for the installation of Java on our computer we will use the repository that the guys at webupd8team offer us.
For this we must open a terminal and execute the following command:
sudo add-apt-repository ppa:webupd8team/java

sudo apt update
Here I must clarify that in this repository they have version 8 and 9 of java so you will choose which version to install.
To install java version 8 run:
sudo apt install oracle-java8-installer
For the case of Java 9 we execute:
sudo apt install oracle-java9-installer
How to install Java 10 on Ubuntu 18.04 and derivatives?
Since they only have up to the ninth version of Java in the old repository, we need to use another repository in case we want to install java version 10 in our teams.
This version has been available for some time now and brings the following features:
- an experimental just-in-time compiler called Graal can be used on the Linux / x64 platform
- local variable type inference.
- shared data class application, which allows application classes to be placed in the shared file to reduce the startup and footprint of Java applications.
- Docker Awareness: On Linux, JVM now automatically detects if it is running in a Docker container
To do this on the terminal we execute this command to add it to our list of repositories:
sudo add-apt-repository ppa:linuxuprising/java
We update our repositories with:
sudo apt update
Y finally we install with this command:
sudo apt install oracle-java10-installer
Customizing the Java installation
Java allows us to have different versions installed on the system, with which we can choose which version to work on without the need to reinstall a previous version without eliminating a previous one.
By using update-alternatives
We can make this configuration that allows us to manage symbolic links that will be used for different commands.
sudo update-alternatives --config java
It will display the different versions of Java that we have installed, of which we can mark or change the default version by selecting the one to our liking.
Hello in reference to «sudo update-alternatives –config java», for compatibility reasons I have installed two versions of Java, 11 by default and 8 (Manual) for compatibility of older ubuntu applications:
Selection Route Priority Status
————————————————————
* 0 / usr / lib / jvm / java-11-openjdk-amd64 / bin / java 1101 automatic mode
1 / usr / lib / jvm / java-11-openjdk-amd64 / bin / java 1101 manual mode
2 / usr / lib / jvm / java-8-openjdk-amd64 / jre / bin / java 1081 manual mode
How could I solve the working of those applications with java8, so that I can use version 8 and not launch 11?
java old_app_name -> not working
/ usr / lib / jvm / java-8-openjdk-amd64 / jre / bin / java old_app_name -> not working
Thanks, greetings David.
* leave linck so it's easier *
I can't install java 8, who knows how? on ubuntu 18.04.1 lts
hello, could you install java 8 on your ubuntu 18.04.1 lts if so, answer me as thanks
i can't install java 8 on my 18.04 lts system either
Thank you!
People, I'm a yotuber, if you don't know something, walk through my channel apart, I can tell you many things about ubuntu. My channel: Mitik456 -_-
Thank you so much!
this page is nice