
nvidia ubuntu
The installation of the proprietary drivers video Nvidia They can be a bit complicated for those users who are new to Ubuntu or who are even just getting a graphics card for whatever activity.
Depending on the card model that we handle, it is mostly possible that we find the drivers for Linux. Although there are two large ones that predominate the market, this time I will show you how to install the Nvidia drivers in our system.
Since sometimes the official installer is not usually the solution to the problem, since there are different ways to install the drivers in the system.
How to install Nvidia drivers in Ubuntu 17.04
The first method that I will show you is the official one, since we have to directly download the drivers offered by Nvidia from its official page, to install them in our system. We can do it from the following url.
For those who do not know what model they have, they can find out with the following command:
lspci | grep VGA
Which will respond to us with the information of the model of our card, and with this information we proceed to download the driver.
Once the download is finished, we can proceed to install on the system. For this we have to unzip the file and open a terminal to position ourselves on the folder where the file that we unzipped and we install with the following command:
sh NVIDIA-Linux-x86_64-340.102.run
The driver version may vary depending on the model of your card. You just have to wait for the installation to finish and restart your computer so that the settings are saved.
How to install Nvidia drivers from PPA in Ubuntu 17.04
The second method is to install the drivers from the repository, which will directly take care of the drivers and dependencies without us taking action on the matter.
To install from the repository, we only need to know what model of graphics card we have, with the use of the command from the previous step.
Now we just proceed to add the repository to the system and install it, we do this by opening a terminal and with the following commands:
sudo add-apt-repository ppa:graphics-drivers/ppa

sudo apt update
And we will have to go to our application menu and search for "Software and Updates".
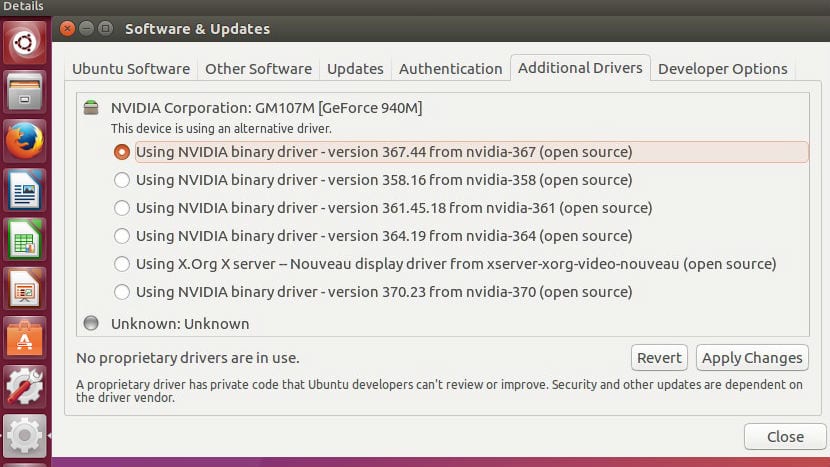
Nvida driver
Within this, in the options menu we position ourselves in "Additional drivers"And we choose the version of the Nvidia drivers that correspond to us. We will only have to wait for the process to finish to restart the computer.
They are loaded in the updates, specifically the 375 proprietary and tested.
Demonstration that there is always a restart when you update.
Good morning, my name is Carlos, I have come to this page through Google, in search of a solution for my problem with the impossibility of connecting my external monitor through HDMI, my knowledge in Ubuntu is very limited and I would greatly appreciate the It helps to solve the problem, I have already tried with all the versions of Drivers available but I cannot get it to work with any of them, or the PC is frozen or both screens are black, my graphics card is NVIDIA GK208M (GeForce GT 740M) and I currently have as Driver version 378.13 nvidia 378 and my PPc is a Sony Vaio SVF1421Z2E, thanks in advance and greetings
I do not understand well what the problem is, it does not detect the screen, it detects it and it does not give an image?
Thanks everything perfect. Only I couldn't install with the download because it asked me to open a super user terminal. I opened it but he didn't recognize the line. I didn't install it the second way and I opened the updates part and it worked. Greetings