Although we are still a huge minority, more and more of us are at least deciding to try Linux, so I think it is convenient to do a small tutorial on how to install any version of Ubuntu on our computer. Whether it is the latest LTS or later editions, Ubuntu is characterized by having a clear and simple wizard that allows us to install any version of Ubuntu on our computer in a few steps.
In order to install Ubuntu, we must get an installation image and burn it to a USB or DVD with which to start the process, the first option being more advisable. Below you have described the steps to follow to install Ubuntu, something we have tried to do as simple and straightforward as possible.
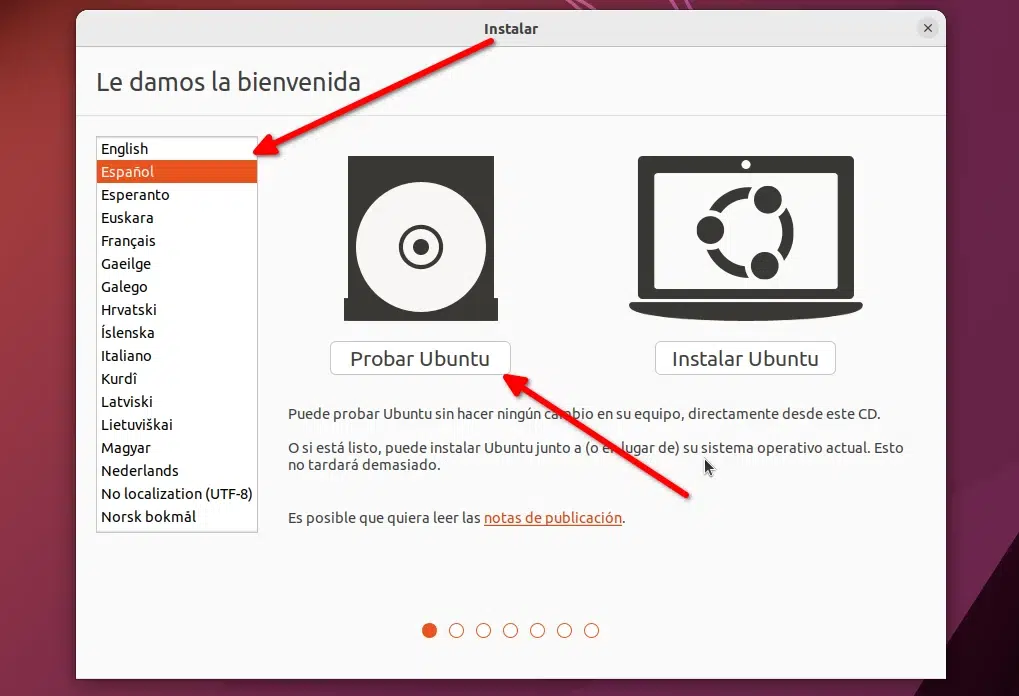
Ubuntu includes an option to try in case we are not convinced by the new operating system
After starting the Ubuntu installation media, a window will appear where we will be asked if we want «Try Ubuntu»Or«Install Ubuntu«. It usually appears in English, so it is recommended to choose our language before proceeding. To install the operating system, we can choose any of the two options, but the normal thing is to choose “Install Ubuntu”.
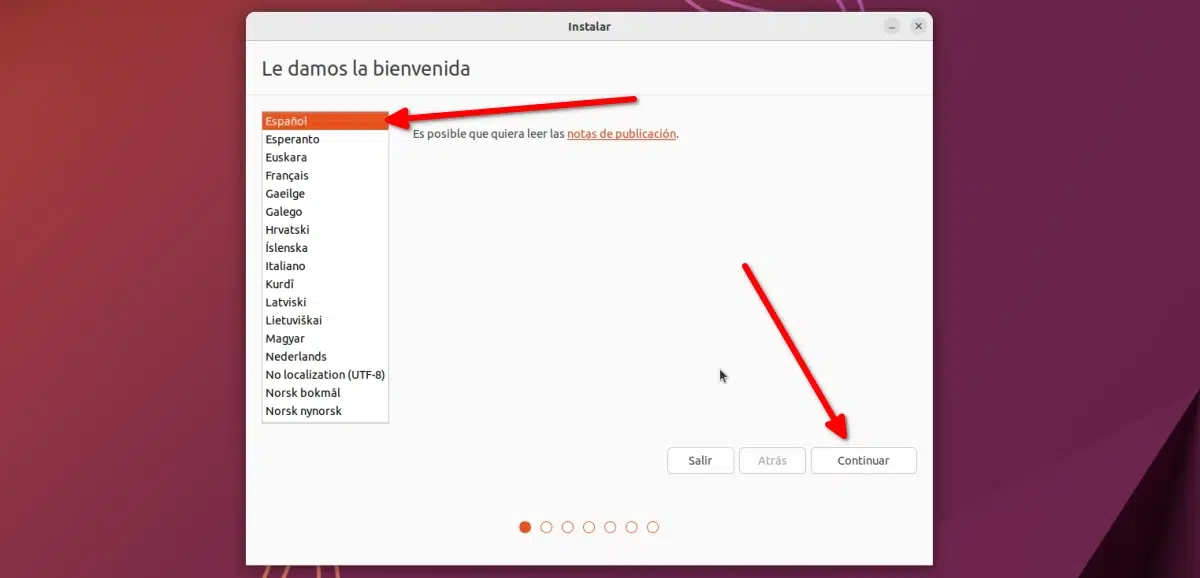
Once we click on "Install Ubuntu", the installation process will begin where we will be asked in which language we want to do it. logically we will choose Spanish and we will click on “Continue”.
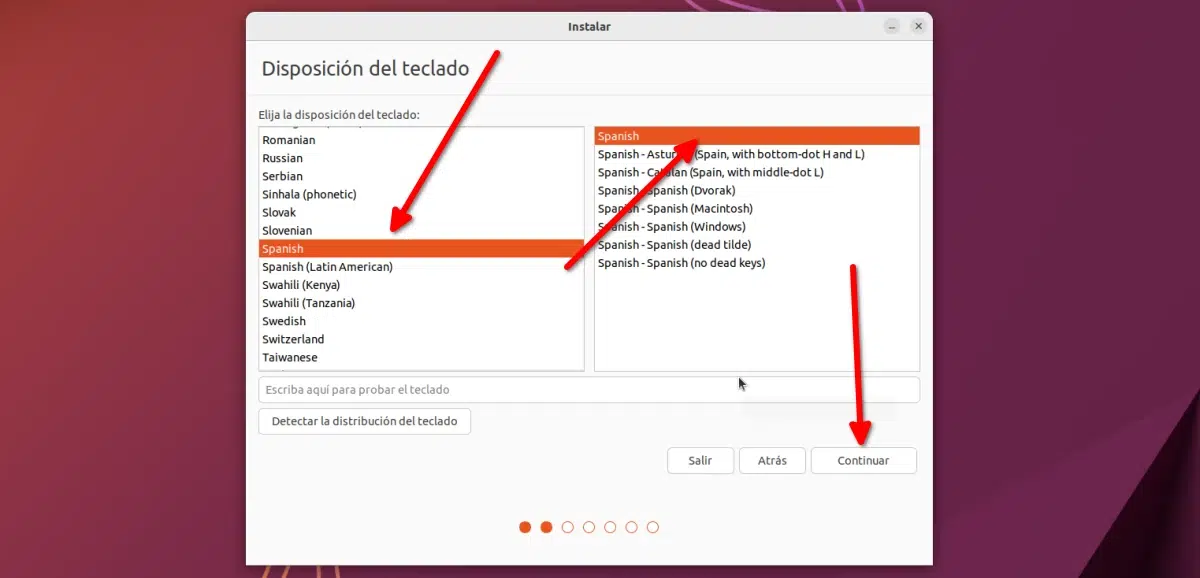
In the next window we will choose the layout of the keyboard, because one thing is the language and another is how the keys are distributed. For Spanish from Spain, you have to use the general option. If we are not sure, in the box below we can write, for example, the question mark, the Ñ and the colon, to make sure that everything is in its place. When we are, we click on “Continue”.
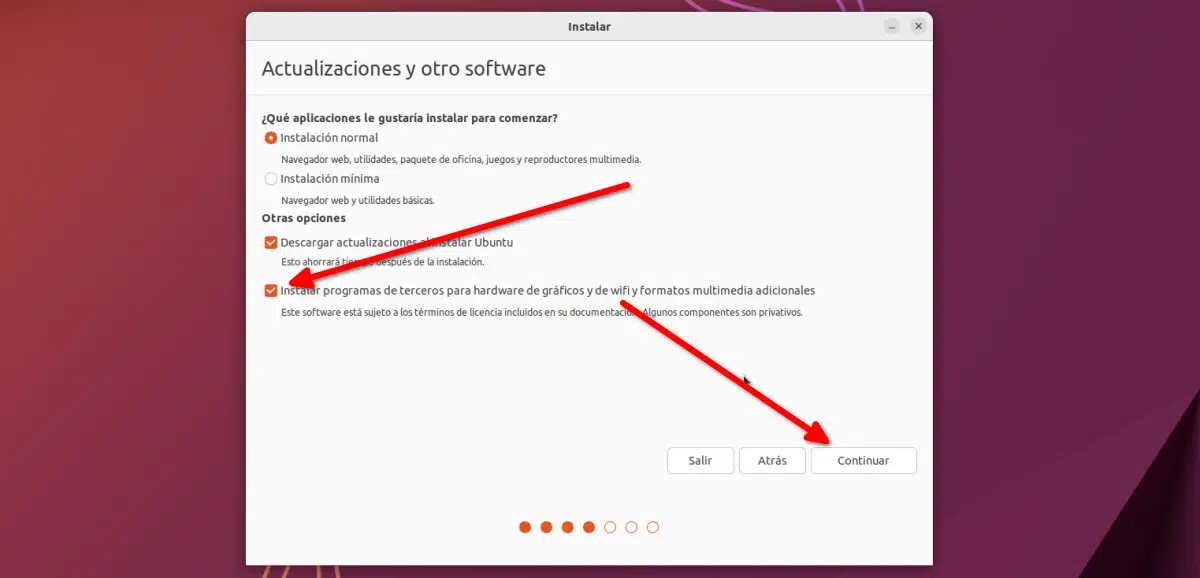
After that, the equipment will be analyzed to see if it meets the necessary requirements or not. If we have passed the test, it will tell us if we want to install the latest versions and third-party drivers while we install. This is the choice of each one, namely that the minimal installation will install the operating system and the programs necessary for it to function correctly, that the option to download the updates will download what it can so that it does not have to be done after the installation of the operating system and that with the last box we will install, for example, support for multimedia formats that may be proprietary.
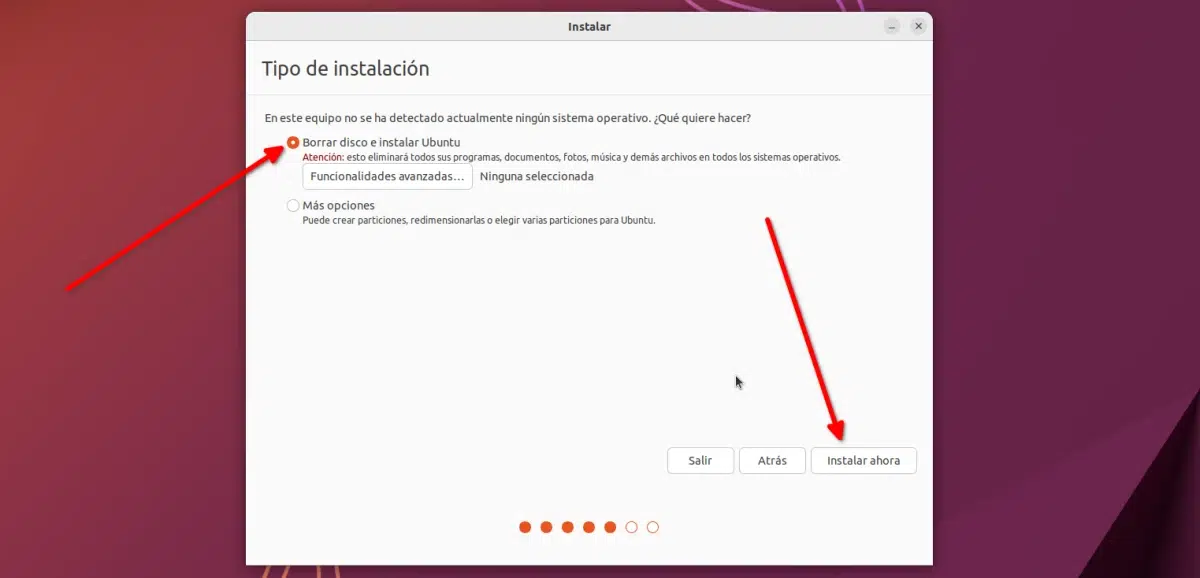
After clicking on "Continue", the installer asks us to tell it where do we want Ubuntu to be installed, on which drive if there are several and if there is only one, choose whether Ubuntu will have the entire hard drive to itself or share it with multiple operating systems. If Ubuntu will really be our only operating system, it is enough to choose the option «Erase Disk and install Ubuntu«. If we want to separate /home (the personal folder) and /swap, we must do it from “More options”, but we have already said that this tutorial was going to try to make it as simple as possible.
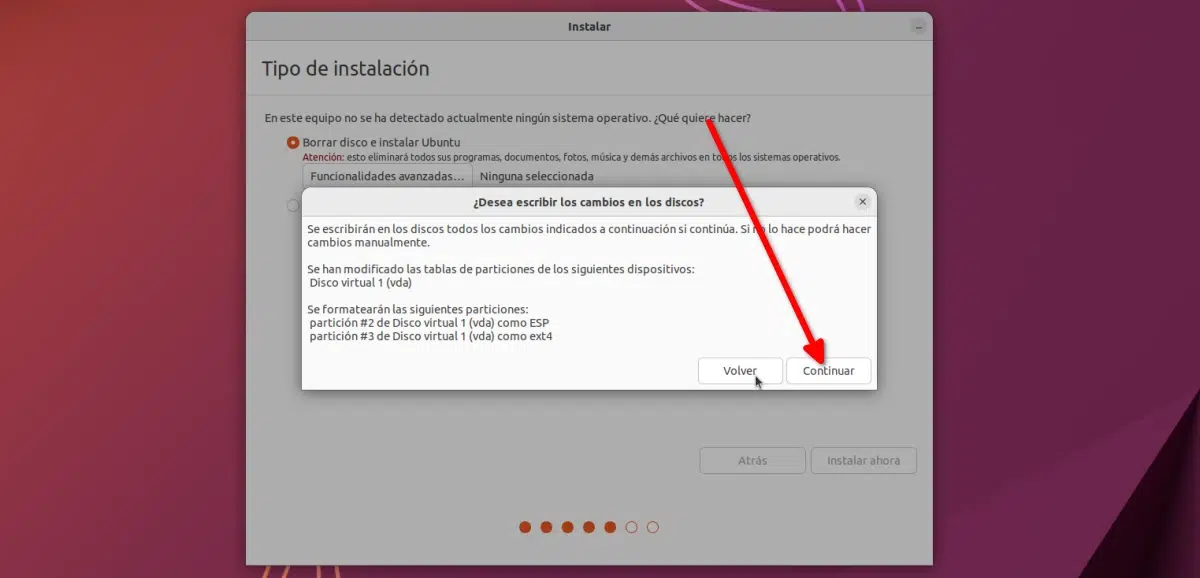
After clicking on "Install now" A screen will appear to confirm the changes, because these changes once made will erase the entire hard drive and what is on it, so if we do not have a backup, the problems can be serious. If we really install Ubuntu with everything saved or on a new computer, we press the "Continue" option without hesitation.
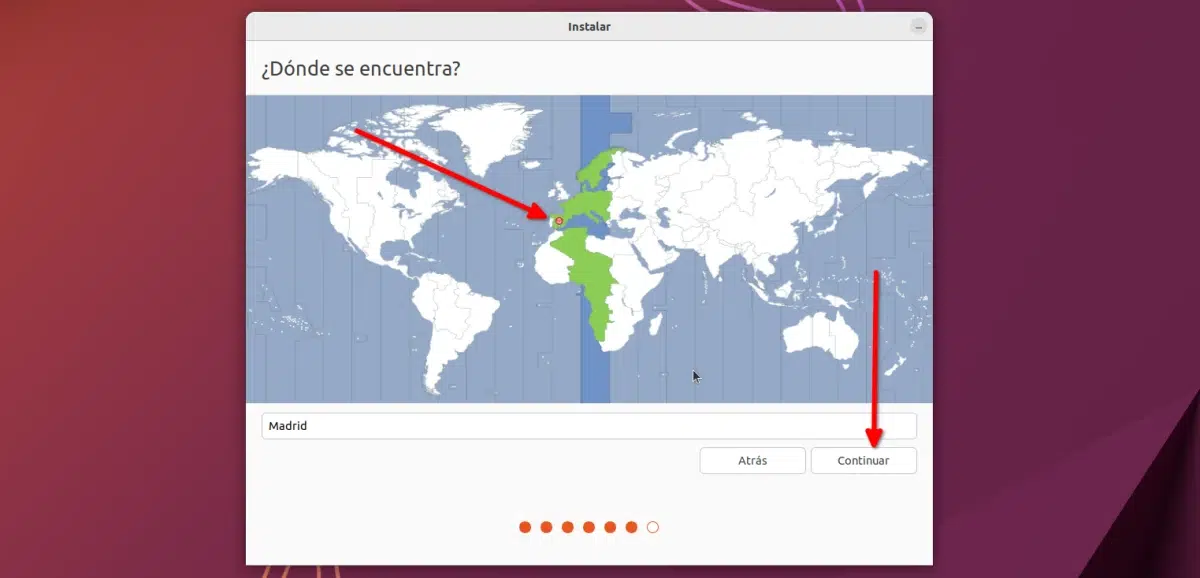
Once we click on "Continue", the screen will appear. location for time zone. In some versions of Ubuntu, this screen is replaced by the screen to create users, in any case, in the screen of time zones, we only have to mark our zone and click on "Continue".
The following is a screen as important as the disk partition screen: creating users. In this step we have to establish our username, password, the name of the team and say if we want it to enter directly or not. The login screen is the first, where it asks us for the password, and if we check the option "Login automatically", the login screen will skip and start the system directly. It is an option, but not very safe.

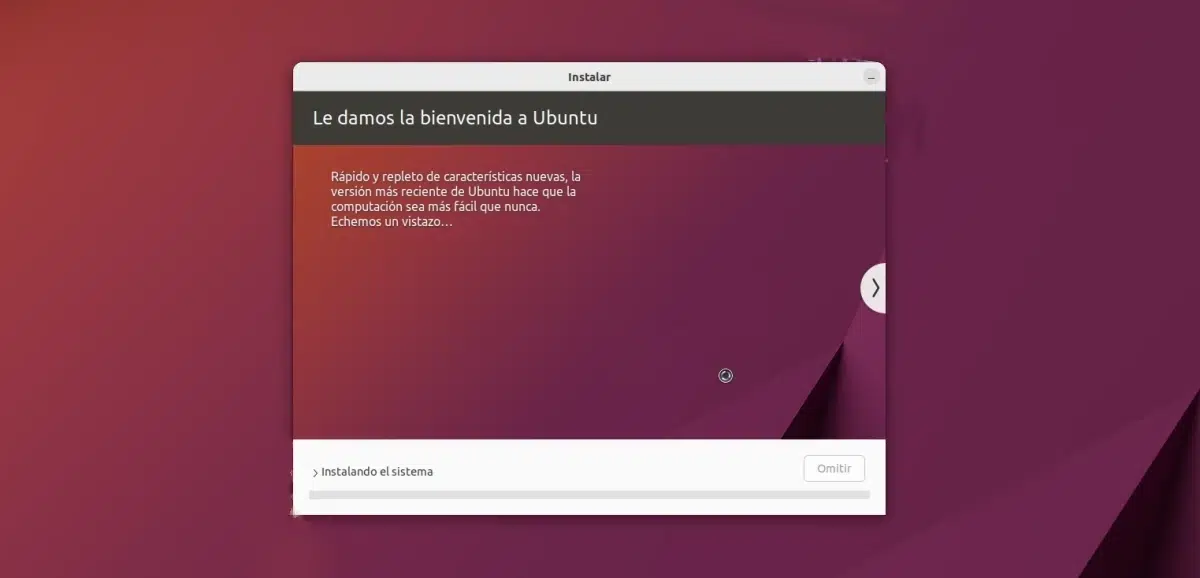
After configuring our user, click on "Continue" and it will appear the typical tour with the newness of the distribution and the installation progress bar. This process is the longest of all, but it will only take a few minutes, it will take more or less time depending on the power of the computer.
And after finishing, we restart the equipment we will find the login screen, with our username and ready to enter the password.

These processes and screens are very similar between Ubuntu versions. In some versions they change the order of the screens and in other versions they change the name, but the process is the same, simple and simple Do not you think?
😉
Me getting ready to update from 15.10 to 16.04 !! 🙂 🙂 🙂 🙂
installing and configuring it to my liking
when I put sudo apt-get update I get this
Ign: 14 cdrom: // Ubuntu 16.04 LTS _Xenial Xerus_ - Release amd64 (20160420.1) xenial / restricted Translation-en
Ign: 15 cdrom: // Ubuntu 16.04 LTS _Xenial Xerus_ - Release amd64 (20160420.1) xenial / restricted amd64 DEP-11 Metadata
Ign: 16 cdrom: // Ubuntu 16.04 LTS _Xenial Xerus_ - Release amd64 (20160420.1) xenial / restricted DEP-11 64 × 64 Icons
Err: 3 cdrom: // Ubuntu 16.04 LTS _Xenial Xerus_ - Release amd64 (20160420.1) xenial / main amd64 Packages
Please use apt-cdrom to make this CD-ROM recognized by APT. apt-get update cannot be used to add new CD-ROMs
Err: 4 cdrom: // Ubuntu 16.04 LTS _Xenial Xerus_ - Release amd64 (20160420.1) xenial / main i386 Packages
Please use apt-cdrom to make this CD-ROM recognized by APT. apt-get update cannot be used to add new CD-ROMs
Hit: 17 http://security.ubuntu.com/ubuntu xenial-security InRelease
Hit: 18 http://ppa.launchpad.net/numix/ppa/ubuntu xenial InRelease
Hit: 19 http://ppa.launchpad.net/ravefinity-project/ppa/ubuntu xenial InRelease
Hit: 20 http://ppa.launchpad.net/webupd8team/java/ubuntu xenial InRelease
Get: 21 http://ec.archive.ubuntu.com/ubuntu xenial InRelease [247 kB]
Hit: 22 http://ec.archive.ubuntu.com/ubuntu xenial-updates InRelease
Hit: 23 http://ec.archive.ubuntu.com/ubuntu xenial-backports InRelease
Fetched 247 kB in 19s (12,6 kB / s)
Reading package lists ... Done
W: The repository 'cdrom: // Ubuntu 16.04 LTS _Xenial Xerus_ - Release amd64 (20160420.1) xenial Release' does not have a Release file.
N: Data from such a repository can't be authenticated and is therefore potentially dangerous to use.
N: See apt-secure (8) manpage for repository creation and user configuration details.
E: Failed to fetch cdrom: // Ubuntu 16.04 LTS _Xenial Xerus_ - Release amd64 (20160420.1) / dists / xenial / main / binary-amd64 / Packages Please use apt-cdrom to make this CD-ROM recognized by APT. apt-get update cannot be used to add new CD-ROMs
E: Failed to fetch cdrom: // Ubuntu 16.04 LTS _Xenial Xerus_ - Release amd64 (20160420.1) / dists / xenial / main / binary-i386 / Packages Please use apt-cdrom to make this CD-ROM recognized by APT. apt-get update cannot be used to add new CD-ROMs
E: Some index files failed to download. They have been ignored, or old ones used instead.
How did you install the new version? From what I read here "W: The repository 'cdrom: // Ubuntu 16.04 LTS _Xenial Xerus_ - Release amd64 (20160420.1) xenial Release' does not have a Release file." I get the feeling that you were using a beta and you still have those repositories installed. Can be? I have never seen this bug, but it tells you that this repository does not have "the final version", so it seems to me that it tries to download from there and there is nothing.
See if you have repositories that you should not from the "other software" tab of "software and updates".
A greeting.
I have read that edubuntu will not have the update 16.04 how can I install ubuntu 16.04 if I have edubuntu 12.04 thanks
Hello, good afternoon, I have Ubuntu studio already updated to 17.10 but I want to switch to xubuntu 17.10, I can go through this without formatting.