![]()
The latest version of Ubuntu 15.10 in its MATE flavor, the coolest desktop for those nostalgic for Gnome who have wanted to adapt to the new times. With the code name "Wili Werewolf" (something equivalent to werewolf in Spanish) and based on the Debian 9.0 "Stretch" distro, it presents between its main novelties that affect its edition, the following:
- The Software Center is abolished which caused quite a bit of criticism from the user community. A new tool called Ubuntu MATE Welcome is included in its place, which seems like a good move given the changes.
- The desk MATE 1.10 has been integrated by default in the update-manager -d y do-release-upgrade, so it is possible to upgrade from Ubuntu 15.04 MATE to Ubuntu 15.10 MATE.
- A new tool to select third-party drivers that you want to use in the team.
As in each version, the various programs that make up the traditional package of the distros have been updated and some minor bugs have been fixed that improve the stability of the system and offer increased compatibility with Raspberry Pi 2.
Ubuntu 15.10 MATE system installation
As for every available Linux distribution, we will start by obtaining the system image from which to install on the computer and burn the image to a disk or use the ISO file to create a virtual machine. Starting the computer from the disk or image we will access the system installation menu that follows the simplified and minimalist tradition of previous versions.
We will select our language and we will choose one of the available options of the environment: test the system to see if it suits our needs and tastes or install it directly on our computer.
Now, common verifications will be carried out of the installation program, such as the space available on our computer storage units and network connectivity. There is the possibility of downloading the latest system updates that have appeared during the installation itself, by checking the box, although this option will slow down the entire installation process. Similarly, there is the option of using third-party software if we have specific needs in terms of drivers or plugins. We will click continue.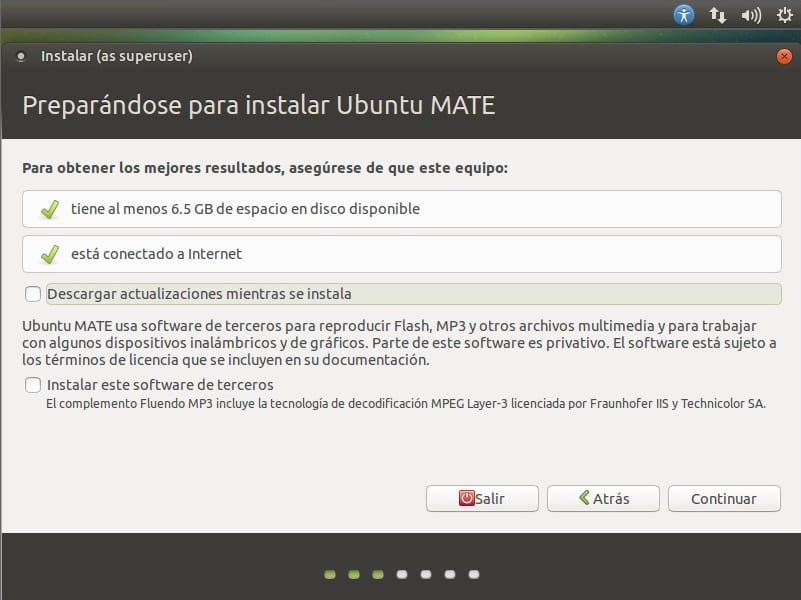
In the next section we are offered the different options to partition our unit. As we are going to carry out a clean installation and we do not want to go into an advanced topic such as the disk partition, we will choose the first option that appears by default and we will continue with the installation. Know what this process is destructive to the data and is not reversible, so if you need more information you can visit this specific guide.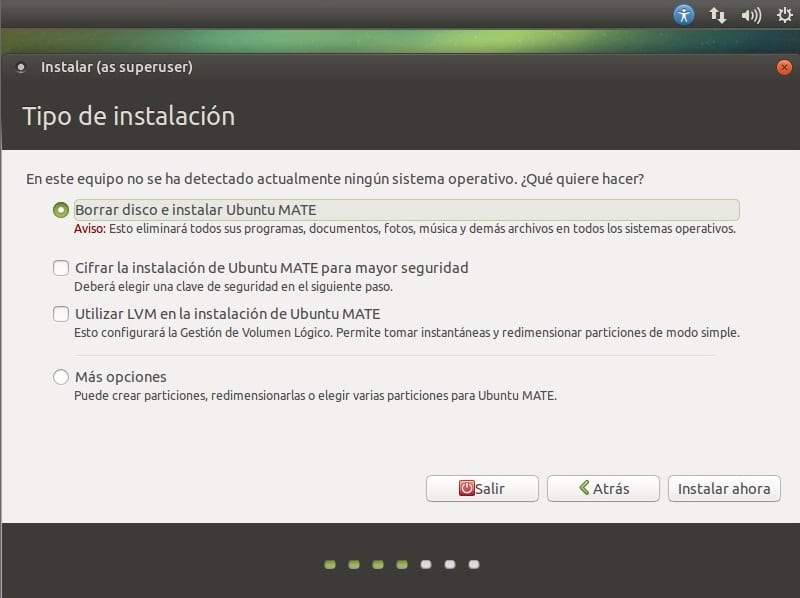
Then we can choose our location on a map. This option is to adjust the system time zone. By default it has detected our region so we just have to click on Continue.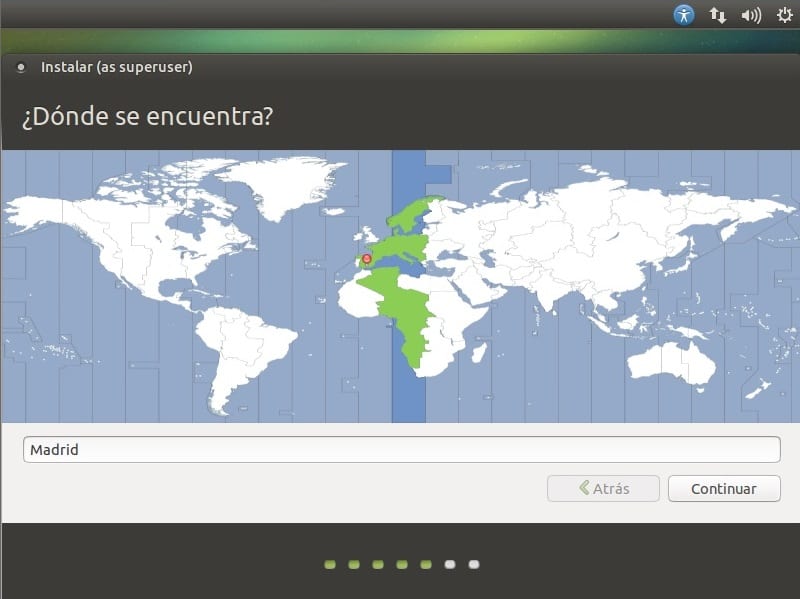
In this step the system asks us for the our keyboard layout through our language. We will choose the one that comes by default or we will change it according to our interests. Next we will press the Continue button.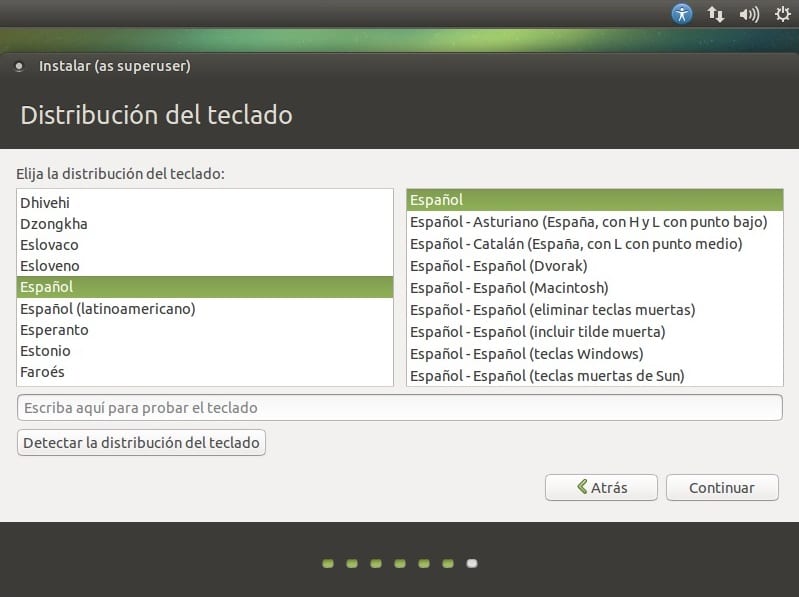
In this step we will configure the main user of the team. We will fill in the required data and continue the installation process.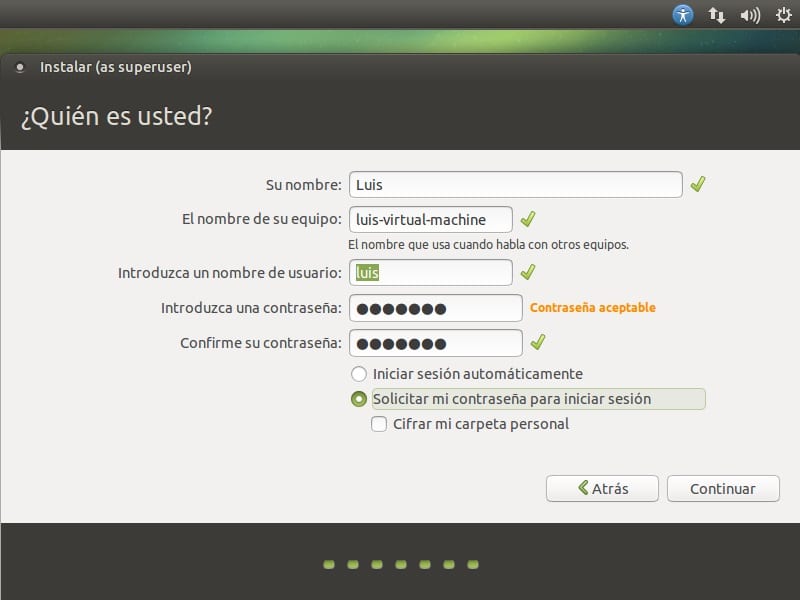
Once this step is completed, the installation of the system will begin, which, for the time it will take, will allow us to move away a few minutes from the screen. When finished, we will be offered the option to continue testing the distro or restart your computer to really start using the system. We will choose this second option and wait for the computer to finish restarting. When the computer finally starts we will see our desktop ready to be used.
First configuration steps
After installing the system, it is convenient to carry out a series of actions that end up getting our team ready to start working. Below we detail what are the general commands that you should apply after finishing the installation of your Ubuntu MATE 15.10.
Upgrade the system
sudo apt-get update && sudo apt-get upgrade
Install java
sudo apt-get install oracle-java7-installer
Install VLC media player
sudo apt-get install vlc
Finally, we will access the System Settings and go to the tab Security and Privacy. From here we can configure el system to our liking. Since Software and Updates, we will select the tab Additional drivers and we can choose those drivers that we want our system to use. With this we have finished installing and configuring our system.
Ubuntu Mate is a marvel, I'm using this version 15.10 with the Cupertino Panel Layout and Helvetica as the default font. It looks fancy !!
Hello, I have a problem I cannot play any mp3 file. Yes, I already installed the restricted package but it still doesn't play anything in mp3. What can I do?
I tried to install java, but did not find the package. What can I do to install it?
I have Ubuntu Mate 15.10
sudo apt-get install oracle-java7-installer
Reading package list ... Done
Creating dependency tree
Reading the status information ... Done
E: The oracle-java7-installer package could not be located