
In the next article we are going to take a look at how we can create a bootable USB using Ubuntu Image Recorder. In this way we will be able to create a bootable USB from Ubuntu, without having to install older programs or having to pull terminal to do it. Everything will be done easily from the graphical environment.
For some time now, the creation of a USB Boot, it has become very common. Surely more than once, it has happened to all users that at some point you need install an operating system and you cannot find the installation disc or it is scratched. We can even come to think that it is silly to buy a CD or DVD to save an OS and use it only on rare occasions.
To create a bootable USB we will need a PenDrive and some .ISO image. These are the acronyms, in English, of the International Organization for Standardization, who was the one who defined its characteristics. This special type of file is so called because it is a "reflection" of everything that the CD, DVD or BD contains (Blu-ray Disc) from which it was created. These files are the way in which users commonly install an operating system that we do not have in the form of a disk. They are a format that can be easily read on both Windows and Gnu / Linux.
Next we will see how create a bootable or bootable USB to be able to install / test an operating system that we will previously download as an .ISO image. We will see how to save it to a USB memory, in a few mouse clicks. For all this we will use only the tools that we can find already installed in our Ubuntu distribution. For this example I am using version 18.04.
What is a boot disk?
It's a removable media containing the operating system startup files that a computer can use to start the system. Especially in case of hard disk damage or any other problem during startup.
In other words, it is a physical media, either CD, DVD, USB, or external hard drive, with which we can start the computer. A boot disk can be used to repair our operating system or to install a new one or just test it.
Create a bootable USB using disk image burner in Ubuntu
This is pretty easy. It only takes two or three mouse clicks to burn an ISO image to USB and then be able to boot the operating system from there. The USB boot will have to be enabled in the boot sequence of our computer. This is outside of what we will see in the following lines. The BIOS usually warn by means of a message, a few seconds after turning on the computer, which key to press to change this sequence.
Well, once cleared up, the main thing is download an ISO image of some OS that we want to use on our USB. We go to the folder where we save the download. Once there, we select the ISO image that we want to burn.
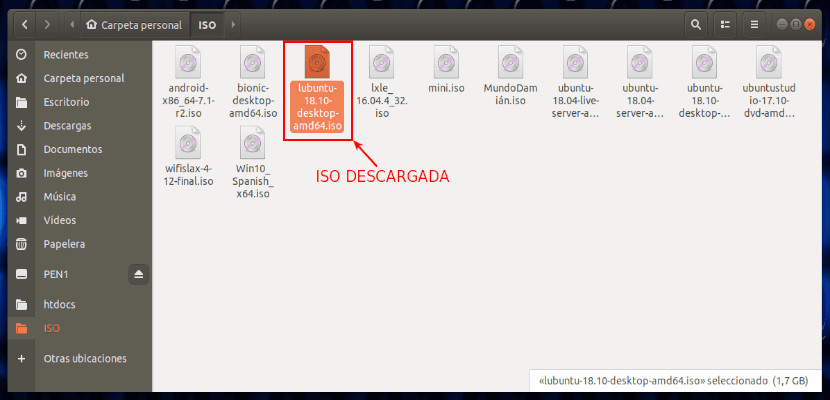
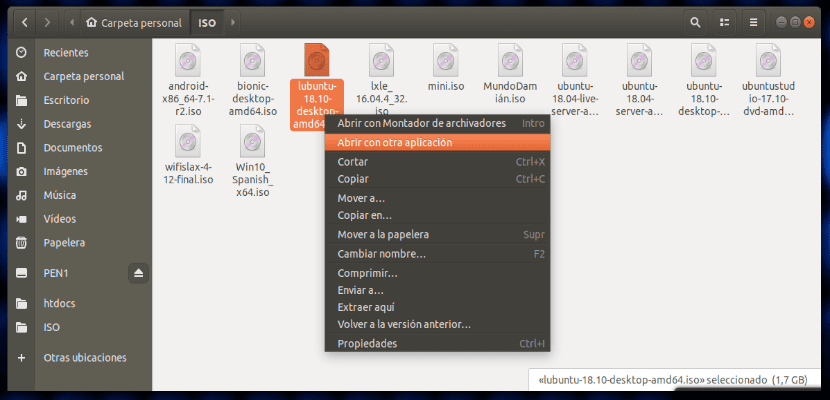
In this example I will use; lubuntu-18.10-desktop-amd64.iso. With the mouse over the ISO file, we press the right button and we select Open with another application.
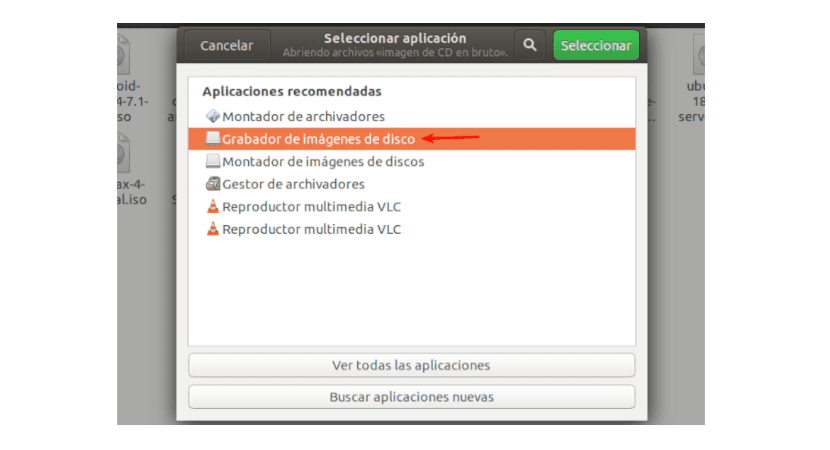
In the list of available programs, you just have to search for Disc Image Burner.
Then the ISO image recorder menu will appear on the screen. In the dropdown we select the USB disk where we want to restore the .ISO file.
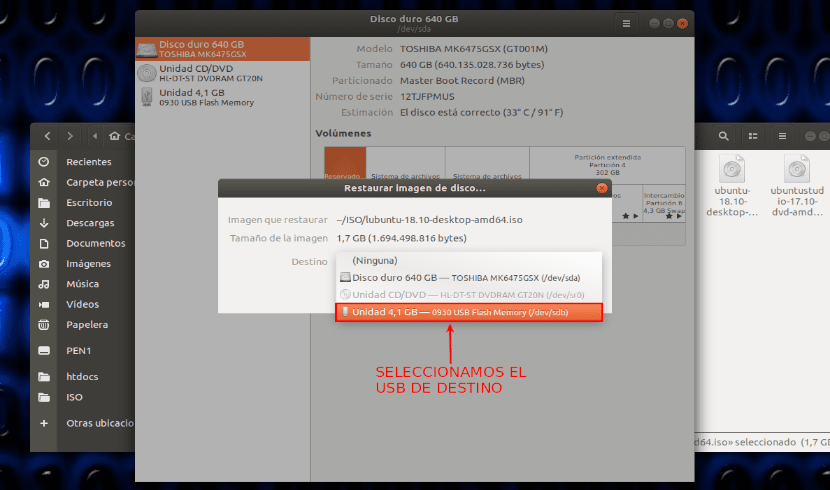
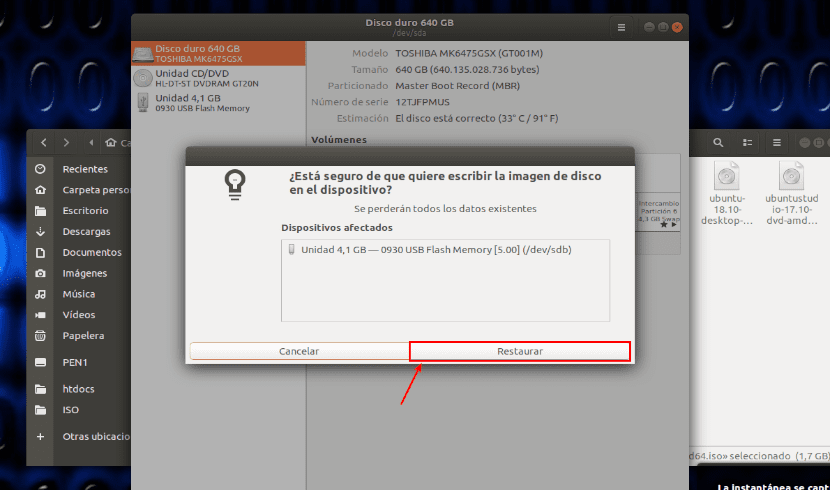
We keep pressing "Start restoration”. The program will warn us that all data on the selected USB device will be erased. For this reason it is always advisable to be sure that we do not have any files that we may need in the future stored on that USB. If we are sure we want to continue the process, we can now press the button «Restore«.
It is going to start bootable USB disk creation. Now it's just a matter of waiting a few minutes.
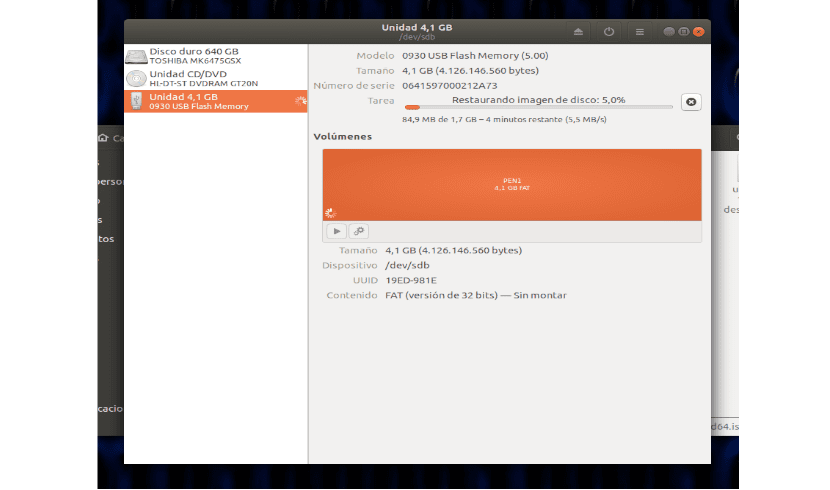
When it finishes, the program will show us the result of the process on the screen.
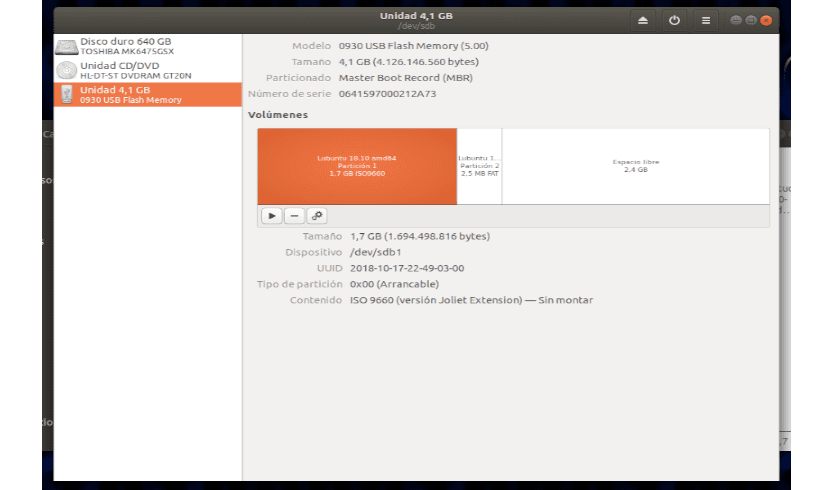
With this alone we have already gotten our bootable USB. Now we can restart the computer with the USB connected so that the process of installation or test of the image .ISO of the OS that we have in the USB is launched. It is important not to forget modify the corresponding values in the order of the boot sequence of our team.