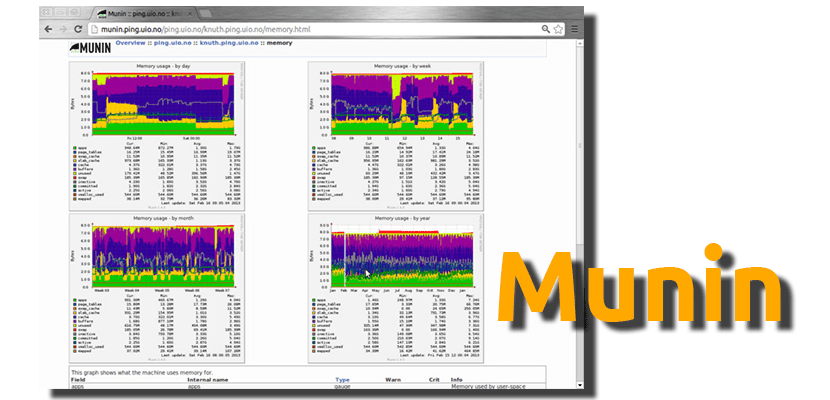
Have you ever needed to monitor several computers at the same time? If this has been your case, surely you have encountered some other problem or have had to alternate to see the information of all of them. If you identify with all of the above, Munin It is the answer to your prayers. It is a program that will show data with statistics from our server such as CPU, workload, RAM used, network traffic, etc.
In this post We are not trying to explain how servers work or anything like that. Here we will only teach you how to install and run this powerful application on your Ubuntu based computer. The rest has to run on your own. Below we tell you everything you need to know in this regard.
How to install Munin on Ubuntu
- Okay. The installation of this program is very simple, so much so that it is enough to say that it is in the official repositories to know that we can install it from the terminal with the command "sudo apt install munin" (without the quotes) or from a package manager such as Syanptic. Once installed, we will have to make it work, for which we move on to the next step.
- We edit the configuration file that is in the path / Var / cache / munin / www and we copy and paste the following text, that is, it will only have to have the following:
dbdir / var / lib / munin
htmldir / var / cache / munin / www
logdir / var / log / munin
rundir / var / run / munin# Where to look for the HTML template
tmpldir / etc / munin / templates# to simple host tree
[munin.localhost.com]
address 127.0.0.1
use_node_name yes [/ sourcecode]
- Next, we edit the server file so that it acts as a node for itself and only listens to itself (loopback) and not on all interfaces on the network. This is achieved by editing the file munin-node.conf changing the value host and 127.0.0.1.
- In the next step we will edit the file apache.conf to configure an alias, something we will do with the following text:
Alias / munin / var / cache / munin / www
Order allow, deny
# Allow from localhost 127.0.0.0/8 :: 1
Allow from all
OptionsNone# This file can be used as a .htaccess file, or as part of your apache
# configfile.
#
# For the .htaccess file option to work the munin www directory
# (/ var / cache / munin / www) must have "AllowOverride all" or something
# close to that set.
#AuthUserFile / etc / munin / munin-htpasswd
AuthName "admin"
AuthType Basic
Require valid-user# This next part requires mod_expires to be enabled.
## Set the default expiration time for files to 5 minutes 10 seconds from
# their creation (modification) time. There are probably new files by
# that time.
#
ExpiresActive On
Expires Default M310
- Next, taking into account that the user would be "admin", we open a terminal, access the directory where we have modified the file and create the password with the following command:
htpasswd -c munin-htpasswd admin
- Everything would already be configured. Now, to make it work we will write the command:
service munin-node restart && service apache2 restart
What would be missing? The most important thing: start monitoring the server. For this, we only have to enter the username and password that we have previously defined by accessing munin.localhost.com, at which point we will see what we have heading this post.
Via: root.com.