In the next article we are going to take a look at NoMachine Remote Desktop and see how to install it on Ubuntu 18.04. This is a remote access tool for Gnu / Linux, Mac and Windows. It will offer us connection protocols such as SSH y NX to connect the equipment.
NoMachine is a remote desktop tool that it will allow us to access a computer from a local network or through the internet. This application is useful for sharing access or files from one computer to another. In addition, with NoMachine we will also be able to perform other interesting actions on a remote computer.
The client that connects to the NX server is considered a thin client. NX is a computer program that performs very fast X11 remote connections, allowing users to access remote Linux or Unix desktops even under slow connections, such as those made with a modem. NX performs direct compression of the X11 protocol, which allows greater efficiency than VNC. The information is sent via SSH, so all the information that is exchanged between the server and the client is encrypted.
Install NoMachine
NoMachine has support for different Gnu / Linux distributions, among which is Ubuntu. It is necessary to be clear that Along with installing NoMachine on the computer that sends a remote connection, it is necessary to also install the application on the PC that you want to access through this program. NoMachine will not work unless it is configured on both the local host and the remote PC.
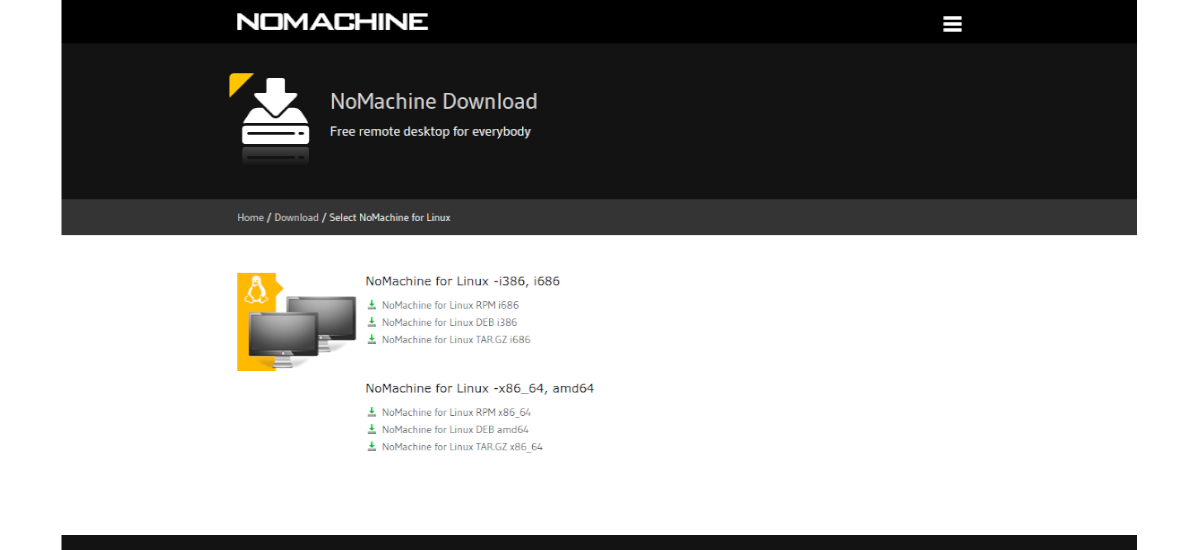
NoMachine officially supports Debian-based Linux distributions, so it's pretty easy to get the client / server working on Ubuntu. To begin the installation, we will first have to go to the download page. You just have to click on it 'NoMachine for Linux DEB i386" or "NoMachine for Linux DEB amd64', according to the architecture of our team.
Once the download is finished, we can open the file manager and double-click the DEB package file to open it with the Ubuntu software option. Then you just have to click on the 'Install' button.
Installation from the terminal
As usual, it is good practice to update the system before installing any packages. We can do this by opening a terminal (Ctrl + Alt + T) and executing the command:
sudo apt update
After the update, we will install wget, to continue with the installation process from the terminal:
sudo apt -y install wget
As the NoMachine remote desktop tool is available as a .deb package for Ubuntu we will be able to run the following command to download the latest version today. In the same terminal you just have to write:

wget https://download.nomachine.com/download/6.9/Linux/nomachine_6.9.2_1_amd64.deb
After downloading the file, the installation will be done using dpkg:
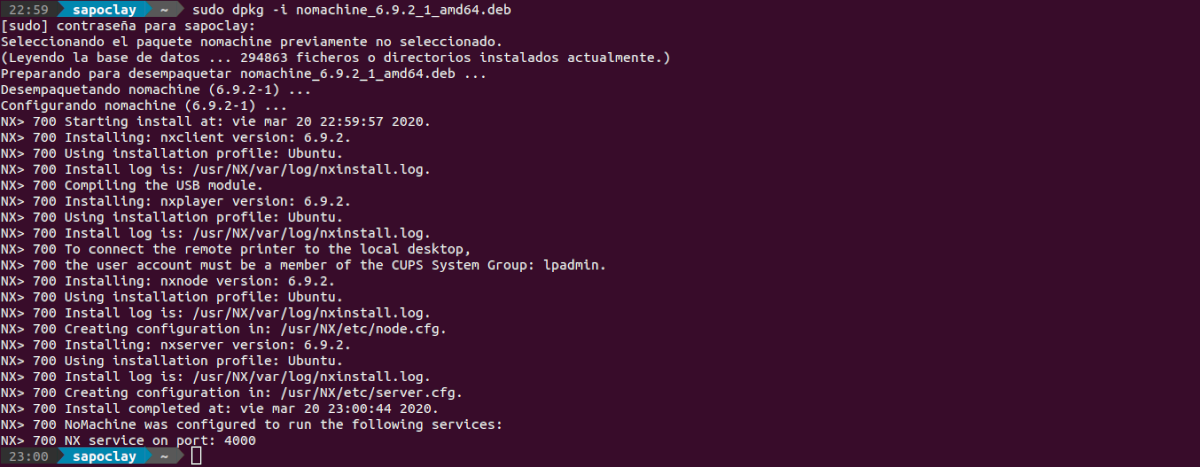
sudo dpkg -i nomachine_6.9.2_1_amd64.deb
Once the installation is finished, we will see a short introduction about what we can do with NoMachine.
Use NoMachine on a local network
After installation, on our local computer and on the computer we want to access, we can now search among the installed applications for the NoMachine remote desktop tool.

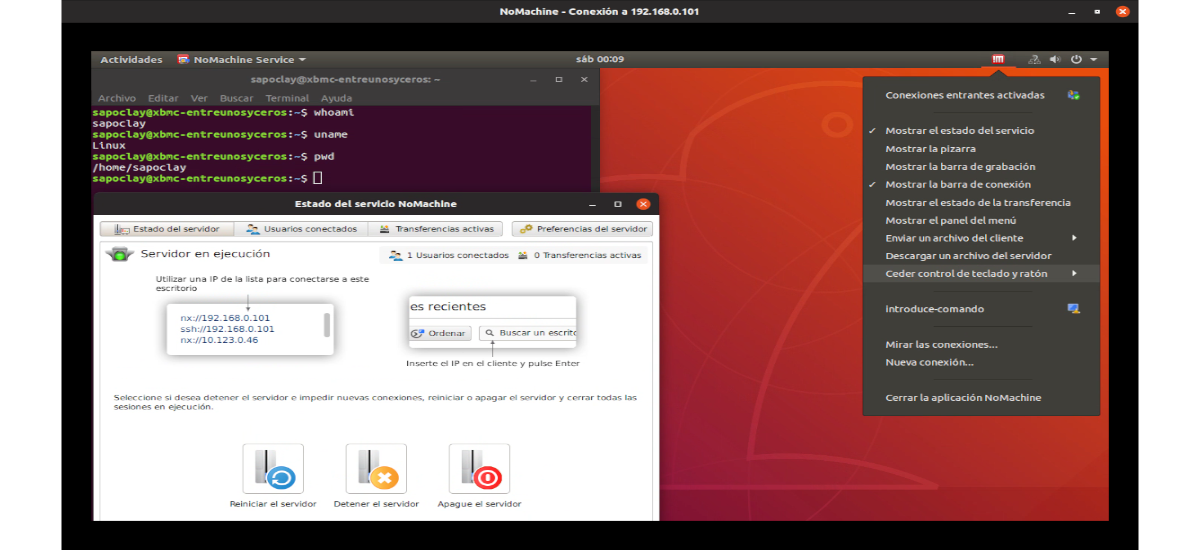
After selecting it, the NoMachine welcome screen will appear and provide us with the information to connect anyone to our team, as you can see in the image below:
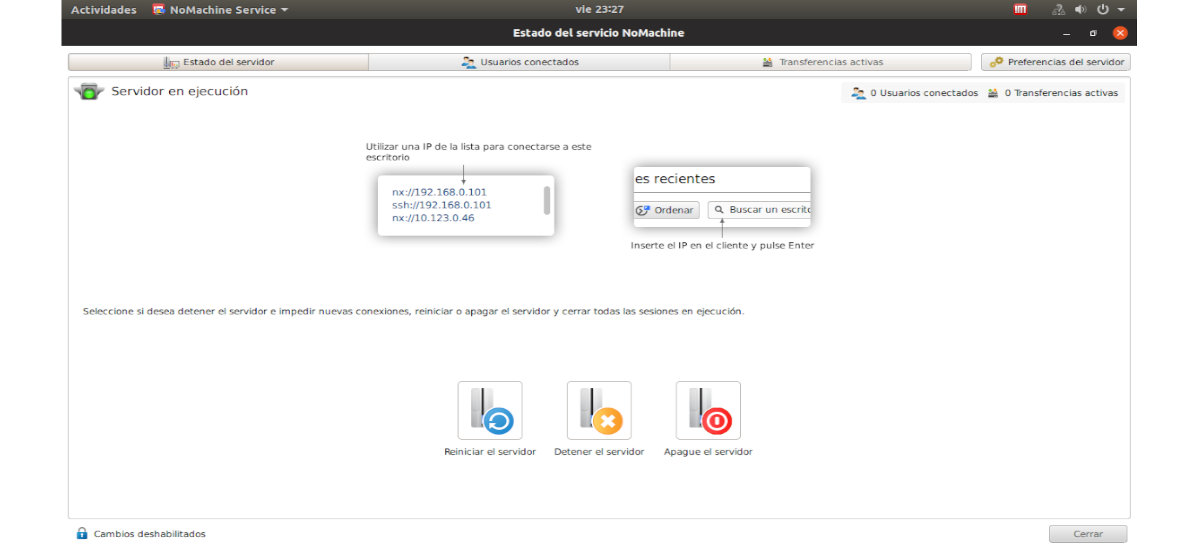
If someone wants to connect to our team, we will only have to provide this information. In this example, the information in the previous screenshot is that offered by NoMachine on the machine to which I am going to connect. It is necessary to have the server running.
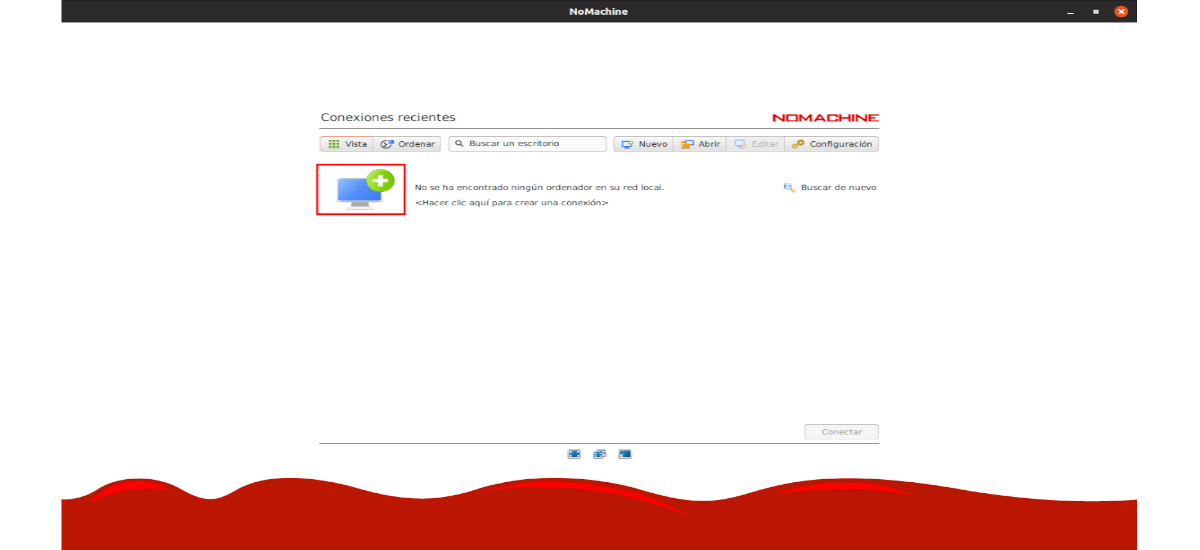
From the computer that is going to connect to another, we can create a new connection by clicking on the screen icon with the plus sign.

Then we will have to choose the protocol with which we want to connect. We will have the possibility to use the NX and SSH protocol.
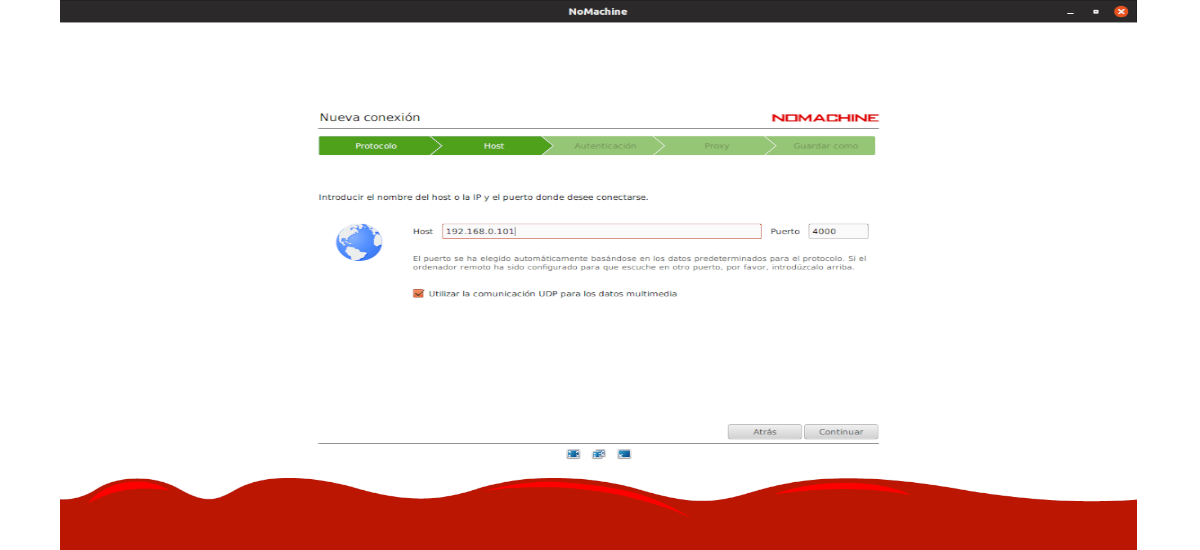
On the next screen we will have to add the IP address of the host to which we want to connect. This information We can see it in the status of the server that NoMachine offers us on the computer that is going to receive the connection.
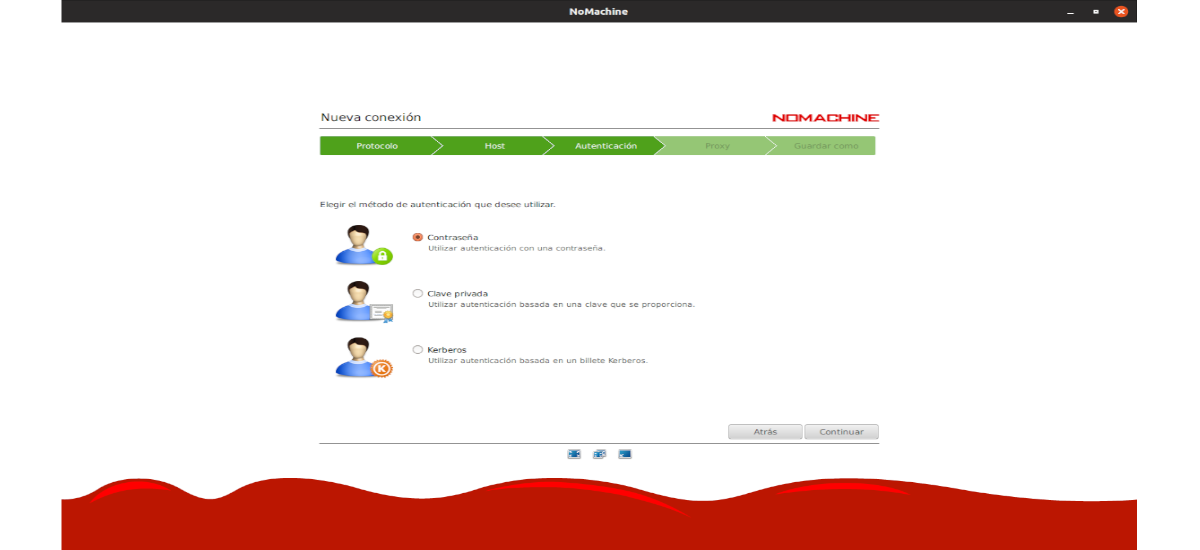
We will also have to select an authentication method. The simplest is to use the password method.
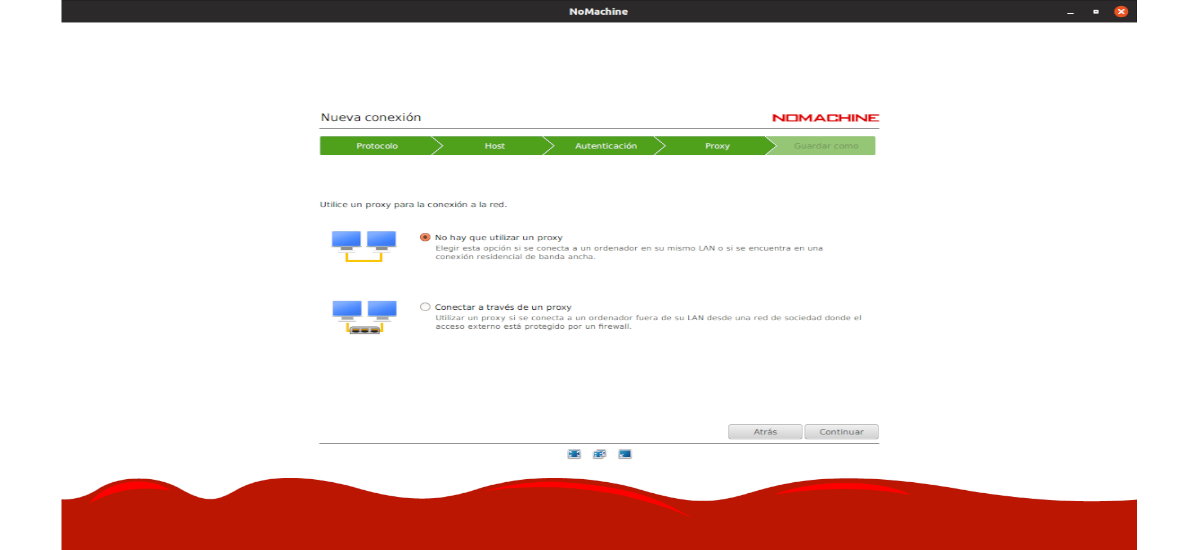
Almost to finish, let's select proxy settings, if any. Finally we will only have to save the connection giving it a name.
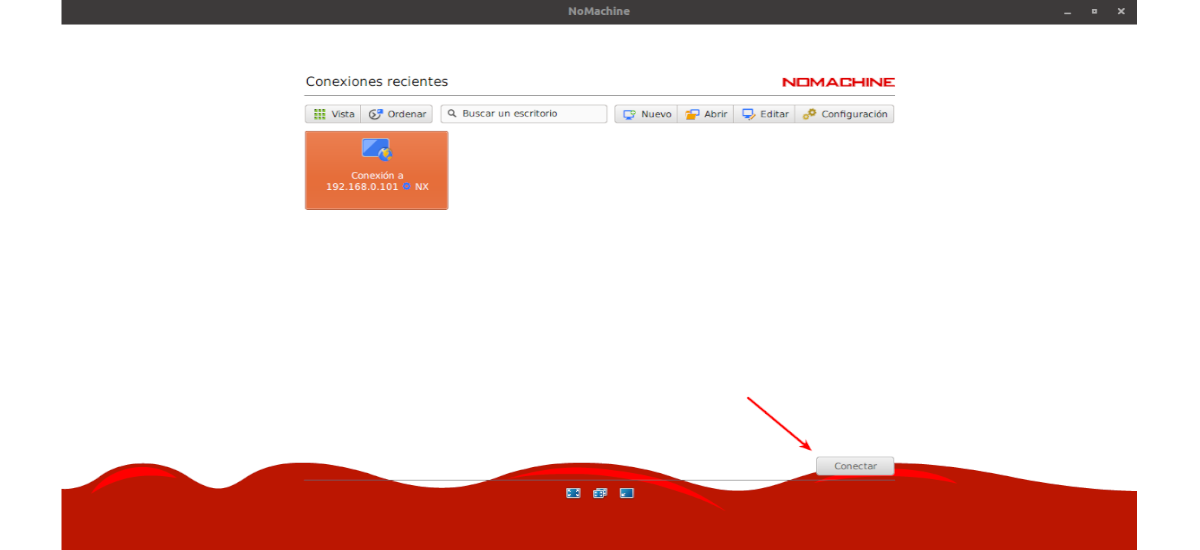
Now we can connect to remote machine.
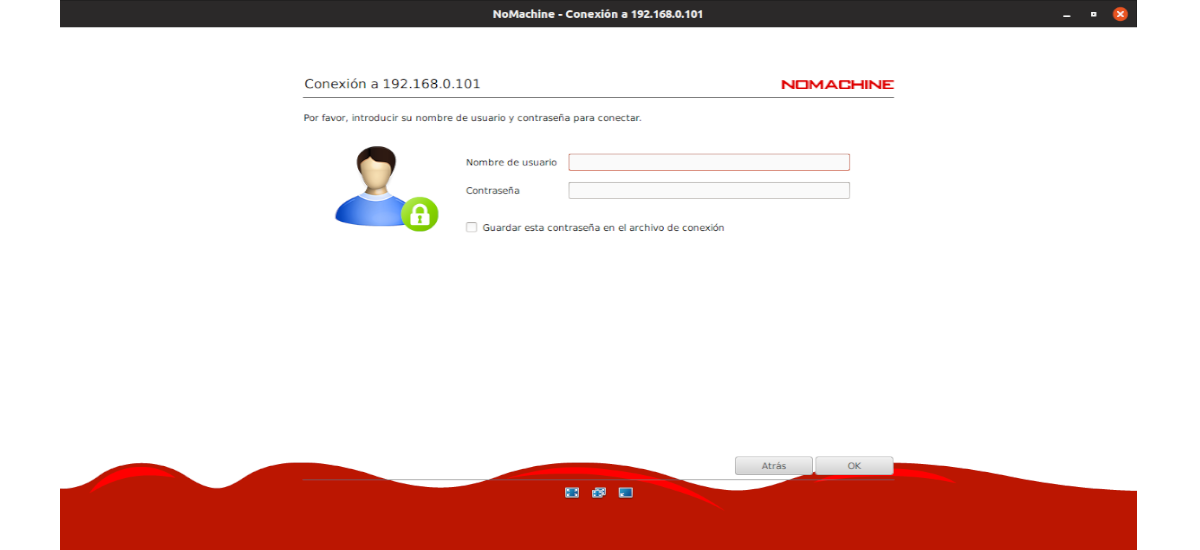
Before connecting we will have to give the username and password of the system. Once the connection has been established, and just before being able to access the remote desktop, the program will show us the available options.
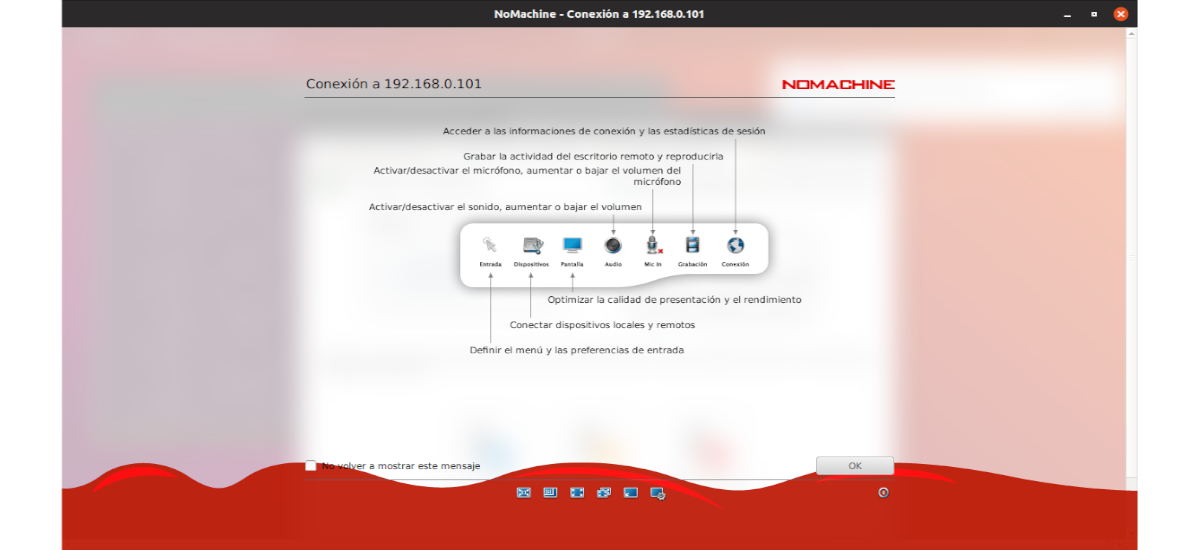
After some information screens, the window from which we can manage the remote computer will open.
This is just a basic use to establish a connection on a local network. In the program website can be found Instructions for using NoMachine for a remote access to a computer over the Internet.
Hello, hear a question, I stopped using it a long time ago because they had changed the license, and I don't remember what restrictions they had put, because of this I looked for an alternative and I found X2go (https://wiki.x2go.org/doku.php/start) and is a no-machine clone or unfork but completely free. It has a client for GNU / Linux, mac and Windows. It works the same as the no-machine but without restrictions. Since I found it I stopped using No-machine completely for more than 10 years. I share this with you in case you want to try the alternative. Or your readers find this information of interest.
I'll see. Thanks for the input. Salu2.