
One of the most attractive features of Ubuntu and most GNU/Linux distros is their ability to be customized to suit each user. There are countless ways to customize our desktop, but in this post we will focus on a very useful as well as aesthetic widget. I'm talking about Conky, a widget that displays information such as, for example, the temperature of our processors, the strength of the Wi-Fi signal, the use of RAM, and many other characteristics.
What we're going to do here today is see how we can install Conky, how we can make it run automatically at the beginning of the session, and we will also see a few configurations for our Conky. we start.
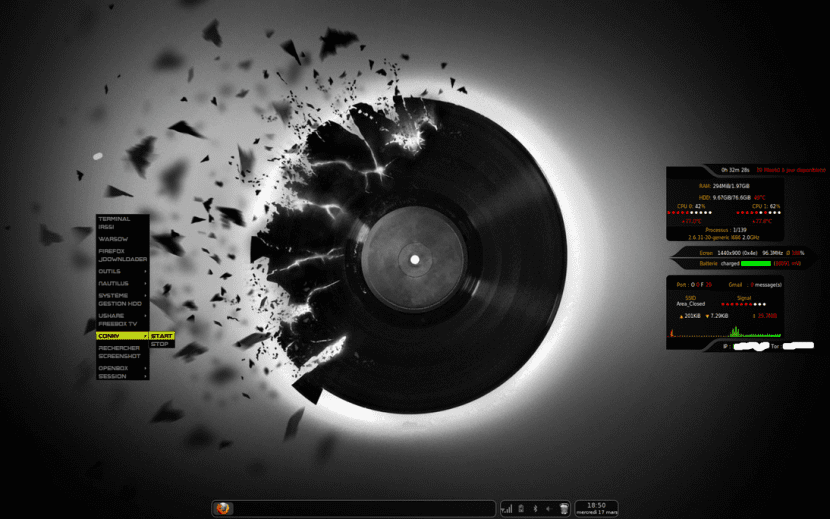
As we have said, the beauty of Conky lies in the fact that through it we can access all kind of information; from emails or the use of the hard drive to the speed of the processors and the temperature of any of the devices on our team. But best of all, Conky allows us to see all this information on the desktop in a very aesthetic and visually pleasing way, through a widget that we can customize ourselves.
To begin with, if we don't have it installed, we have to install Conky. We can do this by running the following command in the terminal:
sudo apt install conky-all
Once installed, we can also install the «lm-sensors» program that will allow Conky to get the temperature of the devices of our PC. To do this, we execute this command in the terminal:
sudo apt install lm-sensors
Once we have installed these last two packages, we have to execute the following command so that “lm-sensors” detects all the devices on our PC:
sudo sensors-detect
At this point we already have Conky installed. Now we can write a script for Conky to run automatically at the start of each session. To do this, we have to create a text file in the / usr / bin folder that is called, for example, conky-start. To do so, we execute:
sudo gedit /usr/bin/conky-start
A text file will be opened in which we have to add the necessary code for Conky to run at the beginning of each session:
#!/bin/bash
sleep 10 && conky;
Now, we save the file and give it the execution permissions with:
sudo chmod a+x /usr/bin/conky-start
Now, we have to look for the "Startup Applications" application ("Startup Applications Preferences" if it does not appear in Spanish) to add the script that we have created previously. Once we have opened the application, a window like the following will appear:

We click on "Add" and a window like this will appear:
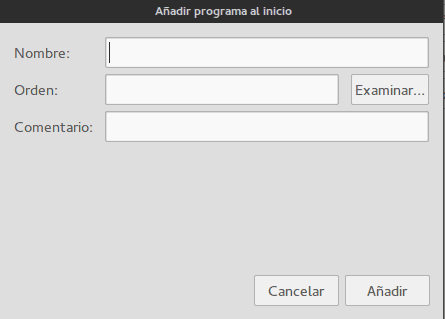
- Where it says Name we can put «Conky»
- Where it says Medals, we have to click on the "Browse" button and look for the script we have created called conky-start located inside the / usr / bin folder. As an alternative, we can directly write / usr / bin / conky-start.
- En Comment, we can add a small descriptive comment of the application that will be executed at the beginning.
Now Conky will run automatically every time you log in.
If the Conky widget still does not appear on the desktop, you just have to restart the system or directly run it from the terminal, typing the name of the program (conky). Once the widget appears on the desktop, it is likely that we will not like the appearance that it presents by default. For this we will show you how you can edit Conky's font to give it the appearance that you like the most.
Conky's source file is found as a hidden file inside our user's directory. This file has the name ".conkyrc". To see the hidden files and directories within a directory, we can do it graphically by pressing Ctrl + H or by executing the command:
ls -f
If the file ".conkyrc" does not appear, we have to create it ourselves with:
touch .conkyrc
Once we find it or believe it, we open it and there we will have the font that comes by default in our Conky or an empty file if we have created it ourselves. If you don't like that configuration, you can copy the font that I use here.
And as you can see, on the internet we can find thousands of configurations just by searching for "Conky configurations" or "Conky configurations" on Google. Once we find the one we like, we will only have to download the source and paste it into the ".conkyrc" file that we mentioned previously. Likewise, in Ubunlog We want to show you a list of the best configurations for Conky obtained from Devianart:
Conky, Conky, Conky by YesThisIsMe.
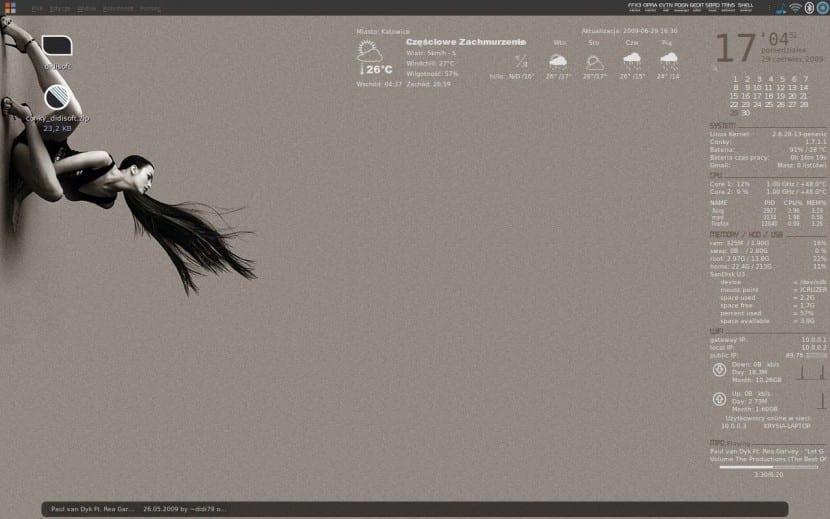
Conky Config by didi79
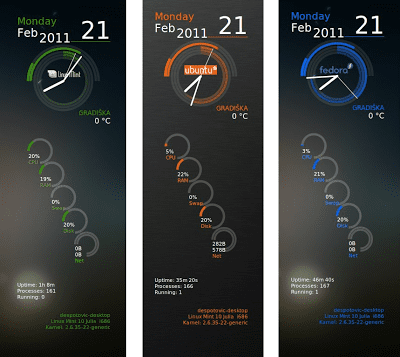
Conky Lua by despot77
My Conky Config by londonali1010
In addition to downloading configurations that are already written, we can create our own or modify existing ones, since Conky is Free Software. We can see Conky's source code at your GitHub page.
Hopefully this post has helped you customize your desktop a bit more. Now with Conky our desktop will have a much more pleasant appearance besides that we will be able to have at hand information that at some point can be very useful.
I tried it once and I liked how it looked, it gave another distinctive touch to the desktop. The problem is that he just always had to go to the desk to be able to check any of those numbers. And the truth is that I have hardly used the desktop for a long time, I have a couple of documents of urgent use and a folder, but nothing else. To be tidy I have the structure of my files in other places and no longer on the desktop (I stopped using it since I left Window $).
So this Conky service was not very practical for me, I tried other options and decided on "System load indicator", I have it in the top bar in my Ubuntu and with that at a glance I can see how everything is going. It has a lot less options than Conky, but what I really use it for 😉
Hi Miguel, thank you very much for this article, since it was the one that helped me the most to install Conky, for the detailed step by step. I installed the same conky as you. But the difference is that mine appears with a black background. How do I have to make it transparent like yours?
Thank you very much.
Good morning Rodrigo,
If as you say you have used the same Conky as me, it should appear with the transparent background. Anyway, open the .conkyrc file located in your home directory and see if the following label appears on line 10:
own_window_transparent yesThis way Conky should get you with the transparent background. Check if instead of "yes" you have "no", and if so, change it.
Thanks for reading and best regards!
Good morning Miguel,
As always thanks for taking the time to reply, not everyone does. Regarding what we talked about above, in line 10 of the script it appears as it should be:
own_window_transparent yes
but still it still appears with the black background. Anyway, I give it as a basket case.
On the other hand, I wanted to ask you how I have to make the weather appear for me.
Thank you!
Hey, I get the following error when starting conky from the terminal
“Conky: missing text block in configuration; exiting
***** Imlib2 Developer Warning *****:
This program is calling the Imlib call:
imlib_context_free ();
With the parameters:
context
being NULL. Please fix your program. »
I hope you can help me!
Goodnight,
First of all, have you created the .conkyrc file in your home directory correctly?
If so, the first error is informing you that it cannot find the TEXT tag within the .conkyrc source file. Check if before formatting the data that will be displayed on the screen, you have the TEXT label set. If you cannot solve the problem, it is best to copy your configuration in Pastebin and pass me the link to review the code.
Thanks for reading and best regards.
Hello, how do I paste it? I already opened the file, I copied it and pefo as it is or I remove the spaces, sorry but it is still my first time and the truth is that the ugly black box does not beat me XD
Hello, I have a problem with conky manager v2.4 in ubuntu 16.04 of 64bits and it is that I want one of the widgets that it brings to stay on my desktop forever, I mean that at each start the widget is there but I can't find someone like me it can help ?? first of all, Thanks
Hi Miguel, I'm Liher, the author of the Conky you show here, I'm glad you liked it. Greetings colleague
hello good, is that when you open the text file and put (#! / bin / bash
sleep 10 && conky;) gives me this problem ** (gedit: 21268): WARNING **: Set document metadata failed: Set metadata :: gedit-spell-enabled attribute is not supported
that I can do?
It didn't help me, it didn't even start
It did not work for me, it seemed that my ubuntu had a win32 lag lol I had to delete it
Hey.
I did see the widget just like yours, but the only problem it presents is that it does not monitor the network. What I can do? Since I am connected to the network. And another question: In case you no longer want it, how do I uninstall it?
Thanks for your time.
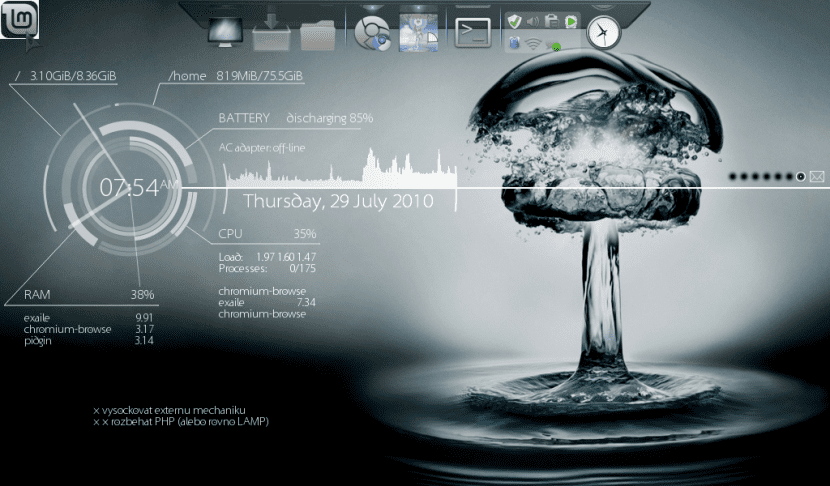
Does anyone know the name of the conky in the first image of the post ???
Extraordinary post, it is the first time that I read something that I understand 100% about conky, the posts about this interesting topic are always very confusing, therefore, I thank you. However, I have a problem with your configuration which I find very objective elegant. The detail is that the intensity of the wifi signal does not appear, can you help me with this please. Thank you in advance for your time and support. Greetings!
Your pastebin configuration fails:
conky: Syntax error (/home/whk/.conkyrc:1: '=' expected near 'no') while reading config file.
conky: Assuming it's in old syntax and attempting conversion.
conky: [string «…»]: 139: attempt to index local 'settings' (a nil value
Good comrades, although this is an old thread, this conky configuration is very good, nowadays conky uses another more modern syntax, I leave you the same version of Miquel's conkyrc, updated for the current lua syntax:
conky.config = {
background=false,
font = 'Snap.se:size=8',
use_xft = true,
xftalpha = 0.1,
update_interval = 3.0,
total_run_times = 0,
own_window = true,
own_window_class = 'Conky',
own_window_hints = 'undecorated, below, sticky, skip_taskbar, skip_pager',
own_window_argb_visual = true,
own_window_argb_value = 150,
own_window_transparent = false,
own_window_type = 'dock',
double_buffer = true,
draw_shades = false,
draw_outline = false,
draw_border = false,
draw_graph_borders = false,
minimum_height = 200,
minimum_width = 6,
maximum_width = 300,
default_color = 'ffffff',
default_shade_color = '000000',
default_outline_color = '000000',
alignment = 'top_right',
gap_x = 10,
gap_y = 46,
no_buffers = true,
cpu_avg_samples = 2,
override_utf8_locale = false,
uppercase = false,
use_spacer = none,
};
conky.text = [[
#Here begins the configuration of the displayed data
#The first is the name of the operating system and the version of the kernel
$ {font Ubuntu: style = bold: size = 12} $ sysname $ alignr $ kernel
#This shows us the two processors and a bar of each of them with their use
$ {font Ubuntu: style = bold: size = 14} Processors $ hr
$ {font Ubuntu: style = bold: size = 10} CPU1: $ {cpu cpu1}% $ {cpubar cpu1}
CPU2: $ {cpu cpu2}% $ {cpubar cpu2}
#This shows us the temperature of the processors
Temperature: $ alignr $ {acpitemp} C
#This shows us the Home partition, the RAM and the sawp with a bar each and its data
$ {font Ubuntu: style = bold: size = 14} Memory and disks $ hr
$ {font Ubuntu: style = bold: size = 10} HOME $ alignr $ {fs_used / home} / $ {fs_size / home}
$ {fs_bar / home}
$ {font Ubuntu: style = bold: size = 10} RAM $ alignr $ mem / $ memmax
$ {membar}
$ {font Ubuntu: style = bold: size = 10} SWAP $ alignr $ swap / $ swapmax
$ swapbar
#This shows us the state of the battery with a bar
$ {font Ubuntu: style = bold: size = 14} Battery $ hr
$ {font Ubuntu: style = bold: size = 10} $ {battery BAT0} $ alignr
$ {battery_bar BAT0}
#This shows us the connection with a bar and its power
$ {font Ubuntu: style = bold: size = 14} Networks $ hr
$ {font Ubuntu: style = bold: size = 10} WIFI intensity $ alignr $ {wireless_link_qual wlp3s0}%
#This shows us the download and upload speed of the internet with graphics
$ {font Ubuntu: style = bold: size = 10} Download $ alignr $ {downspeed wlp3s0} / s
$ {downspeedgraph wlp3s0 30,210 01df01 10fd10}
$ {font Ubuntu: style = bold: size = 10} Upload $ alignr $ {upspeed wlp3s0} / s
$ {upspeedgraph wlp3s0 30,210 0000ff ff0000}
#This shows the CPU usage of the applications that use it the most
$ {font Ubuntu: style = bold: size = 14} CPU usage applications $ hr
$ {font Ubuntu: style = bold: size = 10} $ {top name 1} $ alignr $ {top cpu 1}%
$ {top name 2} $ alignr $ {top cpu 2}%
$ {top name 3} $ alignr $ {top cpu 3}%
#This shows us the percentage of RAM used by its applications
$ {font Ubuntu: style = bold: size = 14} Use RAM applications $ hr
$ {font Ubuntu: style = bold: size = 10} $ {top_mem name 1} $ alignr $ {top_mem mem 1}%
$ {top_mem name 2} $ alignr $ {top_mem mem 2}%
$ {top_mem name 3} $ alignr $ {top_mem mem 3}%
]]
Note that in the network upload and download information, replace "wlan0" with "wlp3s0"
To know the name of the network, use the ifconfig command