
One of the worst problems that we can find in practically any operating system on the market is that we delete certain information that we really wanted to keep and we cannot recover it. But can we really not get it back? In reality, it can always be recovered; you just need to use the appropriate software (and if not, ask law enforcement). Today we will teach you how to recover our deleted photos using PhotoRec., although the program also serves to recover more types of data.
Before we start, we have to explain what PhotoRec is. It is a software that is used to recover lost data from media storage drives such as hard drives, digital cameras or CD-ROMs. With this explained, it is time to also explain how to install the software in Ubuntu and how to get the most out of it. You have it explained after the cut.
How to install PhotoRec on Ubuntu
Installing PhotoRec is very simple, since it is in Ubuntu's default repositories. But if you are already opening the terminal and preparing everything to write the famous installation command, stop a second. Although the software is called PhotoRec (we only have to look at the screenshots to realize that this is the case), to install it we will have to use another name, so in the terminal we will write:
sudo apt install testdisk
How to use PhotoRec
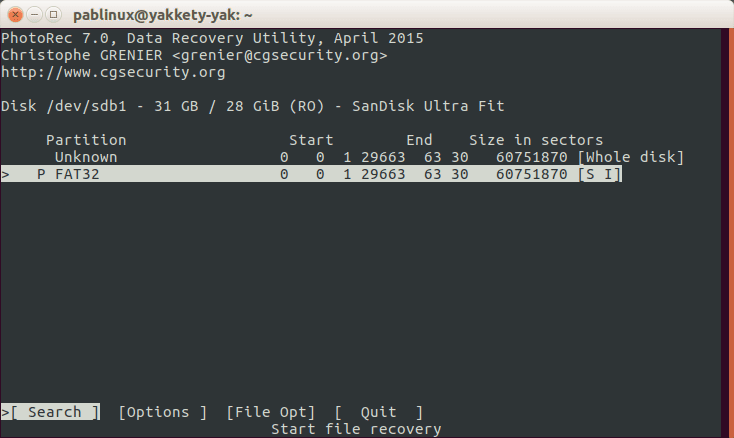
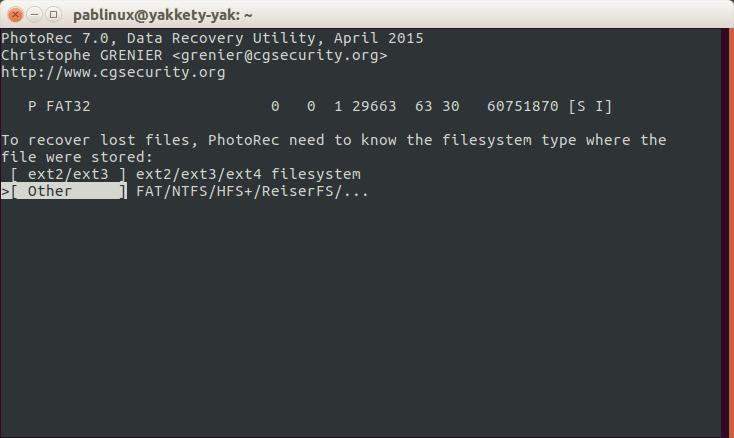
- Once the software is installed, we will have to tell it which unit we want to work on. To do the test, I have used a pendrive whose path is / dev / sdb1, so we open a terminal and write "sudo photorec / dev / sdb1" (without the quotes), which will show us an image like the following:

- If we do not know in which path is the drive from which we want to recover the data, a quick and easy way to find out what is available to everyone is to open a partition manager like GParted and look at it there. So we don't have to remember any commands and we will do everything without the terminal.
- We choose the partition from where we want to recover the files and then we choose [Proceed] by pressing the Enter key. If we only have one partition, it doesn't matter what we choose.
- Next, we select [Options] to see the available recovery options.
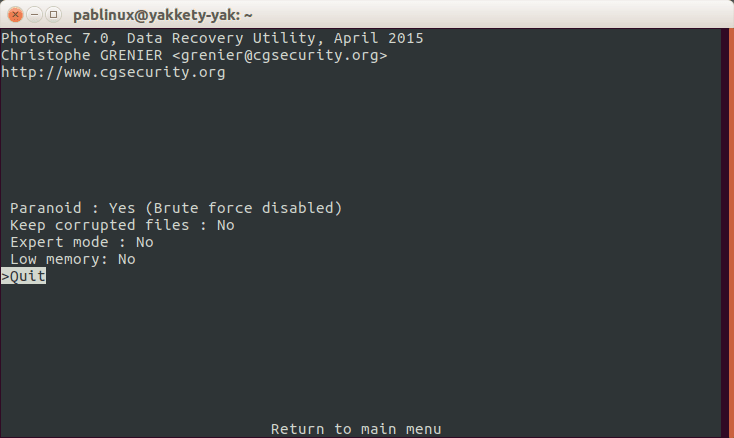
- We press the letter Q to go back.
- In the previous interface, we specify the extension of the files that we want to recover. We have to select [File Opt].
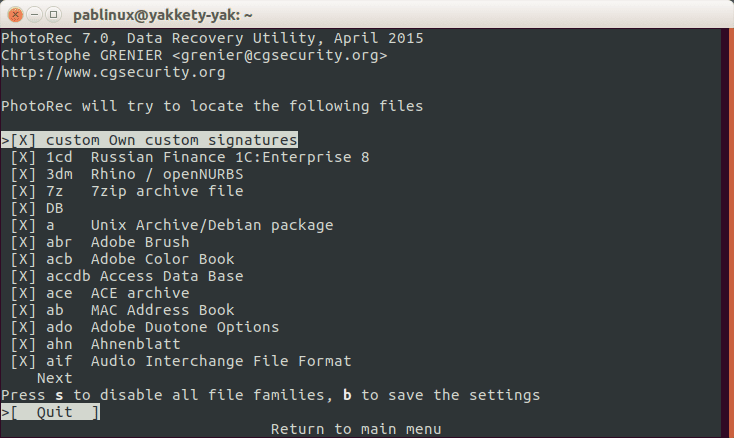
- We press the letter S to deactivate all extensions, unless we want it to search for all available extensions.
- We look for the file extension that we want to recover and mark it with the left or right cursor keys. I'm going to try to recover a file with a png extension.
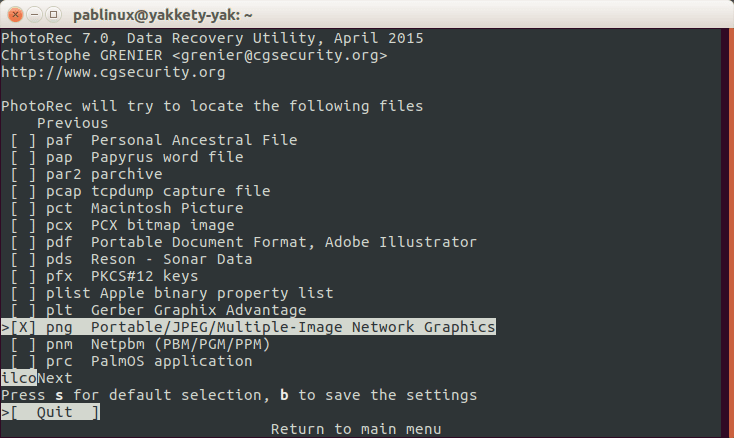
- Next, we press the B key to save the settings.

- We will see the message in the previous image. To go back, we press the Enter key or the Q key.
- We go back a step by pressing the letter Q again.
- Now we select the [Search] option.
- We choose one of the two previous options and then one of the next two. I have chosen the first (Free):

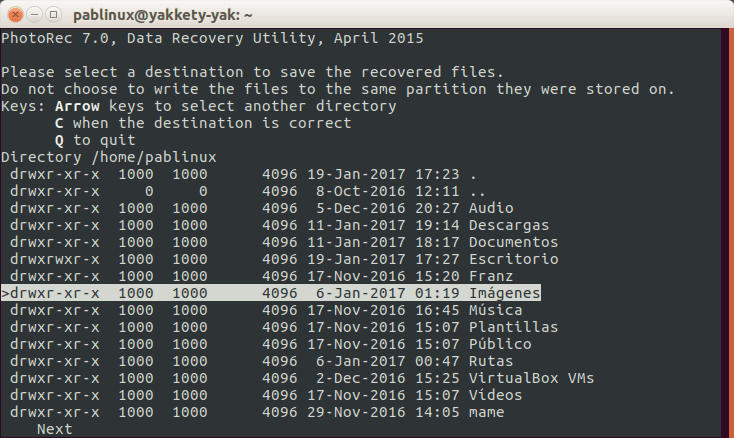
- Next, we select a path where the data will be retrieved. As what we are going to recover is a .png file, I have chosen the Images folder. We press the letter C to confirm the selection. We do not have to choose the same path where the files were hosted before the accidental deletion:
- Then we wait. Once finished, we will see a number of files with the extension that we have indicated will be in the protected folder recover_dir from our personal folder. To be able to access them, we just have to write the command to get privileges that will depend on the operating system we are using, such as sudo nautilus for the standard version of Ubuntu, sudo box for Ubuntu MATE, Sudo Dolphin for Kubuntu or sudo thunar for the official Ubuntu flavor with Xface graphical environment: Xubuntu.
And you will no longer lose any important files from multimedia drives.
Via: tecmint.com
Excellent! Thank you!
Very interesting, thanks for the contribution, a greeting
If I recover files, but they cause me too much weight, how can I delete them?