
In the next article we are going to take a look at QGIS. This is a open source software package for drawing geospatial information. QGIS is a very popular cross-platform geographic information system. We will find it available for Gnu / Linux, Mac and Windows. In this post we will see how install QGIS 3 on Ubuntu 18.10.
QGIS (previously also called Quantum GIS) was one of the OSGeo Foundation's first eight projects. This software will allow us to handle raster and vector formats through the GDAL and OGR libraries, as well as databases.
General characteristics of QGIS
Some of its characteristics are:
- Will offer us vector file handling Shapefile, ArcInfo coverages, Mapinfo, GRASS GIS, DXF, DWG, etc.
- We will have support for a significant number of types of raster files (GRASS GIS, GeoTIFF, TIFF, JPG, etc.)
- One of its greatest advantages is the possibility of use Quantum GIS as GUI of the SIG GRASS, using all the analysis power of the latter in a friendlier work environment.
- QGIS is developed in C ++, Using the Qt library for your interface user graph.
- One of the great strengths of QGIS is that works on different operating systems such as: GNU / Linux, BSD, Unix, Mac OSX, Windows and Android (in experimental phase). It works similarly in all of them.
- QGIS has a plugin infrastructure. The user can add lots of new functionality by writing your own plugins. These plugins can be written in C ++ or Python.
- QGIS 3.0 use the Python version 3.X. Provides developers with links to examples and guides for Plugin Builder as a Python development tool.
We can know more about the features this project on its website.
Install QGIS on Ubuntu 18.10
We can install this software in different ways on our Ubuntu 18.10 system:
Install via APT
To install QGIS through the APT package manager, we just have to open a terminal (Ctrl + Alt + T) and write in it:
sudo apt install qgis python-qgis qgis-plugin-grass
This option will install version 2.18 of the program on our system. If we want a more recent version, go to the next point.
Install via your repository
With this option we will install a more recent version, specifically today, 3.4. We can add directly to the file / Etc / apt / sources.list its corresponding repository. We will edit this file with the following command:
sudo vim /etc/apt/sources.list
We will only need to add one more line.
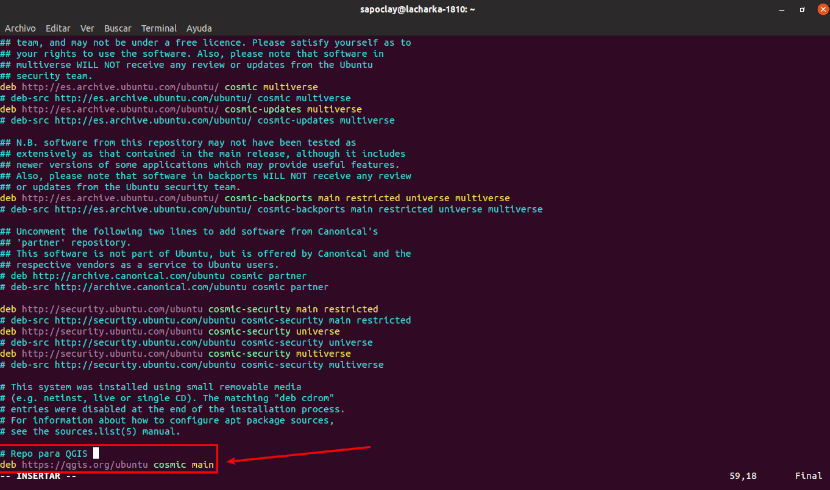
As we are using Ubuntu 18.10 Cosmic Cutlefish for this example, we will have to add the specific repository for Ubuntu 18.10 from QGIS 3. The Ubuntu Cosmic Cutlefish codename is cosmic. For this we will have to add the following line at the top or bottom of the file / Etc / apt / sources.list:
deb https://qgis.org/ubuntu cosmic main
After this, we save and close the file. Now we will have to import GPG key from QGIS 3 with the following command:
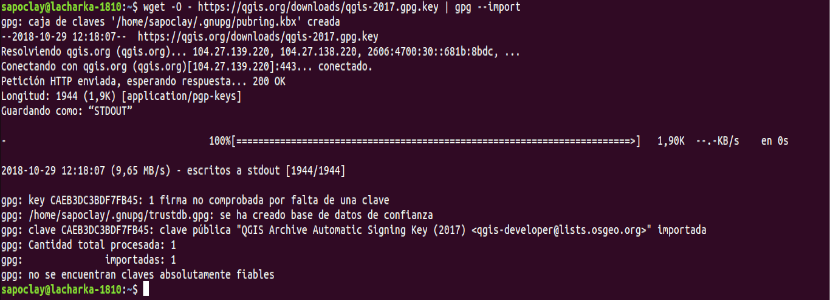
wget -O - https://qgis.org/downloads/qgis-2017.gpg.key | gpg --import
The GPG key must be added to your Ubuntu 18.10 machine. Now you can check if the GPG key was imported correctly with the following command:

gpg --fingerprint CAEB3DC3BDF7FB45
Now we must add QGIS 3 GPG key to apt package manager. Otherwise, you will not be able to update the cache and download and install QGIS 3. To carry out this action we will execute in a terminal (Ctrl + Alt + T):

gpg --export --armor CAEB3DC3BDF7FB45 | sudo apt-key add -
At this point, we must update Ubuntu 18.10 apt package repository cache:
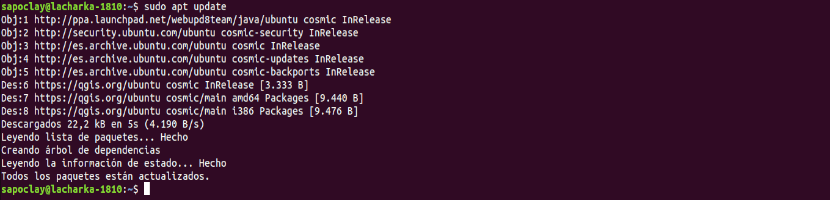
sudo apt update
Now we can install QGIS 3:
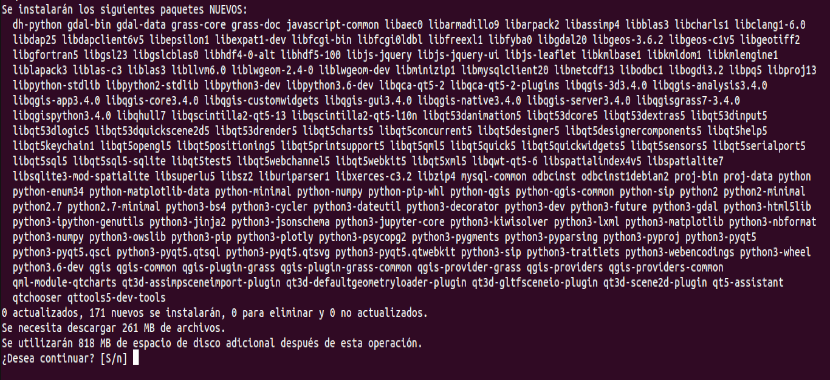
sudo apt install qgis python-qgis qgis-plugin-grass
The QGIS 3 download and installation process should begin. This may take a while.
Start QGIS
Now we can go to GNOME 3 Desktop Environment Activities and search for qgis. We should be able to find the QGIS Desktop logo as shown in the following screenshot. We will click on it to launch the program.

If you have used QGIS before and have configurations of the previous version, you will be able to select "Import configurations from QGIS 2”. If you are new to this software, select “I want a clean start”In the window that will be shown to us before loading the program.
When the program launches, you should see a QGIS 3 loading window as shown in the following screenshot.

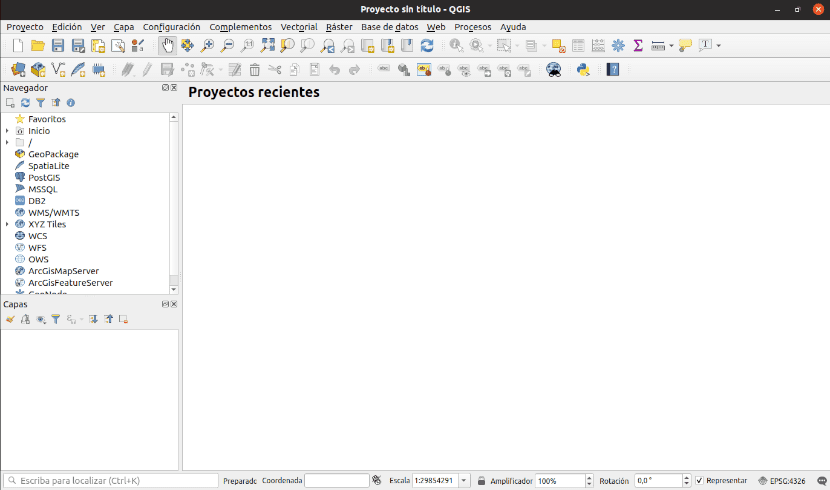
Once the loading of everything that is necessary is finished, we should see the main window of the program.
Now we can start creating geospatial information. For more information on how to use this program, we can refer to the official documentation of the project.
Damien:
Thank you very much for your tutorial.
My Linux level is very limited, I have searched a lot on the internet to install QGIS and I was about to give up, until I found your instructions