In the next article we are going to take a look at how we can install Unity Hub on Ubuntu 20.04. As we will see later, this can be downloaded and installed using the AppImage file that we can find on its website.
Although Unity Engine has been compatible with Gnu/Linux systems for a long time, the same has not happened with its GUI interface. Using Unity Editor (the GUI interface), developers can create cross-platform games, content or 2D or 3D games, all with the help of the tools it offers for a wide range of devices.
In addition to Windows and macOS, Gnu/Linux users can also download the Unity editor from the official website as normal, performing a process similar to the one followed by users of other operating systems.
Download Unity Hub and install the editor on Ubuntu 20.04
If we want to install the Unity editor for Gnu/Linux, we must first download the Hub which is available in format AppImage.
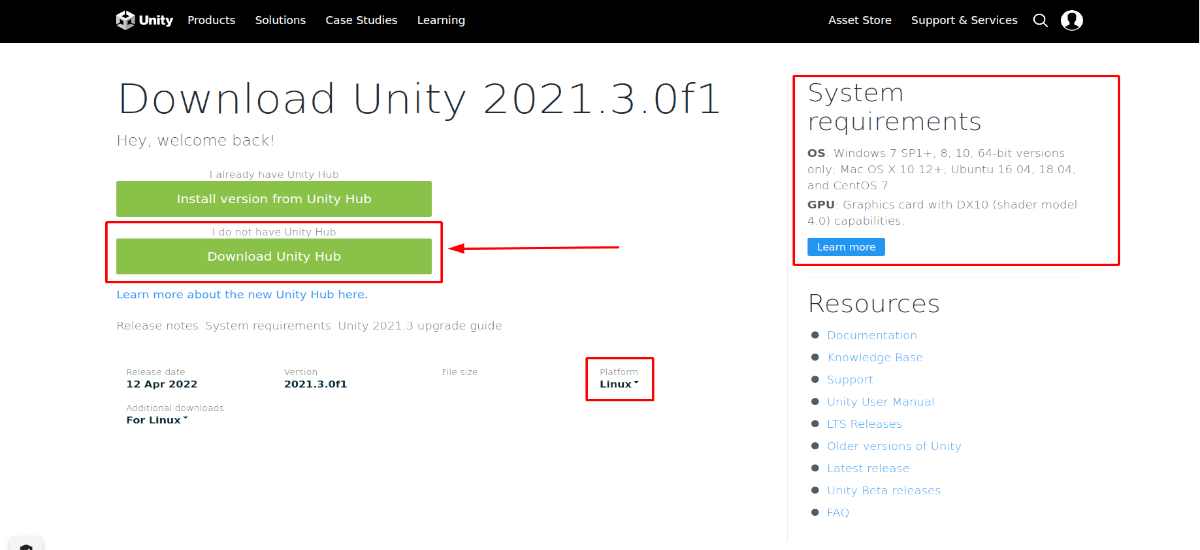
We can use the following link to download UnityHub from the project page. On this page, all you have to do is select Gnu/Linux as the platform, and then press the button that says «Unity Hub«.
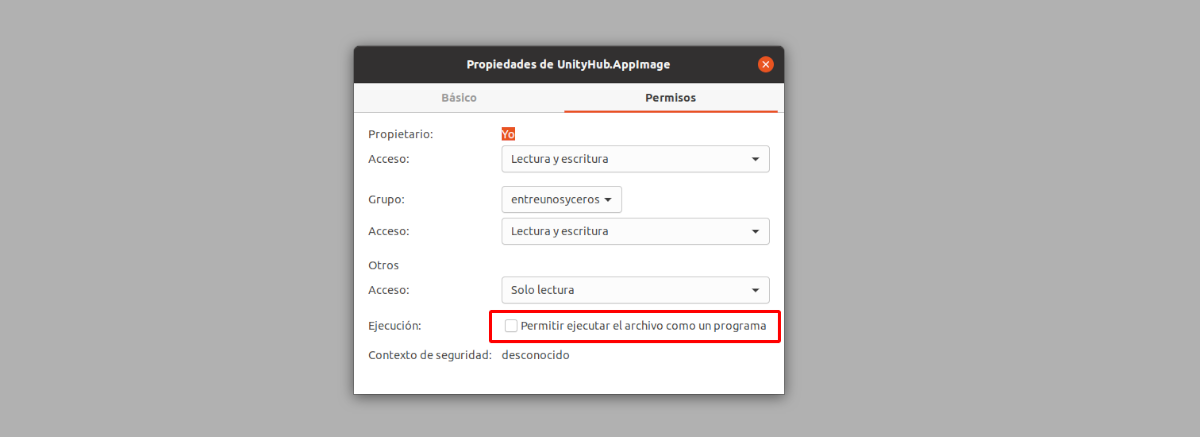
Give permissions to the Unity Hub AppImage file
After downloading the AppImage package from Unity Hub, to run it, first we must make the file executable. To achieve this, simply right-click on the UnityHub.AppImage file. Then we just have to select Properties, to go to the tab Permissions. There just check the box for 'Allow to run the file as a program'.
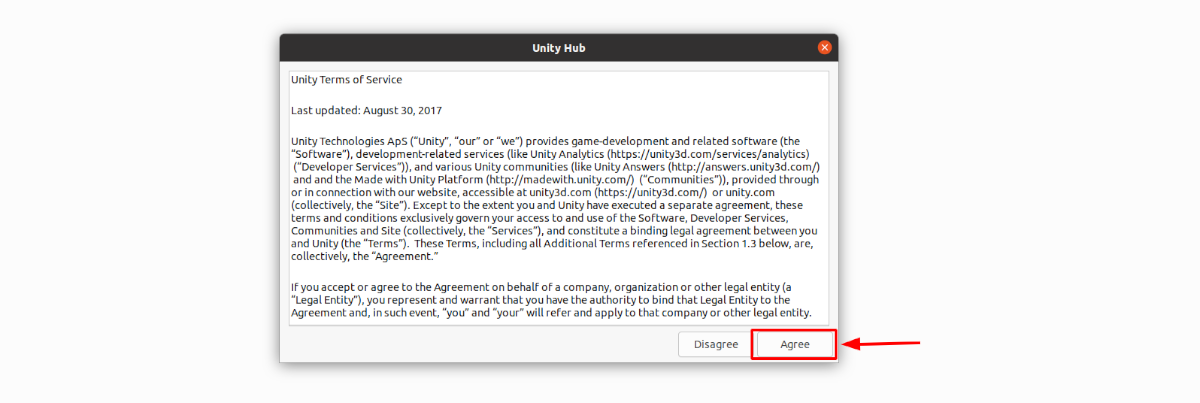
After assigning the permissions, we only need double click on the fileUnityHub.AppImage” and accept the terms.
Sign in to your Unity Technologies account
After accepting the terms, if you have an account with Unity Technologies, click the profile icon. This is in the top right. There it is only necessary to select 'Sign in'.
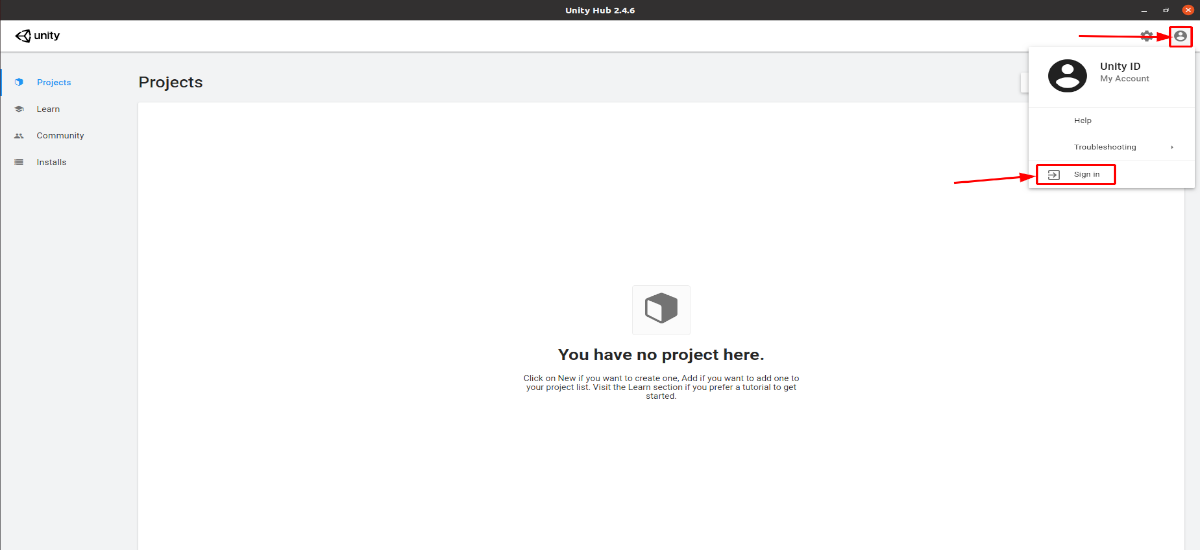
In the window that will appear we will enter the Unity account details.
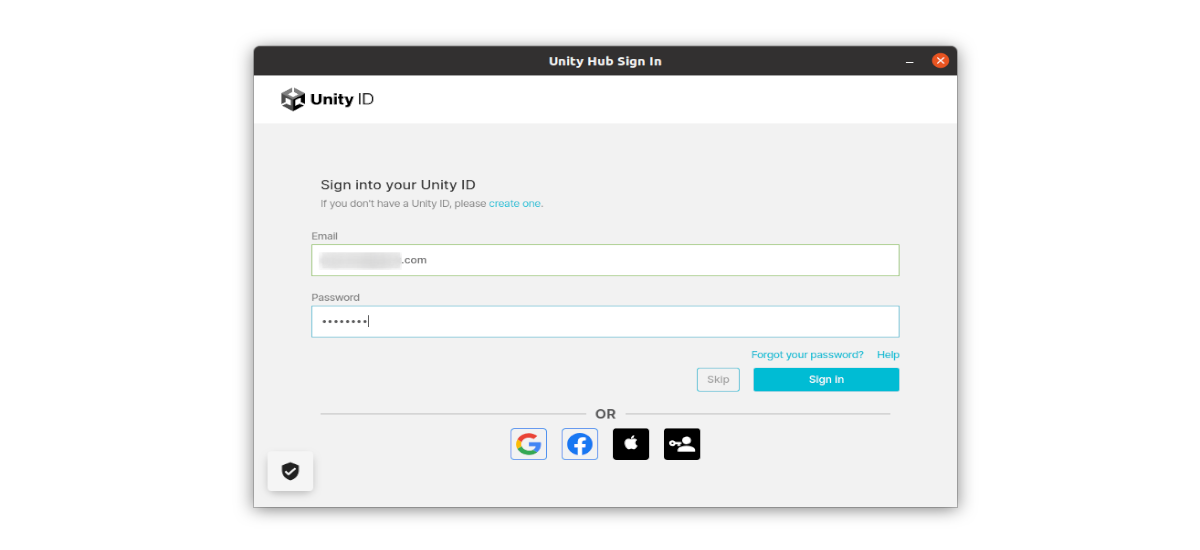
Those without an account can click the 'Create one' link on the screen to enter credentials.
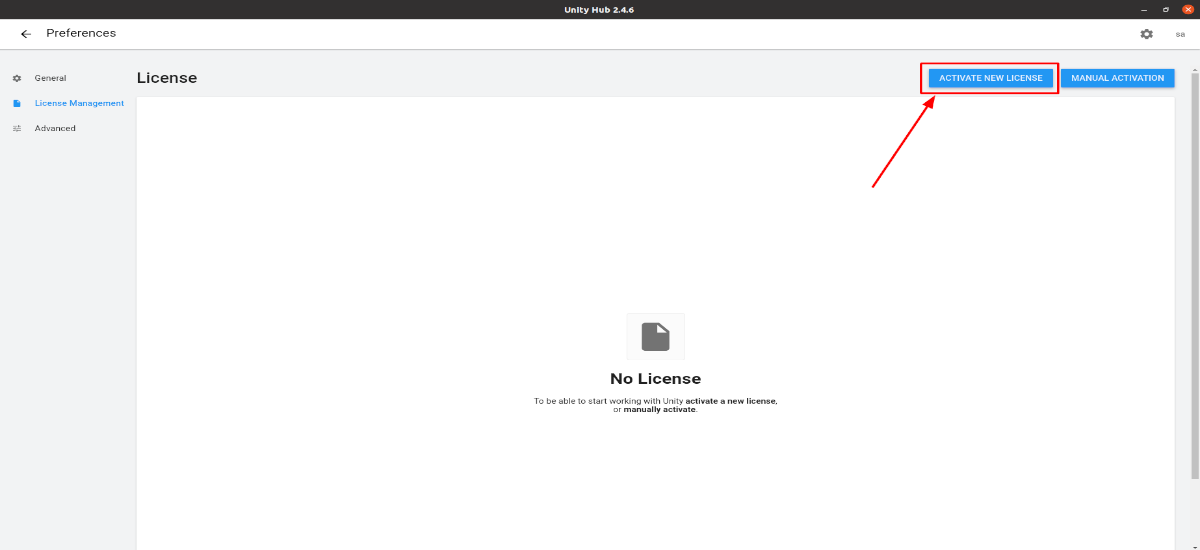
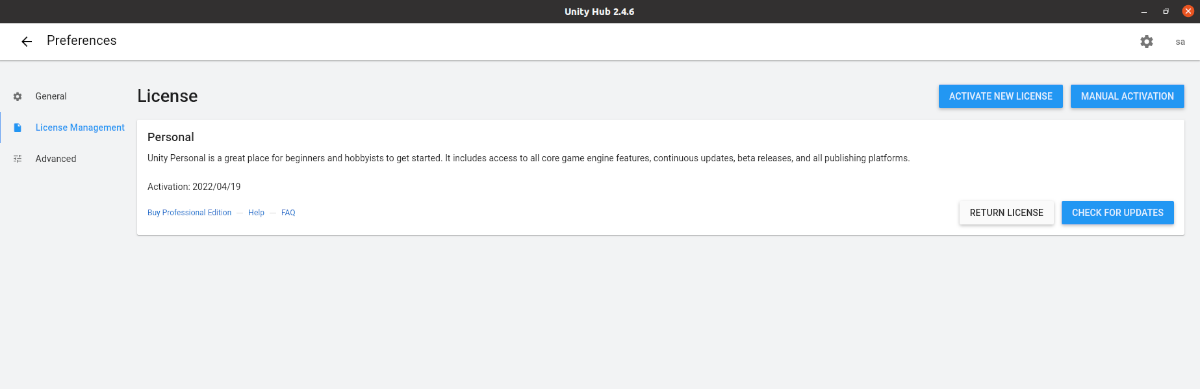
Activate license
Once logged in, we will click on the gear icon at the top right. Later We will select the section «License Management«, and we will click on the button 'Activate new license'.
Select a Free Personal License
In the next step, we are going to mark the license that we want to use. If we select the option 'Unity Staff' we will get a free personal license, and when activating it, we will also select 'I don't use Unity in a professional capacity'.
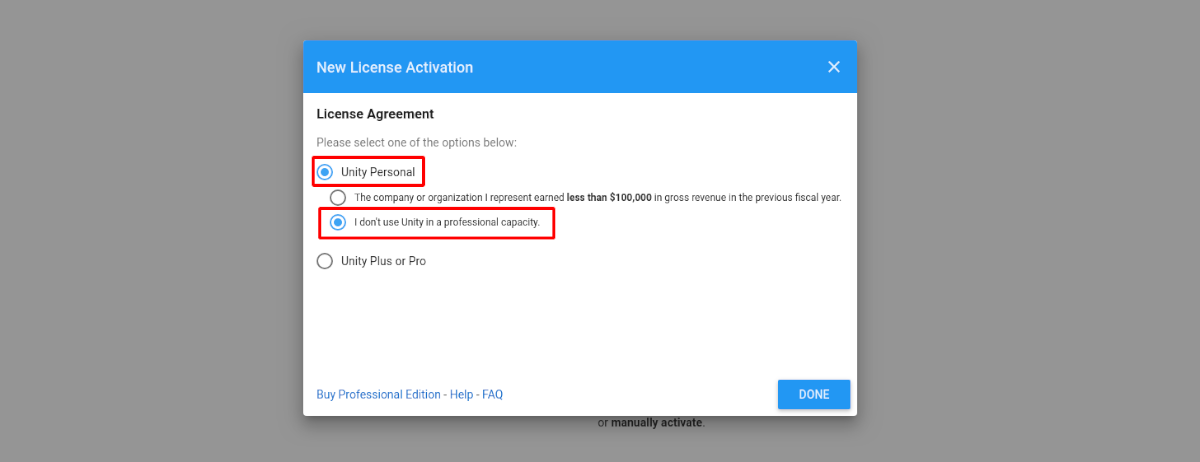
Once you have followed the steps above, Unity personal license should already be activated. This will allow us to download the Unity editor.
Set Unity folder
Finally, we come to the steps where we configure the Unity Editor folder in Gnu/Linux to install it. For that, in Unity Hub, we will select the 'General' and then we will select the location or folder where we want to install Unity Editors on our Gnu/Linux system. For that, we will click on the three points. Besides, We can also select the language, by default it will be English (Spanish does not appear in the list).
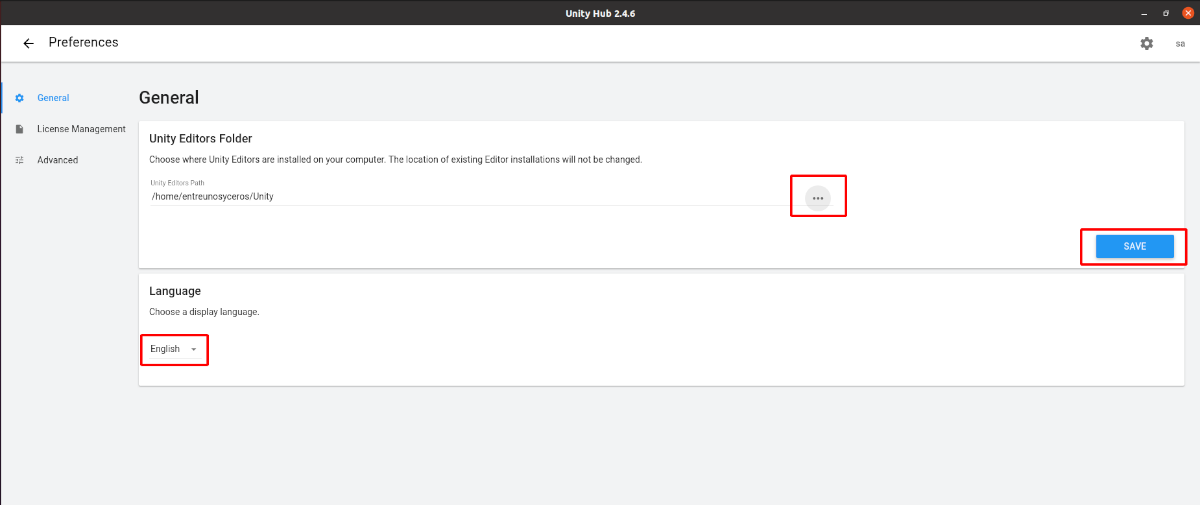
Once this is done, we will click on the back arrow to Back to Main Menu, which is in the upper left of the Hub window.
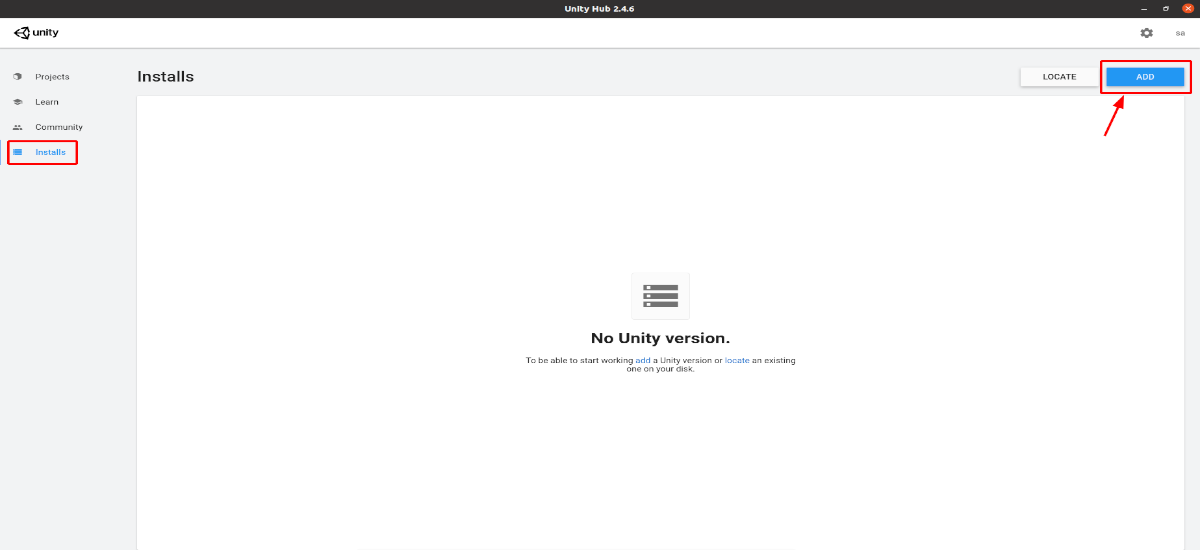
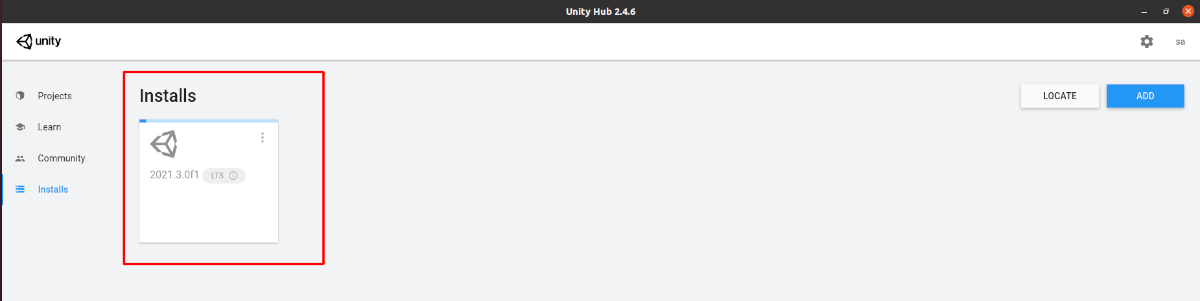
Install Unity Editor on Ubuntu
Once we are in the main menu, we will go to the section 'installs' from Unity Hub. This will allow us to add different versions of the editor. To start the installation process of an editor, it is only necessary click the button "Add", highlighted in the screenshot below.
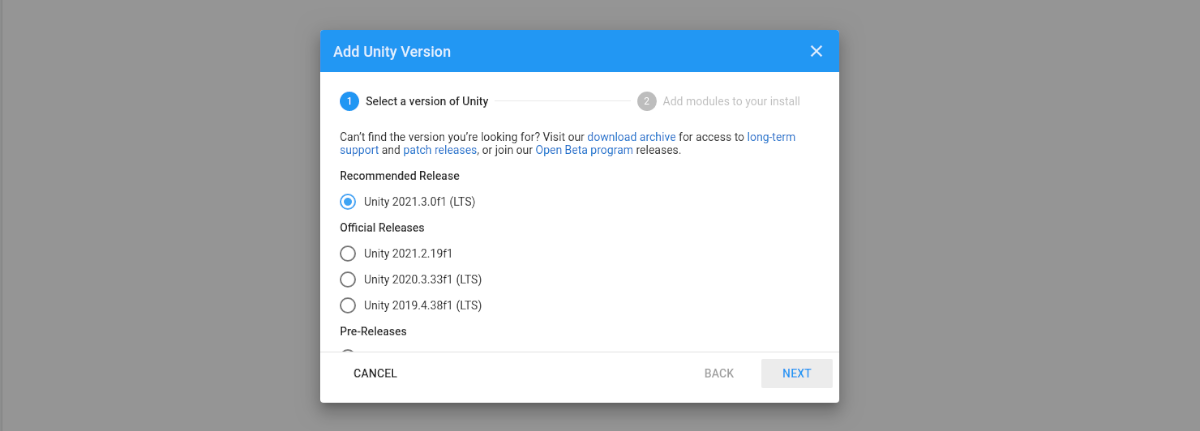
Add Unity Version
Now we can choose between different versions of the Unity editor that can be found available for Gnu/Linux. In this example we are going to stick with the recommended version.
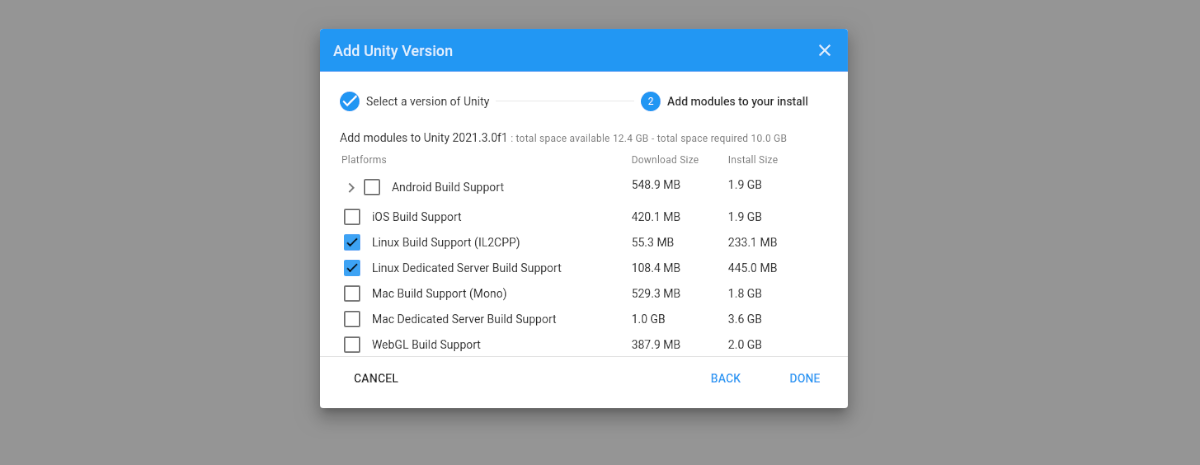
Add modules to install
Once we have decided the version of the Unity editor that we want to download, in the next step we will select the components, in addition to the native compilation for GNU/Linux.
Behind this installation will start.
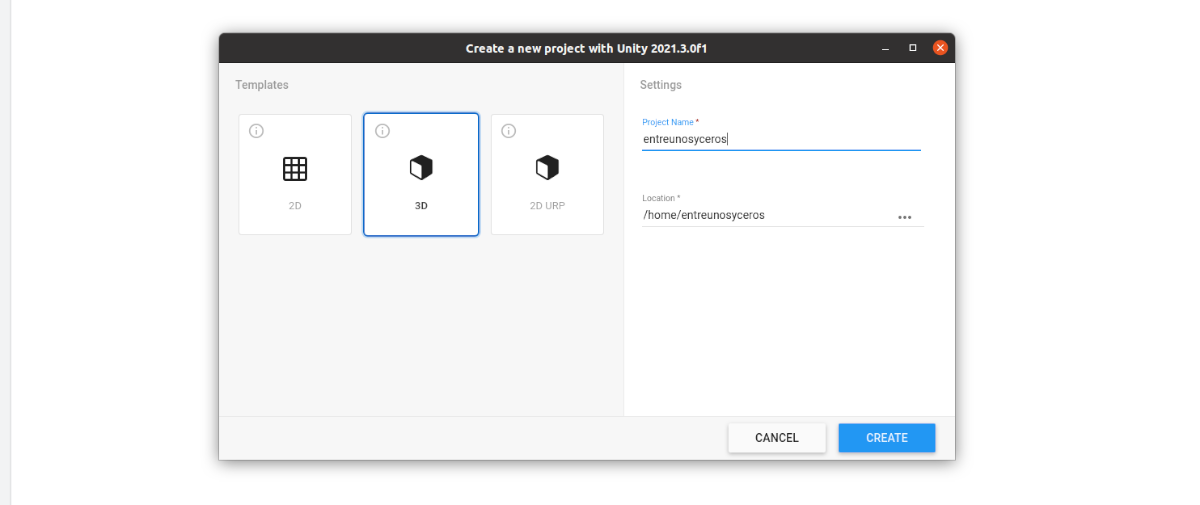
Create new project
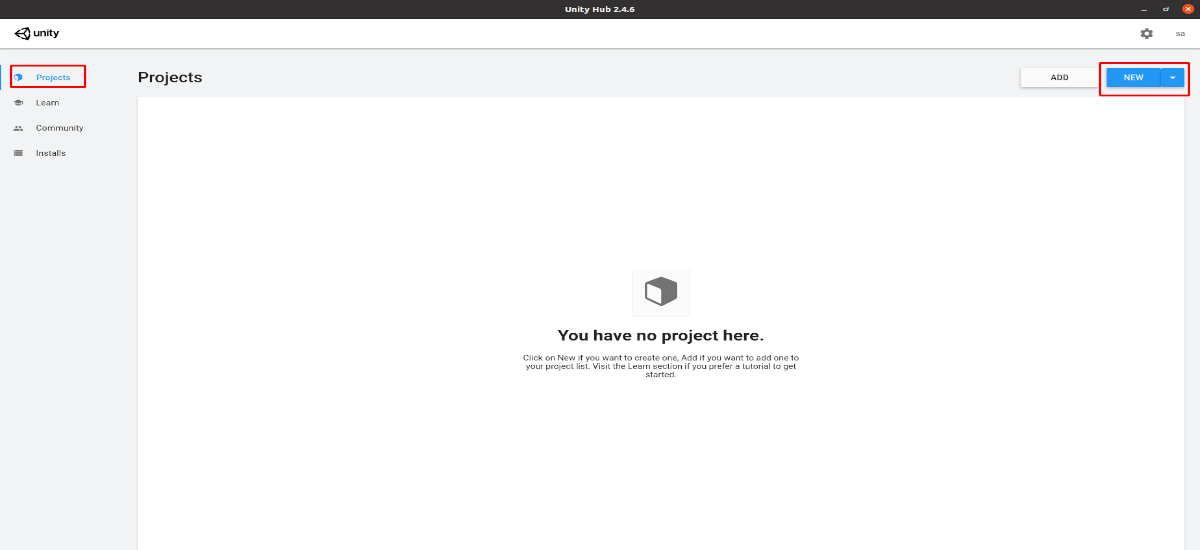
After installing the selected version of the Unity editor, we will have to go in Unity Hub to the section 'Projects'. We'll click the 'New'. The next step will be to choose the type of project, in addition to giving it a name. We'll finish by clicking the 'Create'.
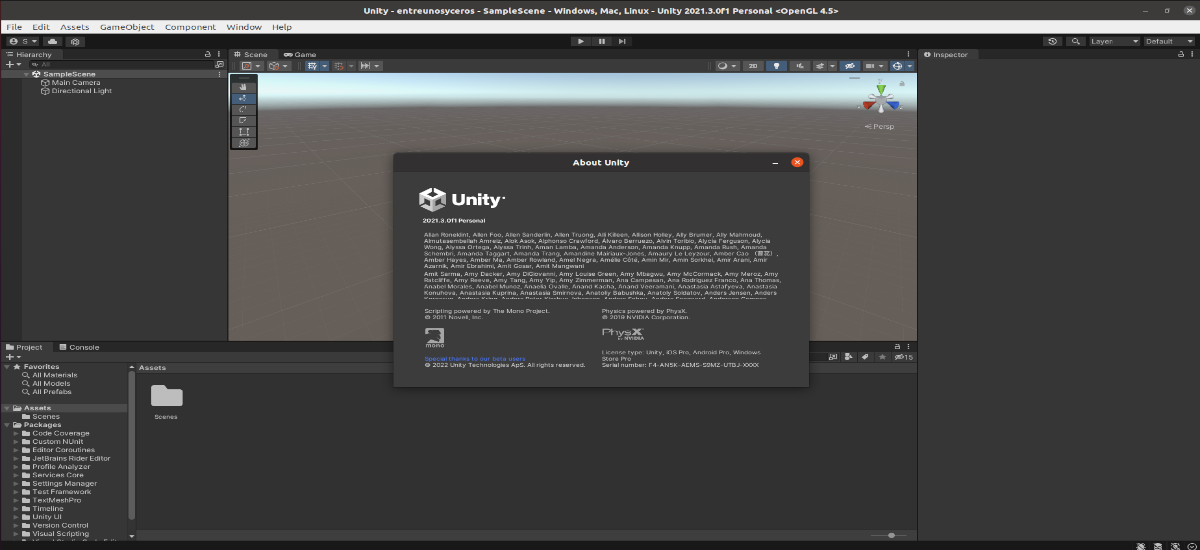
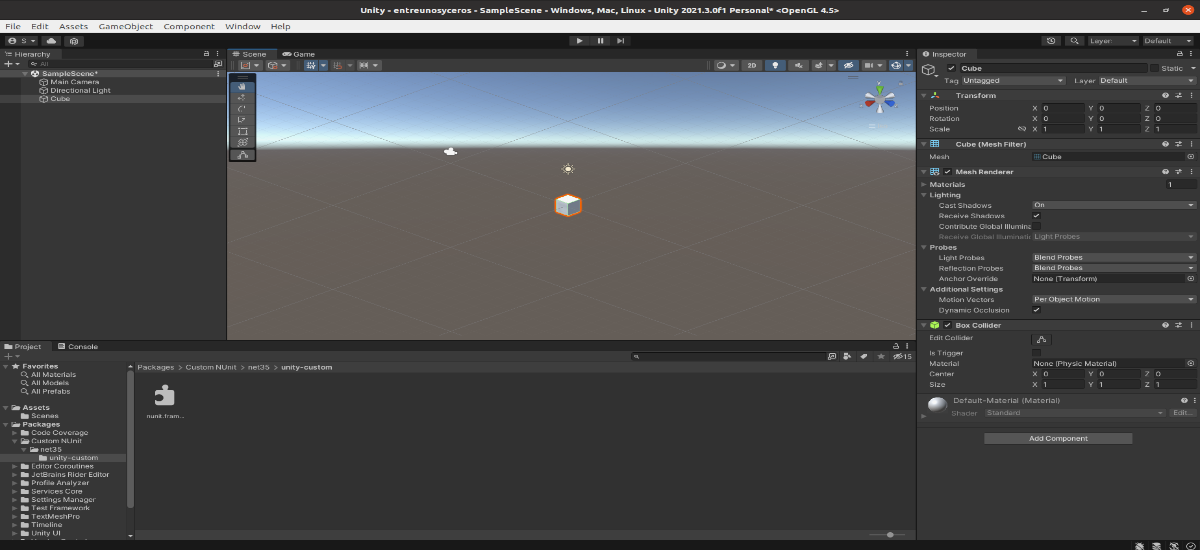
The Unity editor interface

Once everything is installed and created nicely, after a short loading time, you will have the Unity editor interface ready to start developing your project using the graphical user interface.
For more information about this program, users can resort to documentation offered on the project website.