
In the following lines we are going to take a look at how can we upgrade from Ubuntu 18.04 to Ubuntu 19.04 directly from terminal. In an article a few days ago, a colleague explained to us how to upgrade Ubuntu 18.04 and Ubuntu 18.10 to Ubuntu 19.04. However, because Ubuntu 18.10 is still supported, version 18.04 users must first update to version 18.10 and follow the same process to update to 19.04.
Something that I think you have to remember is that Ubuntu 19.04 Disco Dingo it is a normal launch. This means that it is one of those versions that have support for 9 months. In my opinion, users who use Ubuntu for day-to-day work should possibly stick to the LTS version, but that's a matter of taste. For this example I am going to use an Ubuntu 18.04 virtual machine, since I have always preferred to move between LTS versions on my work teams.
As the colleague indicated in his article on how upgrade to Ubuntu 19.04If Ubuntu 18.04 users follow the standard upgrade procedure, they will be prompted to upgrade to version 18.10 first. This is due to the fact that Ubuntu 18.10 has not yet reached the end of its useful life. After Ubuntu 18.10 reaches the end of its useful life in July 2019, Ubuntu 18.04 users will be able to upgrade directly to 19.04, following the standard upgrade procedure..
With that said, next we will see how we can upgrade from Ubuntu 18.04 directly to Ubuntu 19.04 from the command line, bypassing Ubuntu 18.10. If you don't want to wait 3 months or don't have time to update twice, you can follow the instructions below.
How to upgrade from Ubuntu 18.04 to Ubuntu 19.04 directly from terminal
In the following lines we are going to change the update path that Canonical gives us by default. The Ubuntu version that I am using for this example is:

First, run the following command to upgrade existing software. It's important to put attention on if a new kernel is installed while running this command, you must reboot to continue with the update process. In a terminal (Ctrl + Alt + T) we write:
sudo apt update && sudo apt upgrade
We continue to ensure that we have the update-manager-core package installed typing in the same terminal:
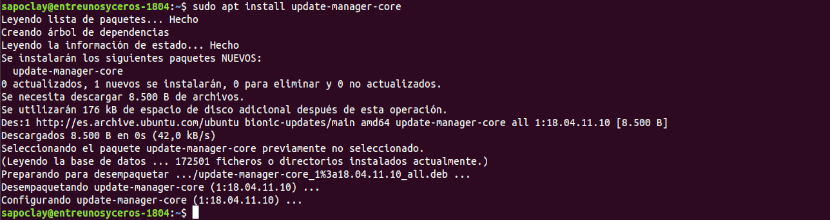
sudo apt install update-manager-core
The next thing we will do is edit configuration file using your preferred command line text editor:
sudo vi /etc/update-manager/release-upgrades
At the bottom of this file, change the request value from "lts" to "normal".
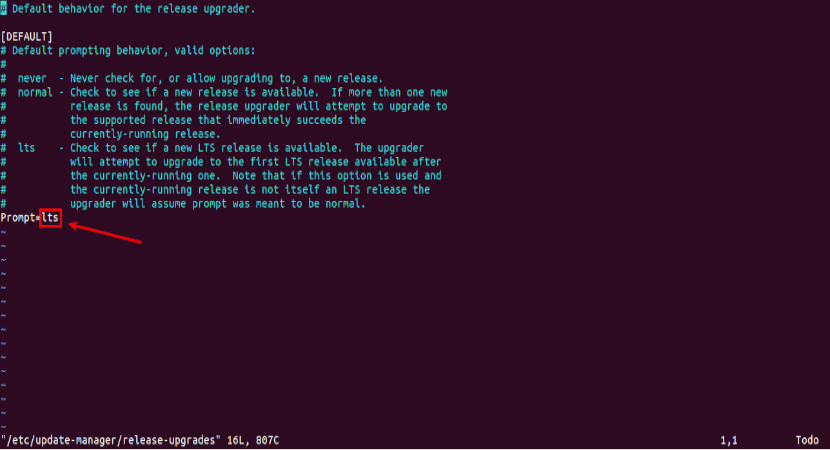
Prompt=normal
By the end, save the file and exit the editor of text.
Disable third-party sources
Then we must execute the following command to change all instances of bionic to disk in archive / Etc / apt / sources.list. Bionic is the name for Ubuntu 18.04, while disco is the name for Ubuntu 19.04.
sudo sed -i 's/bionic/disco/g' /etc/apt/sources.list
If you have added third party repositories in the file / Etc / apt / sources.list and in the directory /etc/apt/sources.list.d/, disable all third-party repositories. You will be able to do this by commenting on each line in the file, adding the # symbol at the beginning. When done, save the file.
Actualización
After disabling the third-party repositories, run the following commands to update software sources. We will also update the software to the latest version available in the Ubuntu 19.04 repository. This step is known as a minimal update:
sudo apt update

sudo apt upgrade
After the minimal update finishes, run the following command to start full update:
sudo apt dist-upgrade
Now you can remove obsolete / unnecessary software packages from your Ubuntu system:
sudo apt autoremove && sudo apt clean
In conclusion, reboot the system:
sudo reboot now
Once rebooted, you can open the terminal window and check your Ubuntu version with the command:
lsb_release -a
You should see something like the following:

And with this we will have updated Ubuntu 18.04 directly to Ubuntu 19.04 no need to update twice or wait for Ubuntu 18.10 to be discontinued.
I tried to do it I had my first kernel panic, 🙂
It serves to update it having W10 installed on the same disk and that it respects it?
It works super !!
Excellent, it worked.
A query, I have an asus ryzen 5 with a radeon vega graphics video card, and I just updated ubuntu to him I follow this post. When the pc starts up, when Ubuntu starts, it shows me a purple screen that lasts for 3 seconds at most; When searching the internet they said that it was for the video card drivers, which according to what I had to configure them, the truth is, I don't know how to do that. Then I received another response saying that if I updated ubuntu to version 19.04 the error would possibly be fixed, but it still keeps getting.
Do any of you have any ideas on how to fix this?
Thank you and I would really be grateful to you if you help me.
Hello, I know that it has already happened several months but the answer may be useful to someone, it is a problem with ACPI, what you have to do is enter the boot options and press the letter "e" now we will edit the line that says linux and You will put pci = np acpi. with that it will start
Excellent report, simple, practical and easy. Congratulations
in the end should I return it from normal to lts?
No friend, since the 19.04 version is not an LTS version but a NORMAL version, I hope I have helped you! 🙂
It worked perfectly, God bless you,
Thank you very much.
Hello, my files are at risk if I update? In other words, should I necessarily endorse?
Thank you very much for the post, now I have Disco Dingo on my pc.
At the time of the update the styles of the Finder were ruined. to see more details you can see the following link of the question in stackoverflow
https://es.stackoverflow.com/questions/319155/como-arreglo-los-estilos-del-buscador-de-ubuntu