
Good as announced in a previous post Voyager 18.04 LTS availability along with all its features, right now I take this opportunity to share with you the installation guide.
It is important that you mention than Voyager Linux despite taking Xubuntu as a base, its developer only decided to continue with the 64-bit version so the 32-bit was totally discarded in this new release.
Without further ado we can start with the guide.
Requirements to install Voyager Linux 18.04 LTS
It is necessary to know the requirements we need to be able to run the system on our computer, despite having Xubuntu as a base, due to the customization layer the requirements are greater:
- Dual Core processor with 2 GHz onwards
- 2 GB of RAM
- 25 GB hard disk
- A USB port or have a CD / DVD reader unit (this to be able to install it by any of these means)
Download and prepare the Installation media
The first thing we have to do is download the Voyager Linux ISO and transfer it to a CD / DVD or USB drive, the download we do from its official page I leave you the link here.
Once this is done we proceed with the creation of the installation medium.
CD / DVD installation media
- Windows: We can burn the iso with Imgburn, UltraISO, Nero or any other program even without them in Windows 7 and later it gives us the option to right click on the ISO.
- Linux: They can use especially the one that comes with the graphical environments, among them are, Brasero, k3b, and Xfburn.
USB installation medium
- Windows: You can use Universal USB Installer or LinuxLive USB Creator, both are easy to use.
- Linux: The recommended option is to use the dd command, with which we define in which path we have the Manjaro image and also in which mount point we have our usb:
dd bs=4M if=/ruta/a/Voyager-Linux.iso of=/dev/sdx && sync
How to install Voyager Linux 18.04?
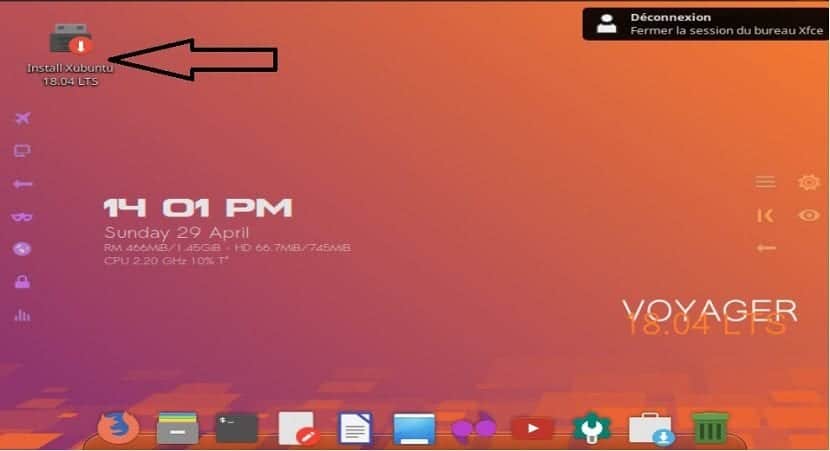
Already with our installation medium we proceed to dump it and wait for it to load so that we can access the system and run the installation wizard.
For run the wizard, we will see a single icon on the desktop, we double click and it will launch to start with the installation of the system.
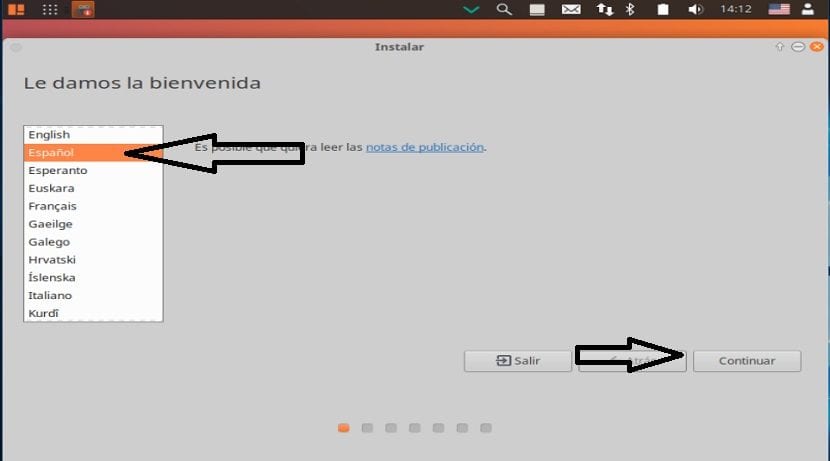
Language selection and keyboard map
On the first screen we will choose the language of the installation in our case it will be in Spanish, we click next.
On the next screen It will ask us to select our keyboard layout and language here we will have to search for it by language and finally know that the keymap matches our physical keyboard.
You can perform a test of the keys in the box that is below the list, here it will ask us to press a series of keys to detect our keyboard map.

Installation of updates and third-party software
Then on the next screen we can choose if we want third-party software to be installed such as flash, mp3, graphics support, wifi, etc.
We can also select if we want to install the updates while we install.

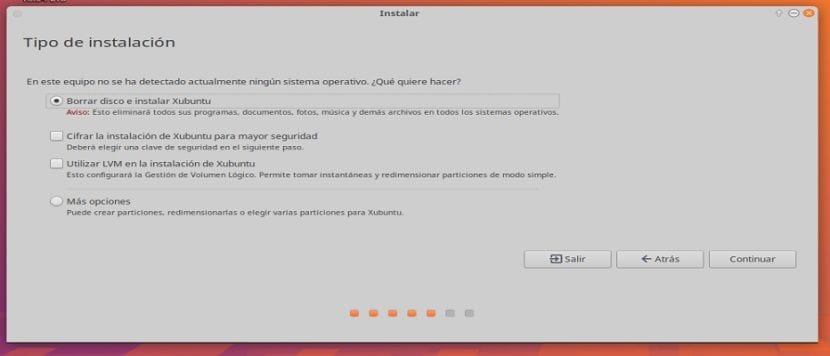
Choose installation path.
Now immediately afterwards it will ask us how Voyager Linux will be installed on our computer, atHere we will have to choose whether to install the entire system on the disk or if we want to perform an advanced installation, where we indicate which partition or disk it should take.
- Erase Entire Disk to Install Voyager Linux
- More options, it will allow us to manage our partitions, resize hard disk, delete partitions, etc. The recommended option if you don't want to lose information.
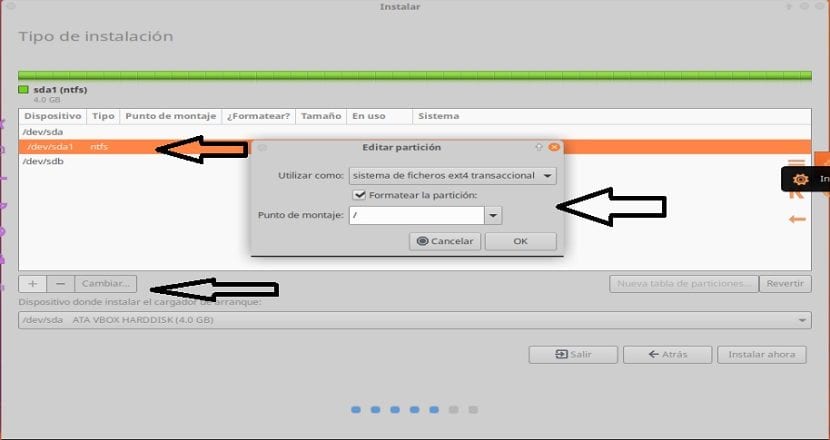
In case of choosing a partition we will have to give it the appropriate format being that way.
Type partition "ext4" and mount point as root "/" ..
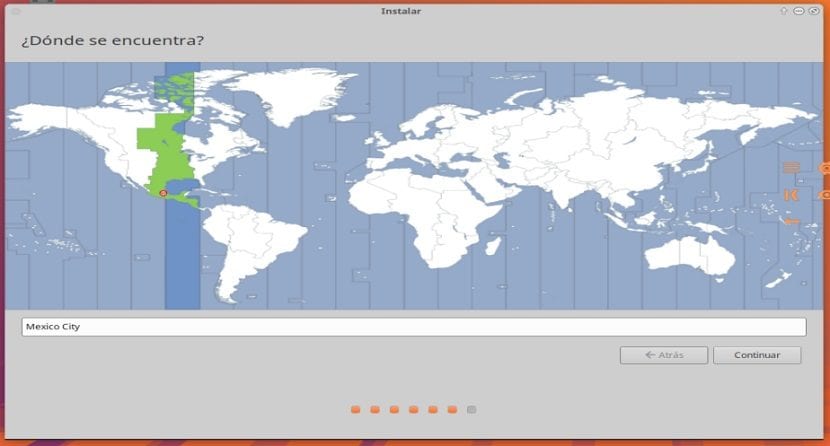
In the next section we will have to indicate our position, this in order for the system to be configured to our time zone.
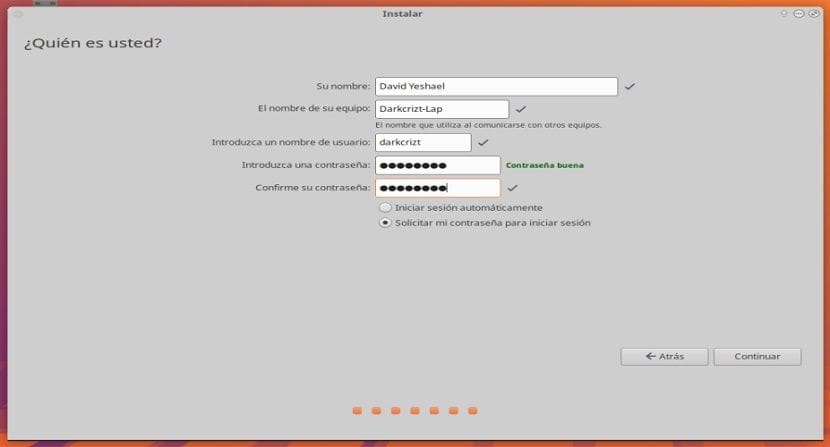
Now alone It asks us to indicate a user as well as the password to be able to access Voyager Linux every time we turn on the computer as well as the password that will be used for superuser privileges.
Click on continue and the installation process will begin, this may take a while if you selected the option to install the updates and the time will depend largely on your network connection.
If I come from Voyager 16:04 LTS, how do I jump to the new version, since I have used the command: sudo apt dist-upgrade and it does not update the system.