
In the next article we are going to take a look at Woof. With this application it can be very useful, despite being a few years old, when it comes to share files on a small local network. The operation of this tool is very simple.
The application will provide a small HTTP server, with which you can serve a specific file or directory a specified number of times. When we use Woof, we will only have to use the file or directory to share as an argument, although the loading task can also be carried out from a web form. The recipient will be able to access the shared file through the web browser or using the command line.
An important feature to highlight of Woof is that the operating system used when sharing the files is not important. It is also not important between what types of devices the files are shared. The only thing that is really necessary is that the user receiving the file or directory has a web browser installed in your system
Install Woof on Ubuntu
In Debian and Ubuntu, we will be able to easily install Woof from the distribution's default repositories using apt. To do this, all you have to do is open a terminal (Ctrl + Alt + T) and install the package using the following command:

sudo apt install woof
Use Woof to share a file
When sharing a file on our local network, the sender of this file will only have to use the path to the file as an argument to the Woof command. This can be done in a terminal (Ctrl + Alt + T) as shown below:

woof ./ruta/al/archivo/compartido
At this point it is convenient to clarify that by default the file is shared once. After the recipient downloads it, the Woof server is going to shut down. This can also be configure using -c option when sharing the file. With the following example, the Woof server will allow 5 downloads of the shared file:
woof -c 5 ./ruta/al/archivo/compartido
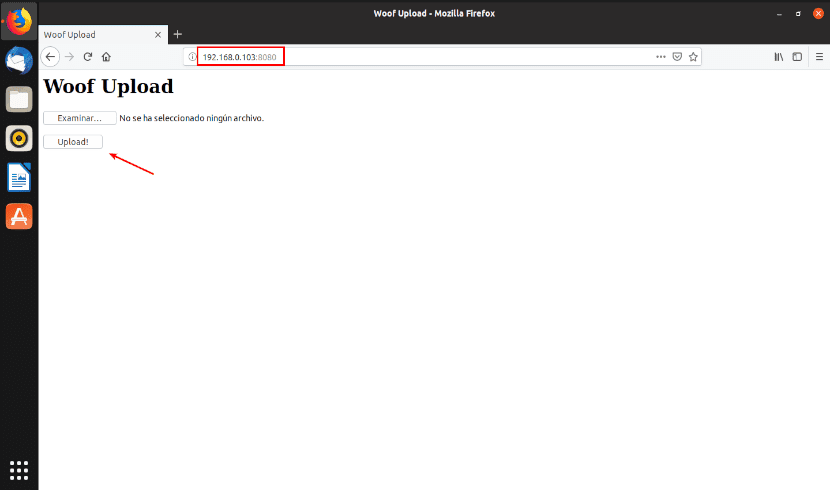
In addition, this utility also allows you to use the -U option. With her you will will instruct Woof to provide a form to allow upload of files from any computer on the network. You will only have to access the generated URL to be able to use it:

woof -U
After browsing and selecting the file, just click the "Upload”To start uploading the file.
The recipient of the file in this case will be the user who launches the command with the -U option. The received file will be saved in the same directory where Woof was launched.

Use Woof to share a directory
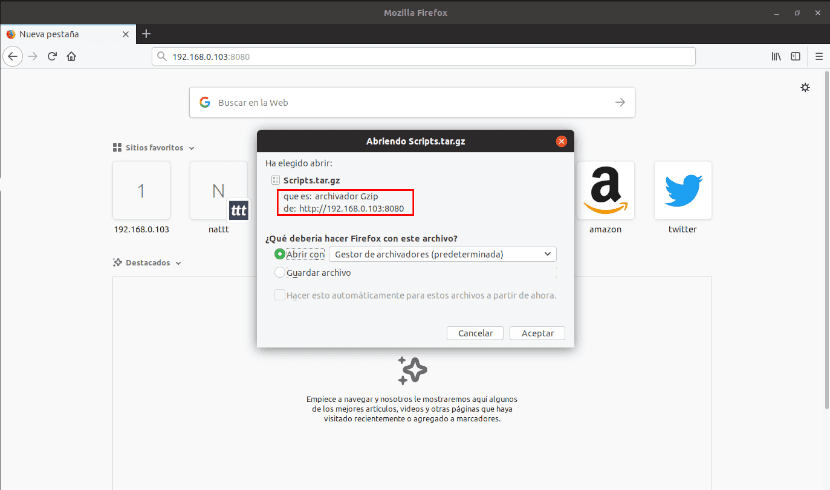
To share a directory, a compressed file can be created by adding the option -z to use compression gzip, -j to use compression bzip2, or -Z to use compression ZIP.

woof -c 3 -z ./ruta/al/directorio/
If you use the options shown in the previous command, the receiver of the directory will be able to download it 3 times and will see that the file to download is a Gzip file.
Download the shared file
When using Woof, a URL will be generated, such as la URL http://192.168.0.103:8080 shown in the first example. This address is the one that the recipient will be able to use to access the file from the web browser and download it to their computer.
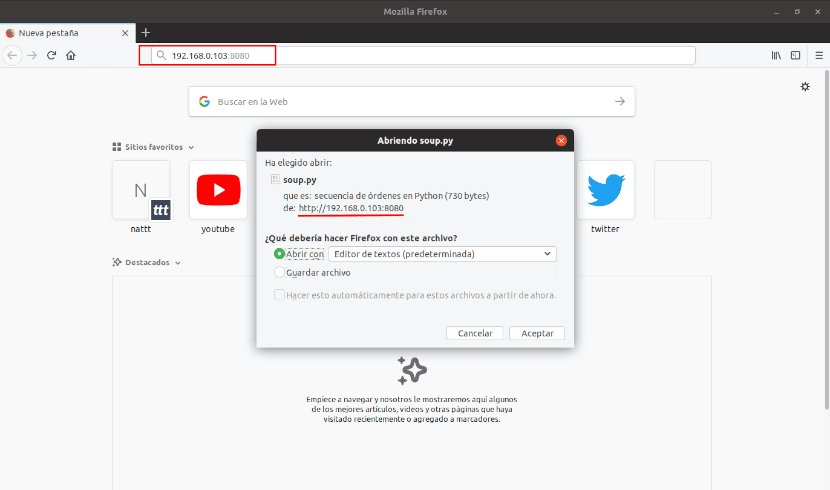
This is the easiest way to download the shared file or directory. All you have to do is click on "Save file".
Another simple way to download the shared file or directory will be using wget. In this way, it will be possible to assign the downloaded file a different name than it had when it was shared. If you decide to use this option, you just have to add the -O option to command. This can be done by typing in the terminal (Ctrl + Alt + T):
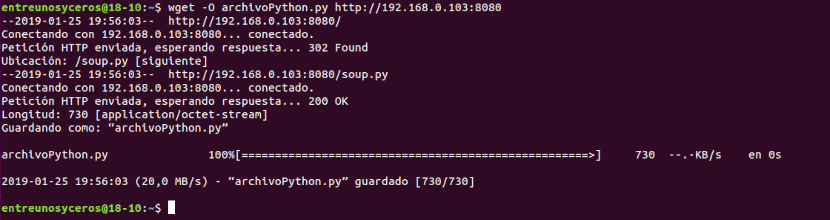
wget -O nombre-de-archivo-personalizado http://192.168.0.103:8080
Help
If you need help using this tool, you can consult the project page. It also can go to the man page corresponding typing in terminal (Ctrl + Alt + T):
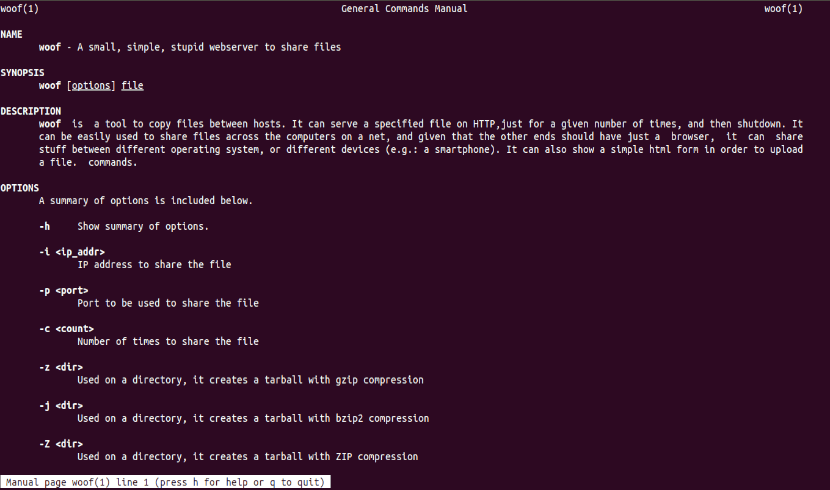
man woof
Another way to get help will be to use the corresponding option by typing:
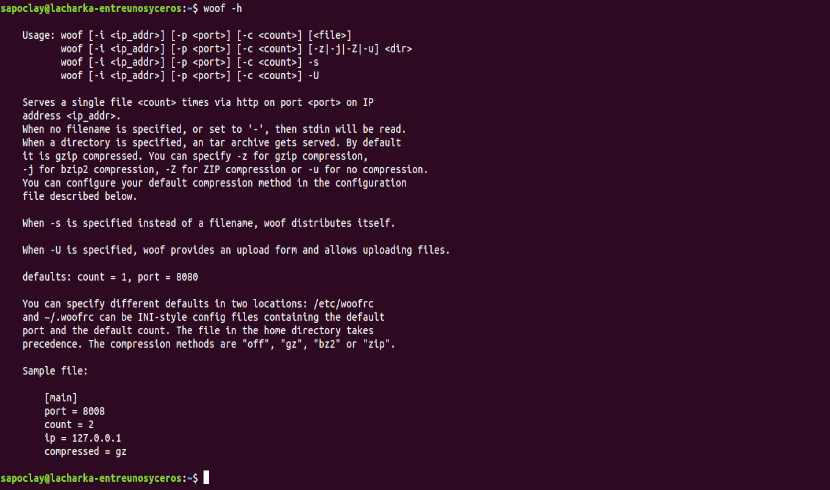
woof -h
As I think has been shown during the article, Woof is a simple, small and easy to use HTTP server. Any user will be able to use it when sharing files on a local network.
Very good, it works for my big lan network