
In the next article we are going to take a look at CPU Power Manager. If you are a laptop user, you probably already know that power management in Gnu / Linux it is not as good as in other operating systems. While there are tools like TLP and powertop to help reduce power consumption, the total battery life is usually not as long as that of Windows or Mac OS.
In this post, we will see another way to reduce energy consumption. It is about limiting the frequency of the CPU, lowering its performance. While this is something that has always been doable, it generally requires complicated terminal commands. Fortunately, there is an extension for GNOME that can help you more easily configure and manage CPU frequency. CPU Power Manager uses the frequency scaling controller intel_pstate (compatible with almost all Intel CPUs) to control and manage CPU frequency from your GNOME desktop.
Another good reason to use this extension is reduce equipment heating. Limiting the frequency of your CPU "could" lower the temperature. It will also decrease wear and tear on the CPU and other components.
General characteristics of CPU Power Manager
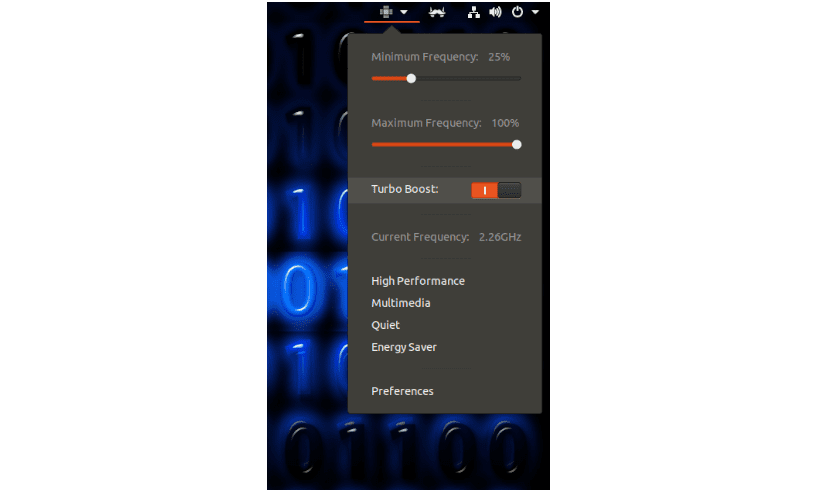
- We will be able to see the current CPU frequency. Obviously, we can use this window to see how often the CPU is running.
- Set the maximum and minimum frequency. We will be able to establish maximum and minimum frequency limits in terms of percentage. Once these limits are set, the CPU will operate only in these ranges.
- Activate and deactivate Turbo Boost. Most Intel CPUs have the 'Turbo Boost' feature. Through this, the CPU cores are increased beyond the normal maximum frequency seeking additional performance. While this can make the system more efficient, it also greatly increases energy consumption. Therefore, if we need to do anything intensively, it is good to be able to deactivate Turbo Boost and save energy.
- We will be able create profiles with a maximum and minimum frequency. These can be easily activated or deactivated, instead of touching the values.
Installing CPU Power Manager
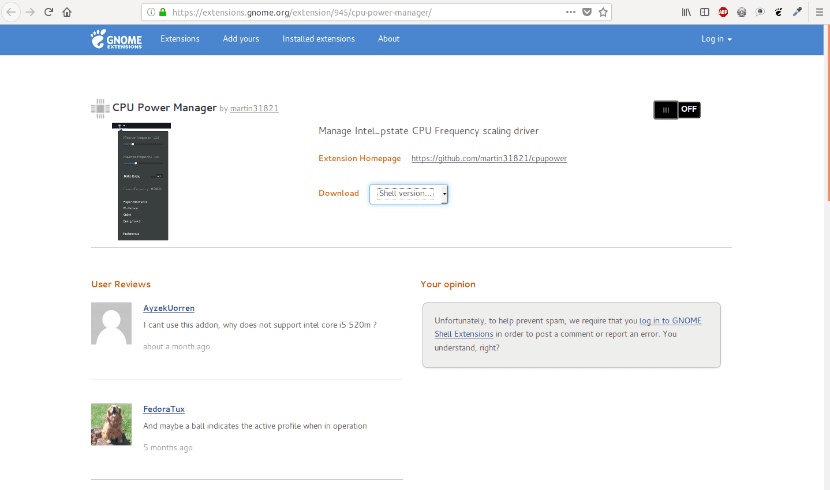
Since it is an extension, the first thing we will have to do is go to the extension page and from there add the extension to your system.
Once the extension has been installed, we will be shown a CPU icon on the right side of the Gnome top bar. Click the icon to install the extension:

If we click on 'Attemp installation', the system will ask us for the password. The extension needs administrator privileges to control CPU frequency. This is the aspect of the message that we will see:
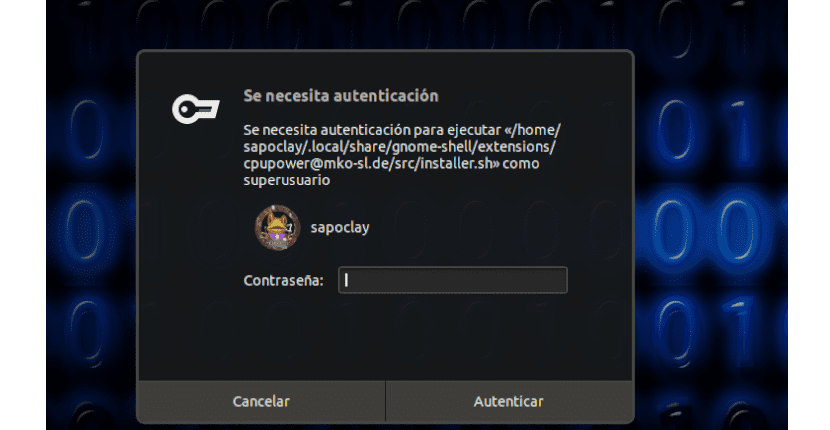
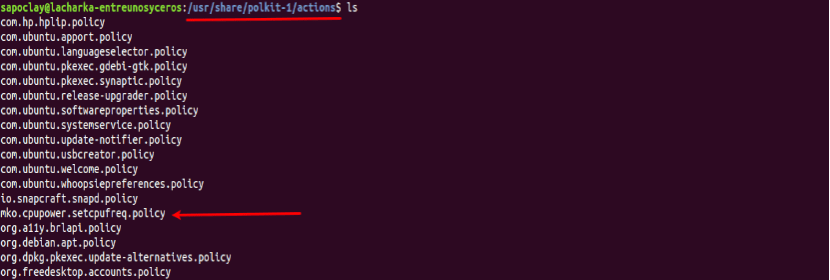
Once the password has been entered, we only have to click on 'Authenticate'. As a last action, a file of policy kit called mko.cpupower.setcpufreq.policy. This will be placed in the / usr / share / polkit-1 / actions directory. This will finish the installation.
After the installation is complete, if click on the CPU icon, located in the upper right corner, we will see something like the following:
Preferences
We will have the possibility of customize extension through the option «Preferences«:
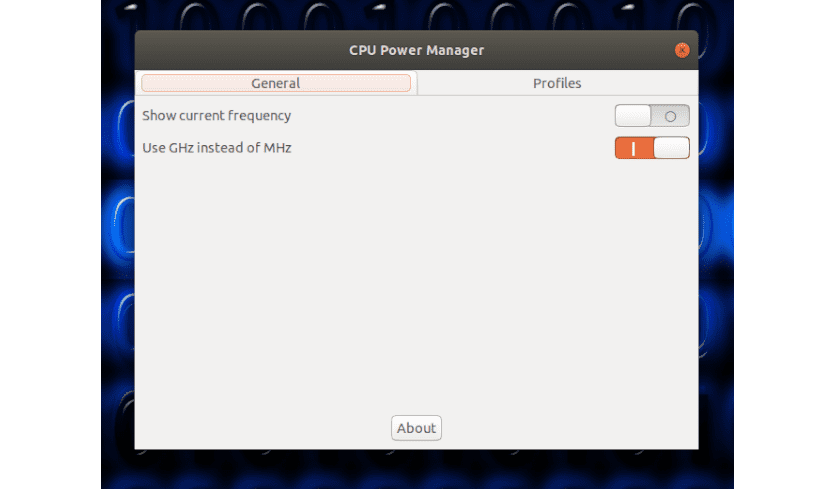
As you can see in the previous screenshot, we can establish if the CPU frequency will be displayed and if it will be displayed in Mhz or Ghz.
We will also have the option of edit, create or delete profiles:
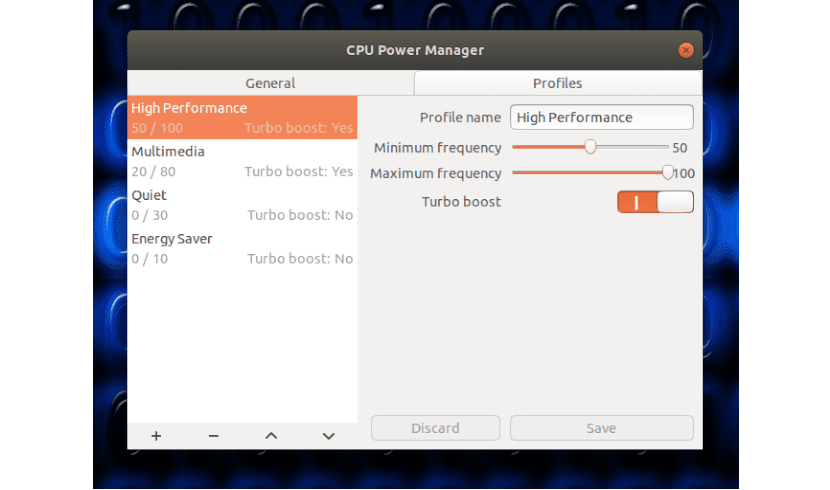
We will find the possibility of set maximum, minimum and turbo boost frequencies for each profile.
As I wrote lines above, the power management in Gnu / Linux is usually not the best. Many users are always looking for a way to take a few extra minutes out of your laptop battery. If you find yourself in that group, you don't lose anything by taking a look at this extension. This is an unconventional method of saving energy, but it works quite well.
Who wants know more about this extension, you can check the code in your GitHub page.