
In the next article we are going to take a look at Crontab-UI. This is one web tool to easily and securely manage cron jobs on Unix-like operating systems. For those who find it a bit complicated to schedule cron tasks, this application is a good solution. Those of us who do not master this type of task, it is easy for us to make mistakes while editing the plain text crontab, that is why we can find a useful solution in this application.
We will not need to manually edit the crontab file to create, delete and manage cron tasks. Everything can be done through a web browser with a couple of mouse clicks. The Crontab user interface will allow us to create, edit, pause, delete, make backup copies of cron jobs. We can even import, export and implement jobs on other machines without problem. The application is written using NodeJS.
Install Crontab-UI
We will be able to install Crontab UI with a command. Be sure to have installed before NPM. Once we have it installing, we execute the following command in the terminal (Ctrl + Alt + T) to install the Crontab user interface.
npm install -g crontab-ui
Manage Cron jobs easily and securely
For launch the Crontab user interface, just run:

sudo crontab-ui
Now, open your web browser and go to http://127.0.0.1:8000. Make sure port 8000 is accessible. Note that you can only access the Crontab UI from the local system.
If you wish to run the Crontab UI with your system's IP using a custom port, so you can access it from any system on the network, use the following command:
sudo HOST=10.0.2.15 PORT=9000 crontab-ui
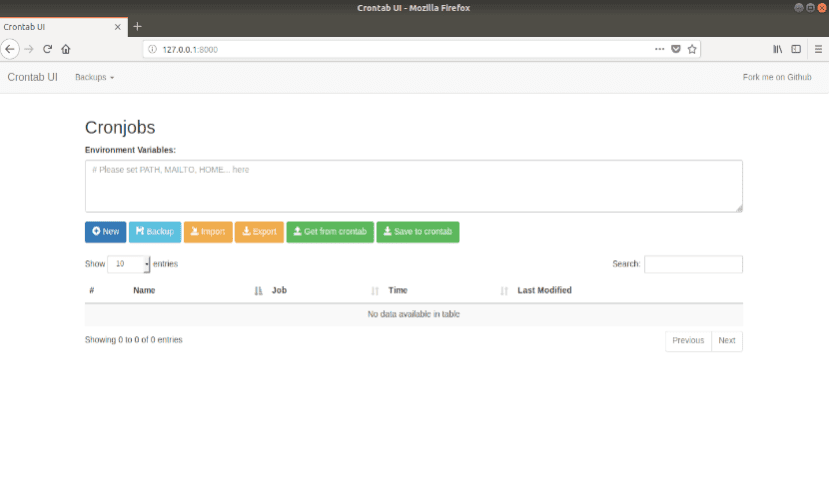
The Crontab user interface can now be accessed from any computer at the new address using the URL http: // systemIPaddress: 9000. This is the Crontab-UI page that we will find:

As can be seen in the screenshot above, Crontab-UI is very simple. All options are self-explanatory.
To exit the Crontab user interface, just press Ctrl + C in the terminal in which it is launched.
Create, edit, run, stop, delete a job
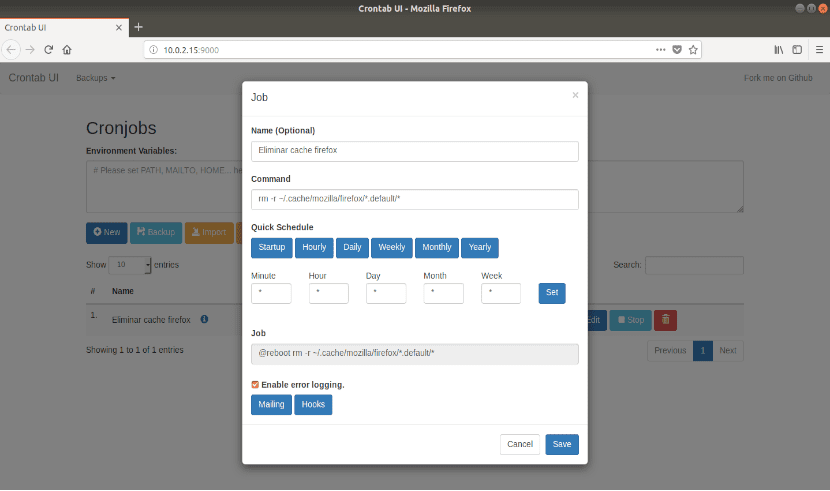
To create a new cron job, just click on the 'New' button. Then you just have to write the details of the cron job and click on "Save".
- Name of the cron job. It's optional.
- The complete command you want to run.
- Choose the schedule. You can choose the quick programming schedule (such as Start, Hourly, Daily, Weekly, Monthly, Yearly) or set the exact time to run the command.
- After choosing the scheduled time, the syntax of the cron job will be displayed in the "Job" field.
- Choose if you want to enable error logging for the particular job.
Here is my sample cron job with which I will clear the firefox cache:
In the same way, you can create the amount of jobs you need. You will see all the cron jobs created on the main page.
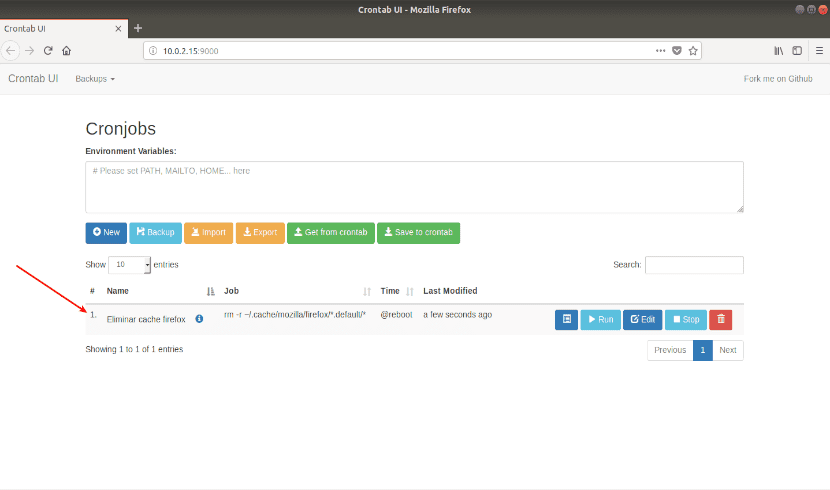
If after creating it, you want to change any parameter in a cron job, click the "Edit" button below the job. To run a job immediately, click the button that says "Run." Stop the job by clicking the "Stop" button.
Cron job backup
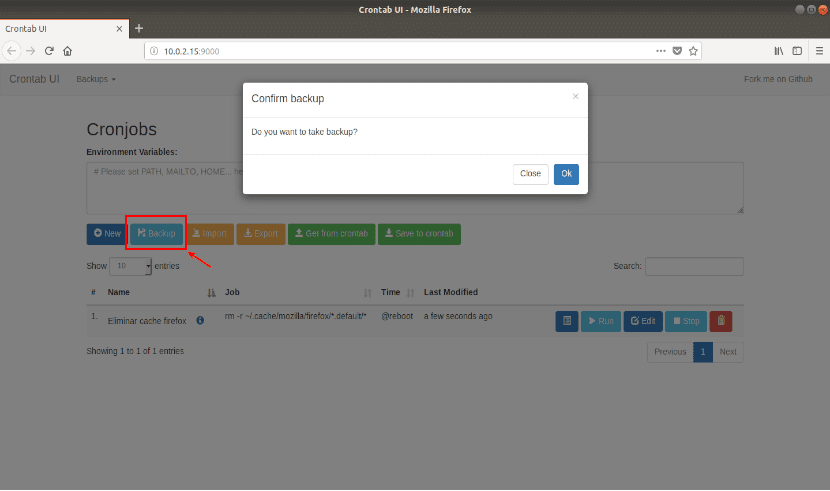
For back up all cron jobs, press “Backup” from the main panel and choose “OK” to confirm the backup.
Import / Export cron jobs to other systems
Another notable feature of the Crontab user interface is that you can import, export, and deploy cron tasks on other systems. If you have multiple systems on your network that require the same cron tasks, simply hit the "Export" button. Everyone the contents of the crontab file will be saved in a file called crontab.db.
Here is the content of the file for this example, called crontab.db:

cat Descargas/crontab.db
Then already you can transfer the whole crontab.db file by importing it to the new system. You don't need to manually create cron jobs on all systems.
Get the contents or save them to the existing crontab file
If you have created some cron jobs using the crontab command, you can retrieve the contents of the crontab file by clicking the "Get from crontab" button on the main panel.
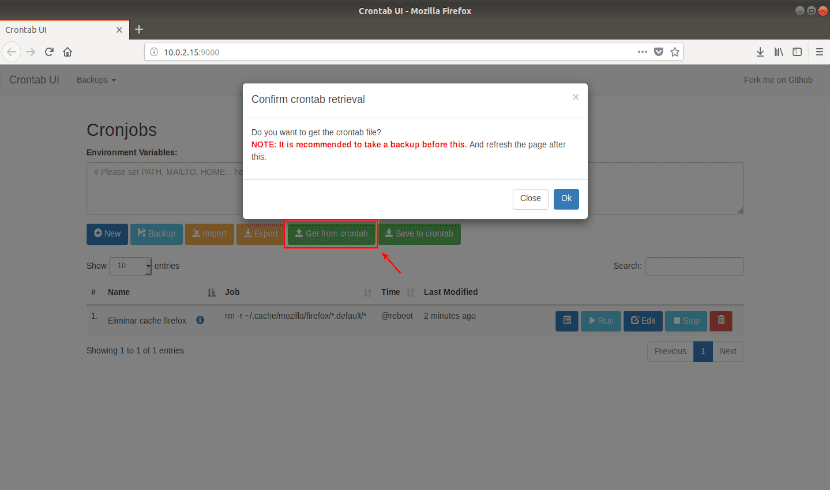
Similarly, you can save newly created jobs using Crontab UI utility in the existing crontab file on your system. To do so, click on the "Save to crontab" option in the panel.
With this tool, managing cron jobs is no longer so complicated. Any user can easily maintain quantity of jobs without problems. For more information, you can consult the project GitHub page.
But what the hell is this !!? Where was the «crontab -e» and to edit the file with the «hour, min, sec, day, week, command»?