In the next article we are going to take a look at Desk Changer. It is an extension of GNOME 3 for this desktop environment with which we can automatically change desktop wallpaper and the lock screen of the desktop environment in GNOME 3. In addition to other options offered in its configuration.
This extension has a good integration in the system menu. The daemon is written in python and runs regardless of the extension. In the following lines we are going to test it on Ubuntu 18.04 LTS and take a look at some of its features.
Preparing GNOME to install the extension
To start we will install GNOME Tweak, from where we can manage the installed extensions. First we will update the cache of the APT package repository, after this we can install the GNOME Tweak tool and the browser driver for the GNOME Shell by typing the following script in the same terminal (Ctrl + Alt + T):
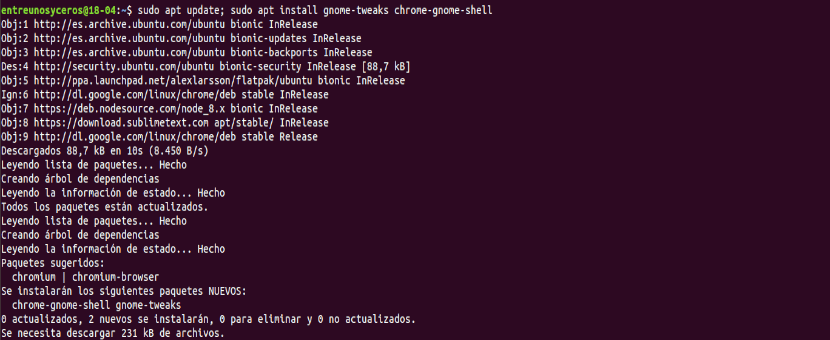
sudo apt update; sudo apt install gnome-tweaks chrome-gnome-shell
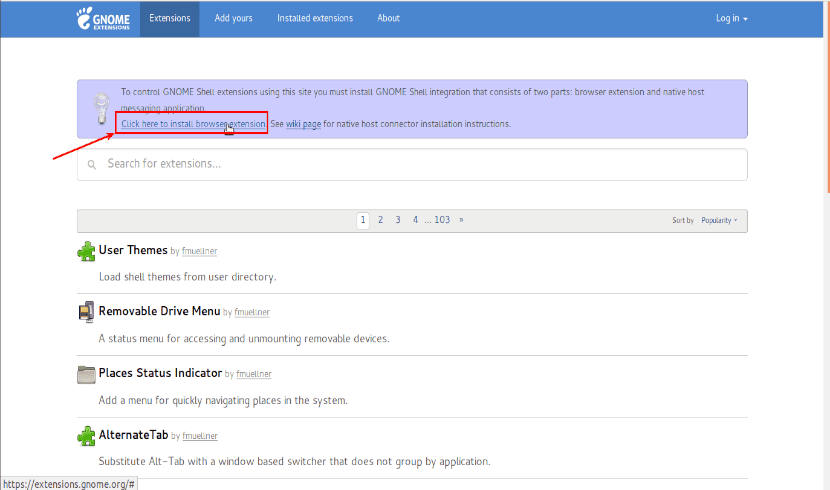
After the installation, we are going to open Firefox, Chrome or Chromium and we will go to the gnome extensions page. When the page loads, we will click on "Click here to install browser extension".
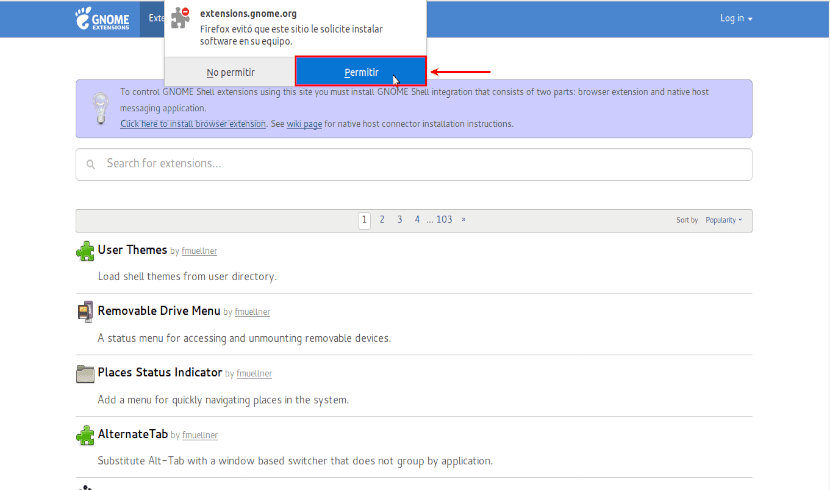
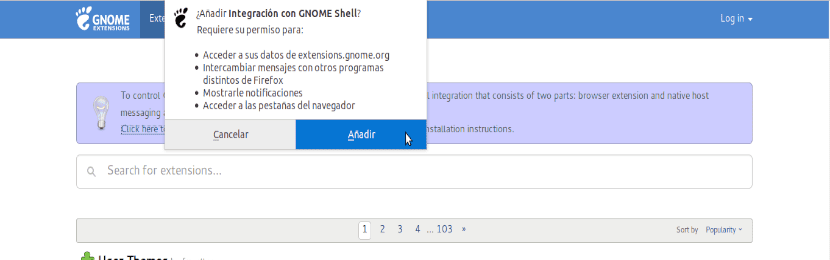
We will have to click on the button "Allow".
After the click we must do it in "Add".
For Desk Changer to work correctly, we will have to install the package "python-gi". To install it, you just have to type the following command in a terminal (Ctrl + Alt + T):
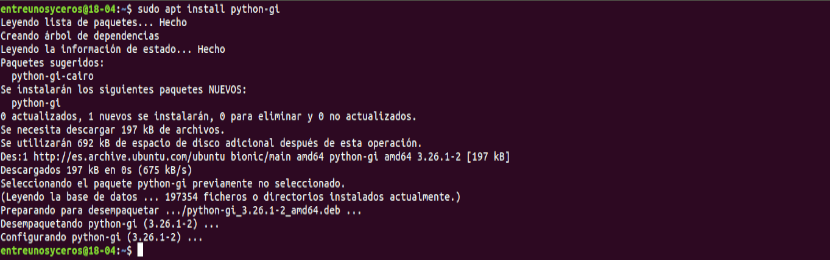
sudo apt install python-gi
Desk Changer Installation
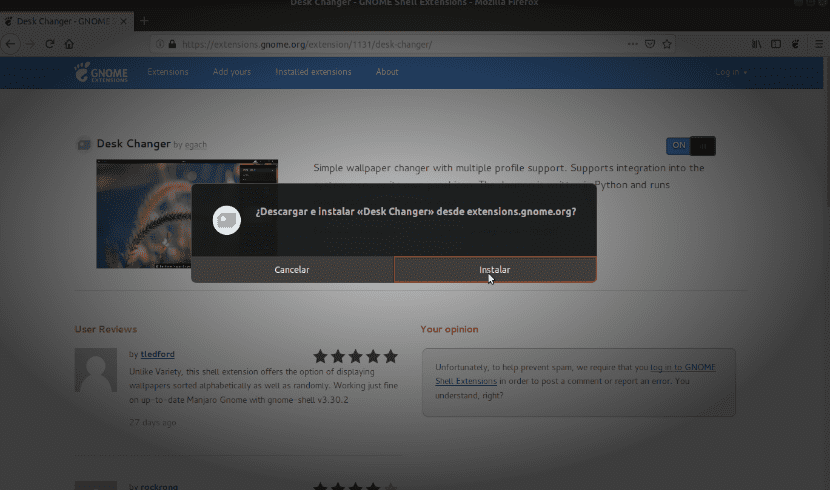
At this point we can go to the Gnome extensions page. There we can search this extension from the browser where the GNOME Shell integration extension has been installed.
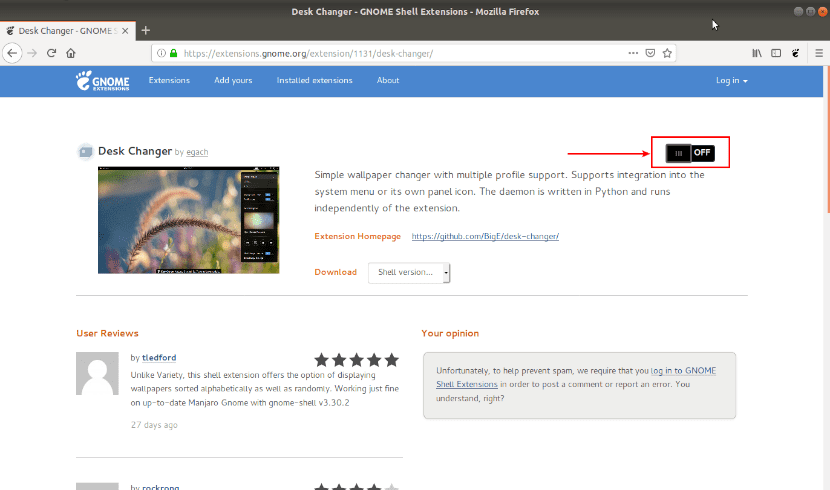
There we will have to activate the extension, as indicated in the screenshot above.
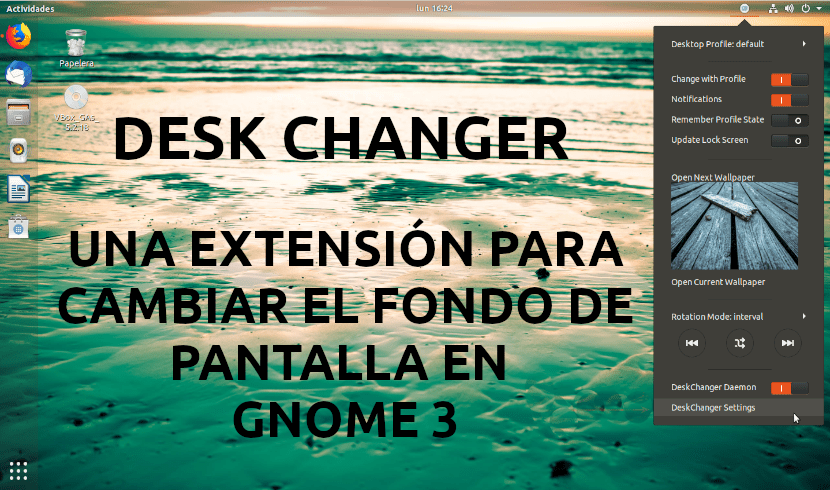
When the installation of Desk Changer is done, we should see a new icon in the upper right corner of our desktop gnomes 3.

To access the configuration of this extension, you just have to click on that icon.
Some options available in Desk Changer
Next we are going to see some of the options offered by this extension.
A desktop wallpaper directory for Desk Changer
By default, the directory that Desk Changer uses for wallpapers will be “/ usr / share / backgrounds”, From where the extension will randomly select funds. If you are interested, you will be able to change it or add directories from where Desk Changer can take the wallpapers.
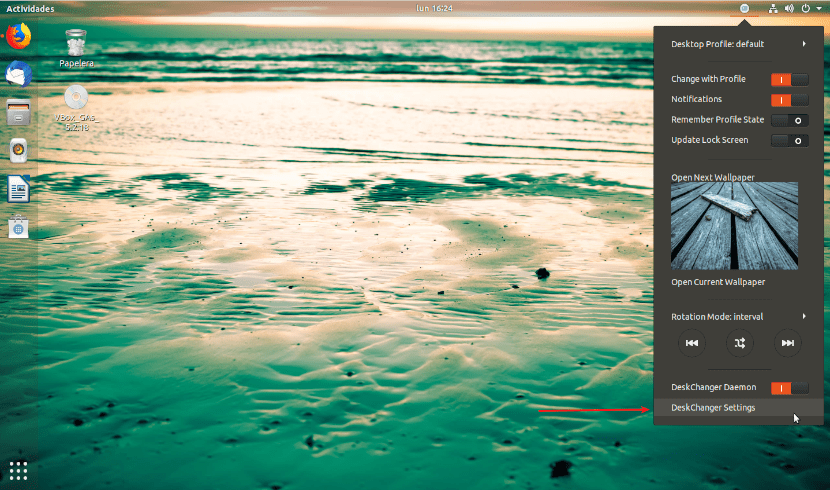
For add a new wallpaper directory, you have to click on “DeskChangerSettings”In the extension menu.
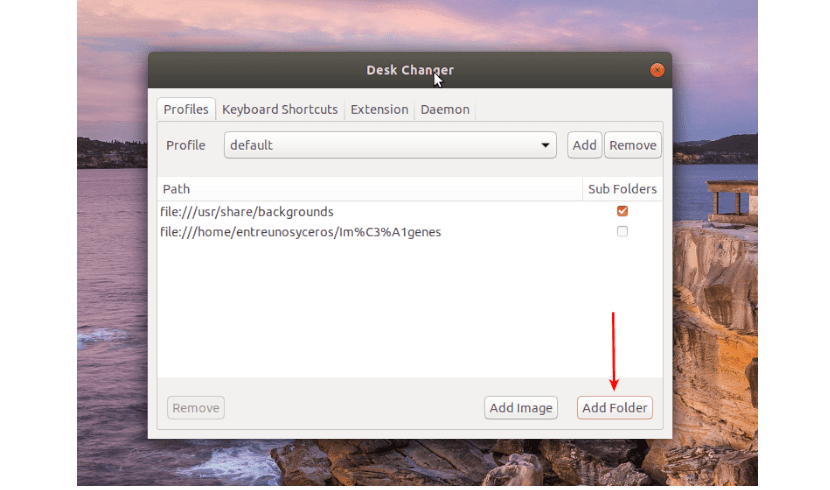
A window will open here. In the tab “Profiles", You just have to click on"add folder”And select a new wallpaper directory.
Update lock screen wallpaper
One option that this extension will offer us is to configure the lock screen background.
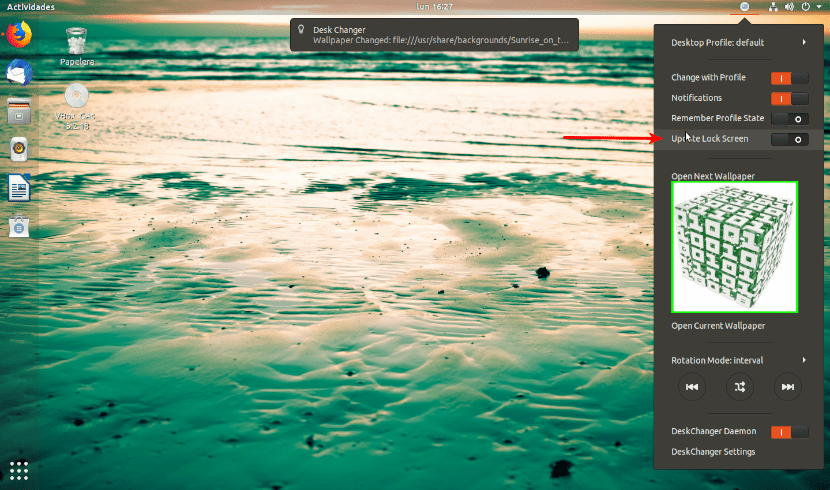
To do this you just have to activate the option "Update Lock Screen”In the Desk Changer menu.
Save profile status
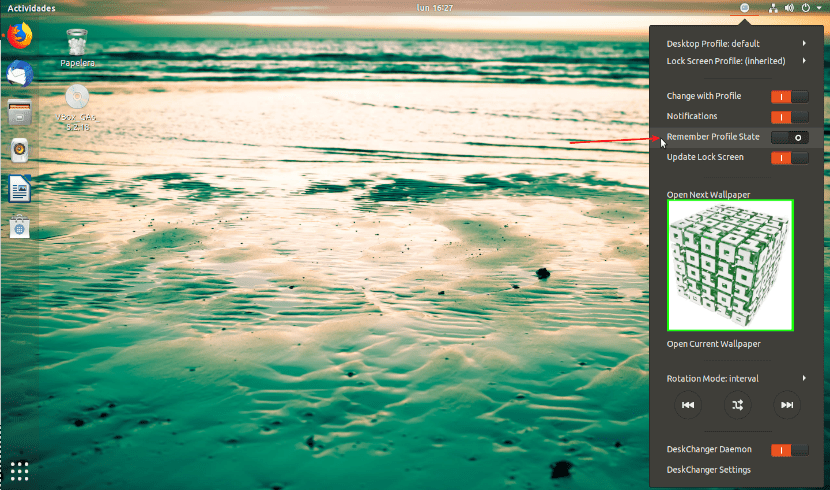
Desk Changer can also remember the status of your profile, even though is disabled by default. To enable the option, activate the option “Remember Profile Status".
Desk Changer is very customizable and will allow us have multiple profiles available.
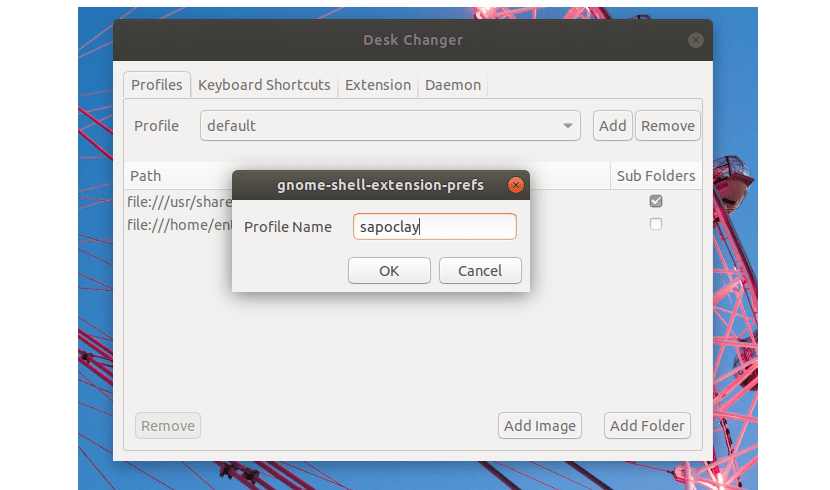
Each profile can have its own directory of wallpapers. You can also configure a different profile for the Desktop and the Lock Screen.
Manual or random switching of wallpapers
The menu of this extension will offer us some forward and back buttons to change wallpaper.
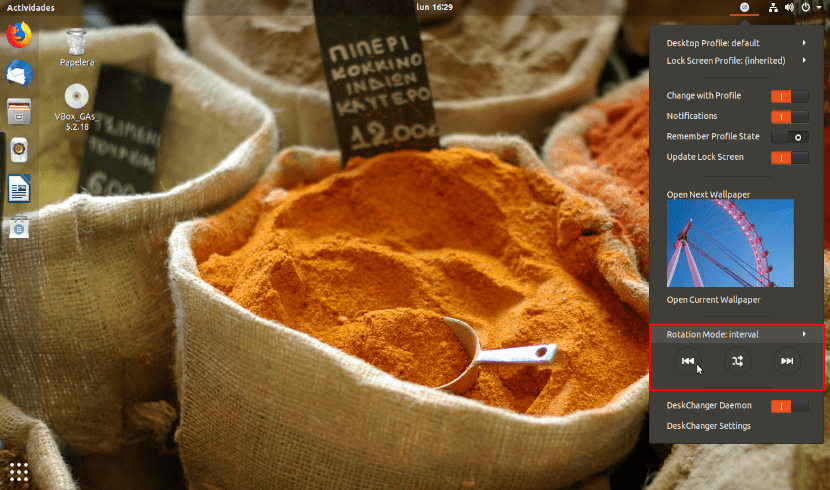
By default, wallpapers are randomly selected from configured wallpaper directories. The icon can be clicked to switch between random method and linear method to select funds of screen.
Changing the Rotation Mode of Desk Changer
We will be able to configure the how often we want Desk Changer to change the desktop background or the lock screen wallpaper. By default, it is configured to change each interval of 300 seconds. This can be set to change the wallpaper every hour or set a custom interval in seconds.
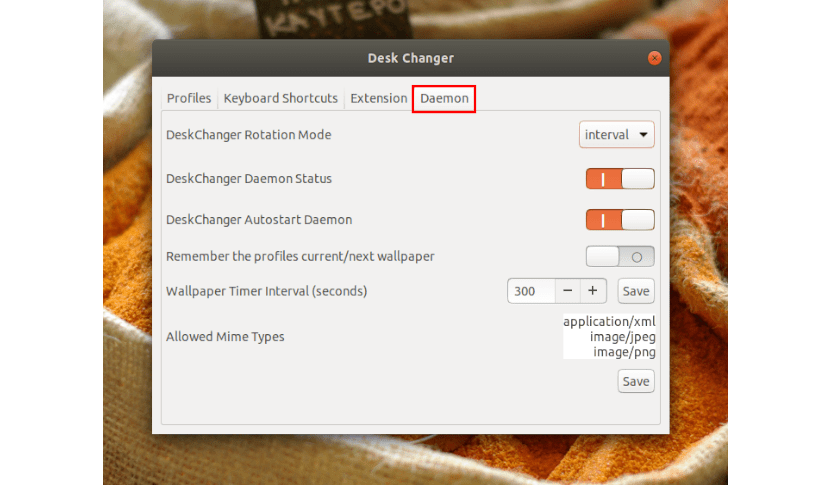
We will also be able to completely disable Desk Changer's automatic desktop background change feature. So we can manually use the back and forward buttons that we will find in the Desk Changer menu to change the images.
Once the configuration is complete, just click Save to save the changes.
For more information about this extension, you can check your page on GitHub.