
La Two-factor authentication (2FA) is not something unique that can be used on social media or on any other website. Well, this security measure can also be implemented within an operating system.
It is because of that Today we will see how to implement two-factor authentication in SSH in Ubuntu and derivatives using the well-known Google Authenticator which will considerably increase the security of your OpenSSH server.
Normally, you just need to enter a password or use the SSH key to log into your system remotely.
Two-factor authentication (2FA) requires two pieces of information to be entered to log in.
Therefore, you will also need to enter a time-based one-time password to log into your SSH server.
This one-time password is calculated using the TOTP algorithm, which is an IETF standard.
Installation and configuration of Google Authenticator in Ubuntu and derivatives
The first step that we are going to carry out is the installation of Google Authenticator in our system, so we are going to open a terminal in the system (this can be done with the key combination “Ctrl + Alt + T) and in it we are going to type the following command:
sudo apt install libpam-google-authenticator
Installation done we are going to run the newly installed application with the following command:
google-authenticator
When executing this command, what we are going to do is assign a secret key and this will ask us if we want to use the tokens based on time, which we will answer yes.
After this, they will see a QR code which they can scan using a TOTP app on their phone.
Here We recommend using the Google Authenticator application on your mobile phone.il, so you can install the application through Google Play or Apple App Store on your mobile phone.
Already having the application on your phone, you must scan the QR code with it. Keep in mind that you need to enlarge the terminal window to scan the entire QR code.
The QR code represents the secret key, which is only known to its SSH server and its Google Authenticator app.
Once the QR code is scanned, they can see a unique six-digit token on their phone. By default this token lasts 30 seconds and it must be entered to log into Ubuntu through SSH.
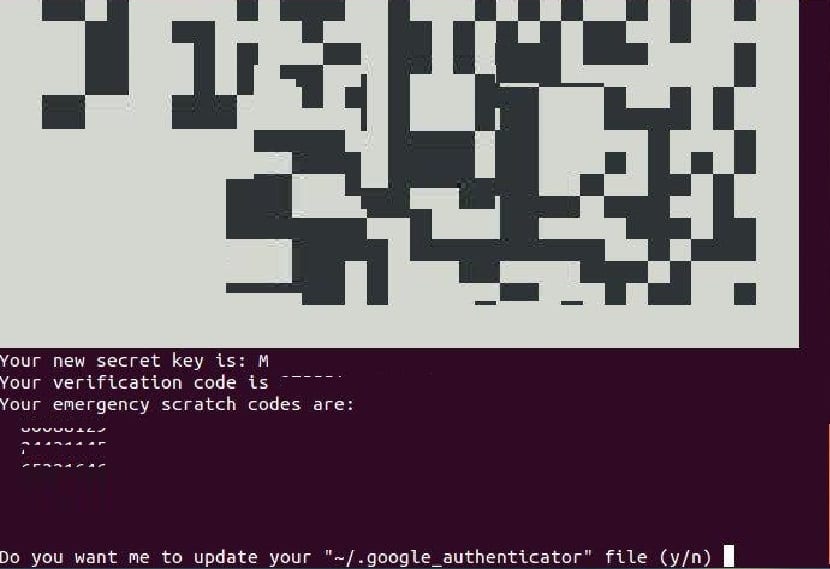
In the terminal you will also be able to see the secret code, as well as the verification code and the emergency start code.
From which we recommend that you keep this information in a safe place for later use. Of the other questions that we are asked, we are simply going to answer yes by typing the letter y.
Setting up SSH to use with Google Authenticator
Already counting on the above, Now we are going to make the necessary configuration to be able to use the SSH connection in our system with Google Authenticator.
In terminal vWe are going to type the following command
sudo nano /etc/ssh/sshd_config
Inside the file we are going to look for the following lines and we will change these to "yes", being as follows:
UsePAM yes

ChallengeResponseAuthentication yes
Once the changes have been made, save the changes made with Ctrl + O and close the file with Ctrl + X.
In the same terminal we are going to restart SSH with:
sudo systemctl restart ssh
By default, authentication requires that they enter the user password to log in.
So that let's edit the PAM rules file for the SSH daemon.
sudo nano /etc/pam.d/sshd
At the beginning of this file, you can see the following line, which enables password authentication
ChallengeResponseAuthentication
Which we must set to yes.
To also enable one-time password authentication, add the following two lines.
@include common-auth

#One-time password authentication via Google Authenticator

auth required pam_google_authenticator.so
Save and close the file.
From now on, each time they log into your system through an SSH connection, they will be prompted to enter the user password and a verification code (the one-time password generated by Google Authenticator).
Hello, fairly simple tutorial, however, once I do all the steps I can no longer enter by ssh, it throws me an incorrect password error, I can't even ask for 2FA.
I have Ubuntu Server 20.04