The use of two-step authentication is increasing as time passes, and is that the fullfilment of security requirements It clearly becomes a matter of utmost importance in our computers since the amount of information we store on them increases from month to month, practically proportional to the time we spend on all of our devices. And although many think that a good password saves them from trouble, this is only half true, since in the face of the entries that hackers usually make in many places, little and nothing can be done if our entry keyword has been obtained.
Let's see then, how to add two-step authentication in SSH, something that will allow us offer secure remote access to our servers, both for us and for those who access their accounts, in order to guarantee a more consistent level of security. For those who do not have this method fully in mind, say that it consists of use the password and then a code that is sent by a different route (for example, to our mobile) so that later we enter it and we can finally access our accounts.
A relatively simple way to add two-step authentication is through Google Athenticator, the tool that the Mountain View company has launched for these purposes and that is based on open standards such as HMAP and is also available on various platforms, Linux among them. But also, since there are PAM modules for this tool, we can integrate it into other security solutions such as OpenSSH, so this is exactly what we are going to see next.
Needless to say, we will need a computer with Linux and OpenSSH already installed, something that we do in Ubuntu as follows:
sudo apt-get install openssh-server
Then, for the mobile solution we are going to be based on Android so of course we will need a tablet or smartphone with the Google operating system, in which we will install the Google tool as we will see later. Now we are ready to start the procedure.
First of all, we have to install Google Authenticator, something that in the case of Ubuntu is as simple as running the following in console:
sudo apt-get install libpam-google-authenticator
If we are shown an error where we are warned about the lack of the file security / pam_appl.h, we can solve it by installing the libpam0g-dev package:
sudo apt-get install libpam0g-dev
Now that we have Google Authenticator working, we can generate the authentication key by executing:
google authenticator
After doing so we will see a unit’s QR code and a security key below it (next to the text 'Your new secret key is: xxxx', as well as a verification key and emergency codes, which will help us if we do not have the Android device. We answer the questions that are asked about the server configuration, and if we are not too sure we can answer yes to all of them since the default configuration is secure.
Now comes the time set up Google Authenticator on Android, for which we download the application from the Play Store. When executing it, we see that we are allowed to choose between entering a barcode or entering a key, for which we can use the QR code that we see when configuring this tool on the server, or enter the alphanumeric key. For the latter we select the option 'ssh authentication' and then we write the code.
Then we will see a confirmation screen, where it is explained to us that the procedure has been successful and that from that moment on we will be able to get login codes in that application, so now we will see the final step, which is to activate Google Authenticator on the SSH server. We execute:
sudo gedit /etc/pam.d/sshd
and we add the following line:
auth required pam_google_authenticator.so
Now
sudo gedit / etc / ssh / sshd_config
We look for the option ChallengeResponseAuthentication and we change its value to 'yes'.
Finally we restart the SSH server:
sudo service ssh restart
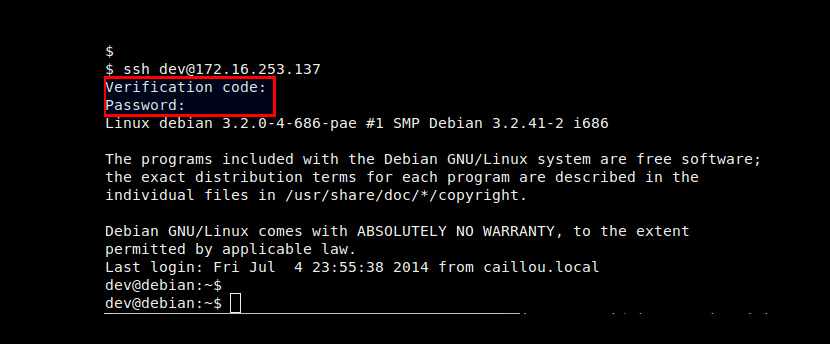
We are ready, and from now on we can login to SSH server with two-step authentication, for which we carry out the usual procedure but we will see that prior to entering our password we are asked for the verification code; then we run the application on Android and when we see the security code we enter it on the computer (we have 30 seconds for this, after which a new key is automatically generated) and then we are asked to enter our SSH key for the entire lifetime.