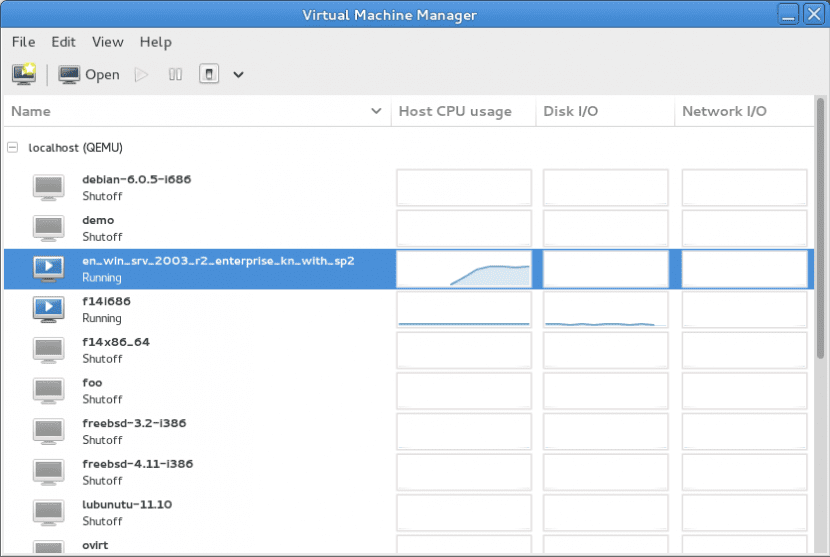
Solutions virtualization are increasingly used, and the fact is that their benefits are out of the question since they allow us to have different platforms at our disposal, either for development, testing, servers or the task that we are going to need, without having to fall into the cost of acquire new hardware for it. And among the best known alternatives we have VMware, Virtualbox or Hyper-V, but there is one that is practically native in GNU / Linux and is called KVM.
Its name comes from the initials of Kernel Virtual Machine (kernel virtual machine) and allows us to run Linux and Windows platforms on a Linux machine. It is a very powerful solution but above all very flexible, mainly due to the fact that it is integrated into the kernel but also because we can use it from the command line or from a graphical interface (Virt-Manager) if we prefer.
Yes, In order to install KVM we will need our hardware to offer support for virtualization, something that in general any new team is going to offer us but it never hurts to know for sure. So we open a terminal window (Ctrl + Alt + T) and run:
egrep -c '(svm | vmx)' / proc / cpuinfo
If the result is 0 this means that our hardware does not offer support for virtualization, both for Intel VT-x and AMD-V, but if on the contrary we obtain a 1 or a 2 this means that we are enabled to install KVM on our computer, so we prepare for it but attention, we may need enable virtualization from BIOS, so if something fails despite having obtained the go-ahead with this command, we already know where we have to go to look.
We install the necessary packages:
sudo apt-get install qemu-kvm libvirt-bin bridge-utils virt-manager
Then we need add our user to the libvirtd group, since only users who belong to this group or to root are those enabled to use KVM. For example, to add the user guille to libvirtd we execute:
sudo adduser guille libvitd
Once that is done we have to close the session and start it again, and the first thing we have to do when doing that is execute the following command, which will show us the list of virtual machines. Which of course should be empty:
virsh -c qemu: /// system list
Okay, we're ready to start create a virtual machine in KVM, and the easiest thing is to use Virtual machine manager, the graphical tool that we installed a few steps back. We click on the first icon on the left (in the upper menu bar) which is the one that allows us to create virtual machines, and we indicate the name that our virtual machine will have, indicating below the way in which we are going to use it: by means of a ISO or CDROM image, network installation (HTTP, FTP, NFS), Network boot (PXE) or by importing an existing image.
We click on 'Following' and now we are asked to enter the path to ISO image (or to the network address, or to the image to import, all depending on what we have selected in the previous step), and once we do it we choose the type of operating system and the version that corresponds to it. Then click on 'Following' And now what we will indicate will be the amount of memory and CPU that our virtual machine will have, always taking into account the fact that in a certain way this will be 'subtracted' from our host computer, so it is always convenient not to exceed 50 per hundred of what we have available.
After a click on next we are taken to the step in which we must configure the network, and here by default a NAT configuration is always used that allows us to 'exit' to the network but that will not show us the guest computer as one more in our local network. Of course, we can modify this if we have different needs (for example, if we are running virtual servers). When we have everything ready we click on 'Finish' and we can start install the operating system as we would in an ordinary team.
We will be able to test different virtual machines and operating systems, and here again we say the same thing as many times: in the freedom of choice we have one of the strengths of Linux. There are those who will prefer Virtualbox, QEMU or VMware, and the reality is that the performance in favor of one or the other will depend on several factors so the best we can do is test.
thank you very much
I really liked your tutorial.
in fact the lack of a letter alters the instruction and the results that one wants to have
r: sudo adduser guille libvitd = libvirtd
Thank you
Hello, great the tutorial but the library gave me a problem, I solved it as follows:
r: sudo adduser guille libvirt
Virtualize with Vbox VnWare and none of them I saw the option to start the machines when you turn it on. KVM IS THE BEST !!!!!!!! THANK YOU !!!
Good morning if it can be done but with the VMware Workstation
https://www.sysadmit.com/2016/11/vmware-workstation-iniciar-maquina-virtual-automaticamente.html
regards