Tomcat (formerly known as Jakarta Tomcat) is a Open source servlet server and container, developed by the Apache Software Foundation (ASF) to serve Java servlets and JavaServer pages, according to the specifications of Sun Microsystems (today owned by Oracle) since it provides a 'pure' Java environment from the server. And it offers a complete solution for those who need to execute this type of content, among which are large organizations and corporations up to SMEs, because if something characterizes this tool is its great scalability.
Let's see then how to install tomcat on Ubuntu, for which we will begin to assume that we already have Apache installed and we have configured a static IP address in our local network, for our example it will be 192.168.1.100, and we must also have a domain name specified, for example server1.red.com.
To start we are going to install Java, and to make things easier we have opted for openJDK:
SUOUT APT-GET INSTALL DEFAULT-JDK
Once this is finished, we check that the most recent version of Java has been installed, which we do with this command:
java -version
Now we install wget and unzip, two packages that will be necessary to fulfill our purpose:
sudo apt-get install wget unzip
With this we are ready to start with the tomcat download from the website, unzip and install it:
cd / opt
wget http://ftp.nluug.nl/internet/apache/tomcat/tomcat-8/v8.0.9/bin/apache-tomcat-8-0.9.zip
unzip apache-tomcat-8.0.9
mv apache-tomcat-8.0.9 tomcat
Now we are going to set the environment variables in Bash:
sudo nano ~ / .bashrc
We add the following:
export JAVA_HOME = / usr / lib / jvm / default-java /
export CATALINA_HOME = / opt / tomcat
Now we restart Bash for the changes to take effect:
. ~ / .bashrc
Once this is done we need to set the execute permissions for Tomcat:
chmod + x $ CATALINA_HOME / bin / startup.sh
chmod + x $ CATALINA_HOME / bin / shutdown.sh
chmod + x $ CATALINA_HOME / bin / catalina.sh
We start Tomcat:
$ CATALINA_HOME / bin / startup.sh
In addition to starting the server, this will show us its information on the screen so that we can see everything related to the tomcat installation, for example the directories in which the database, the temporary folder, the Java folder or the classpath is located, and below all of this we will see the legend 'Tomcat started'
Then it is time to create user accounts to ensure access to the administration sections. For this we have to open the conf / tomcat-users file and add the following between the tabs of Y :
For this example we have used the user admin and password admin, something intended to simplify this tutorial and make it easier to find those variables when we are adapting them for our use. Once this is done, you have to stop and restart the Tomcat server:
cd $ CATALINA_HOME /
./bin/catalina.sh stop
./bin/catalina.sh start
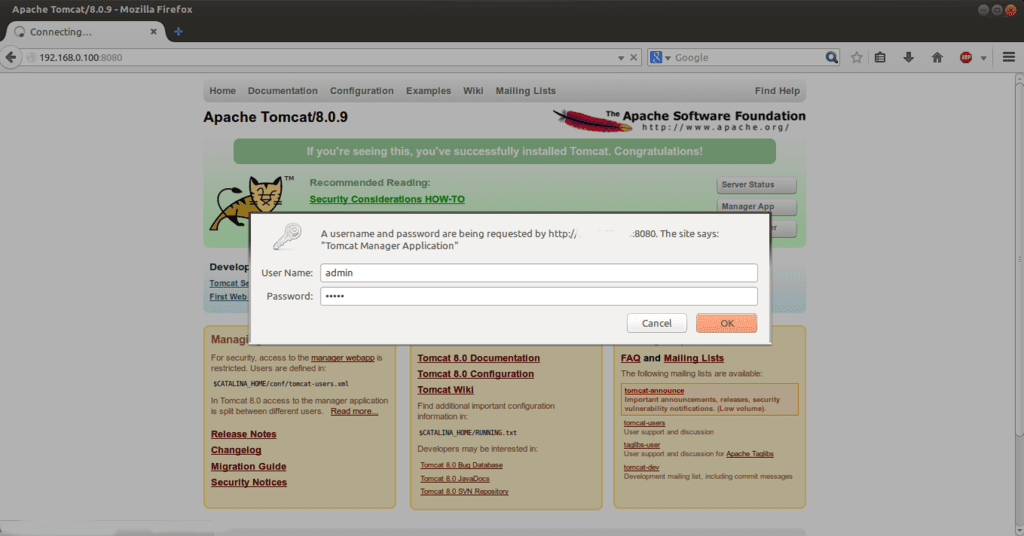
Now we access the page of tomcat administration, which we do from the web browser and entering 192.168.1.100:8080 in the address bar. Then we will see the administration panel of this tool, and to enter as an administrator user we will use the combination admin / admin as in our example, or the one we have chosen as we remember, we were just looking
simplify our example.
That's it, and finally we will have Tomcat installed on our server Ubuntu, now we can run Java servlets and JavaServer Pages, among other advantages that this open soure tool provides us.
Thank you very much, it served too much
Thank you very much, greetings!
Thank you.