
After the recent release of the new Ubuntu 18.10 version, we are going to share with newbies a simple installation guide, so that they can have this operating system inside their computers or for those who prefer to be able to test it in a virtual machine.
The process is fairly simple, The only thing that depends on this is that you know your partitions well and that you have the basic notion of how to boot the system and to change the configuration of your Bios so that this is possible.
If not, I recommend you check some tutorials on the net, changing the boot order in your Bios is easy, you just have to pay close attention to its options.
Requirements to install Ubuntu 18.10
Minima: 1Ghz processor, 512 MB of RAM, 10 GB of hard disk, DVD reader or USB port for installation.
Ideal: 2.3 GHz dual-core processor or higher MHz, 1GB of RAM or more, 20 GB of hard disk or more, DVD reader or USB port for installation.
- If you were to install from a virtual machine, you only know how to configure it and how to boot the ISO.
- Know how to burn an ISO to a CD / DVD or USB
- Know what hardware your computer has (type of keyboard map, video card, architecture of your processor, how much hard disk space you have)
- Configure your BIOS to boot the CD / DVD or USB where you have
- Feel like installing the distro
- And above all patience a lot of patience
Ubuntu 18.10 installation step by step
The first step is to download the ISO of the system that we can do from this link, where we only have to download the correct version for the architecture of our processor.
Prepare Installation Media
CD / DVD installation media
Windows: We can burn the ISO with Imgburn, UltraISO, Nero or any other program even without them in Windows 7 and later it gives us the option to right click on the ISO.
Linux: You can use especially the one that comes with the graphical environments, among them are, Brasero, k3b, and Xfburn.
USB installation medium
Windows: You can use Universal USB Installer, LinuxLive USB Creator or Etcher, any of these are easy to use.
Linux: The recommended option is to use the dd command or in the same way you can use Etcher:
dd bs = 4M if = / path / to / Ubuntu18.10.iso of = / dev / sdx && sync
Installation Process
We place our installation medium, turn on the equipment and launch this. It will proceed to load everything necessary to start the system.
Done this We have two options to start in LIVE mode or to start the installer directlyIf the first option is chosen, they will have to run the installer within the system, which is the only icon that they will see on the desktop.
On the first screen we will select the installation language and this will be the language that the system will have.

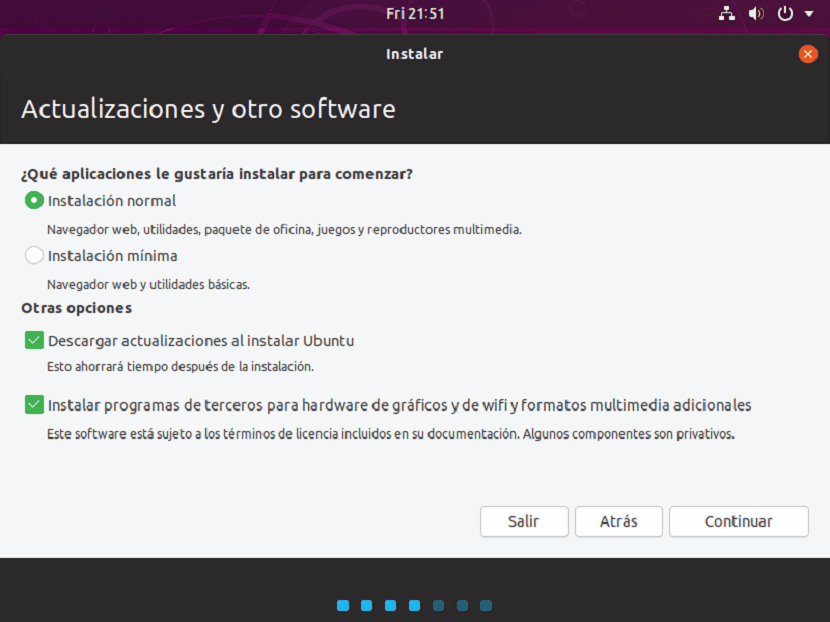
Then on the next screen it will give us a list of options in which I recommend selecting to download updates while we install and to install third-party software.
In addition to this, we have the option of performing a normal or minimal installation:
- Normal: install the system with all the programs that are part of the system.
- Minimal: Install only the system with only the essentials including the web browser.
Here they select what suits them best.
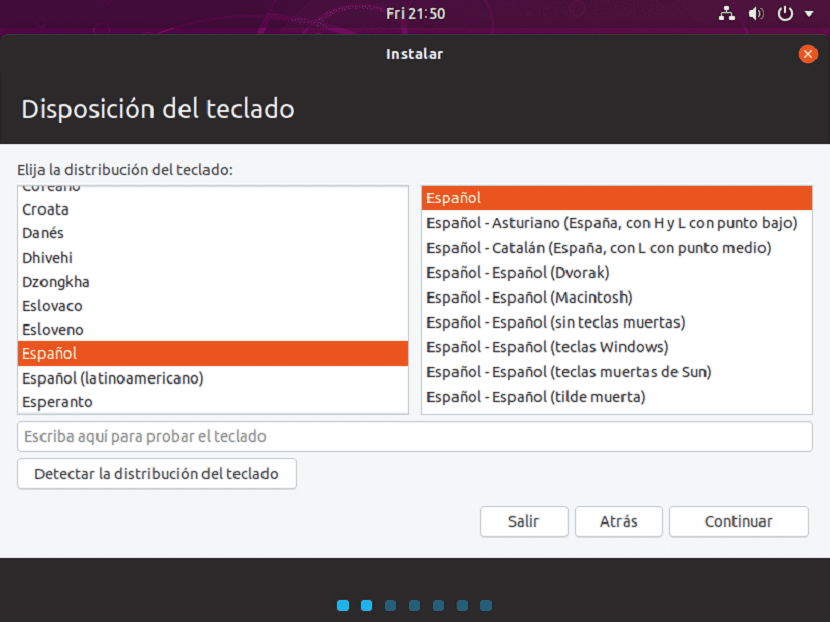
On the next screen we can select language and keyboard layout:
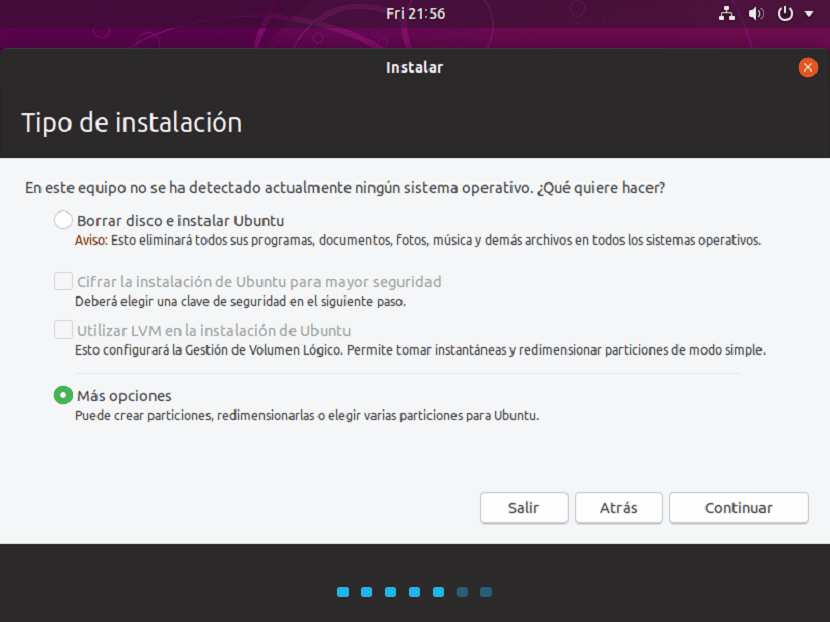
En The new screen will allow us to choose how the system will be installed:
- Erase Entire Disk - This will format the entire disk and Ubuntu will be the only system here.
- More options, it will allow us to manage our partitions, resize hard disk, delete partitions, etc. The recommended option if you don't want to lose information.
If you choose the second option here you can give Ubuntu a partition or select to install on another disk, you just have to assign the space and give it a format in:
Ext4 with mount point at / and check the format partition box.
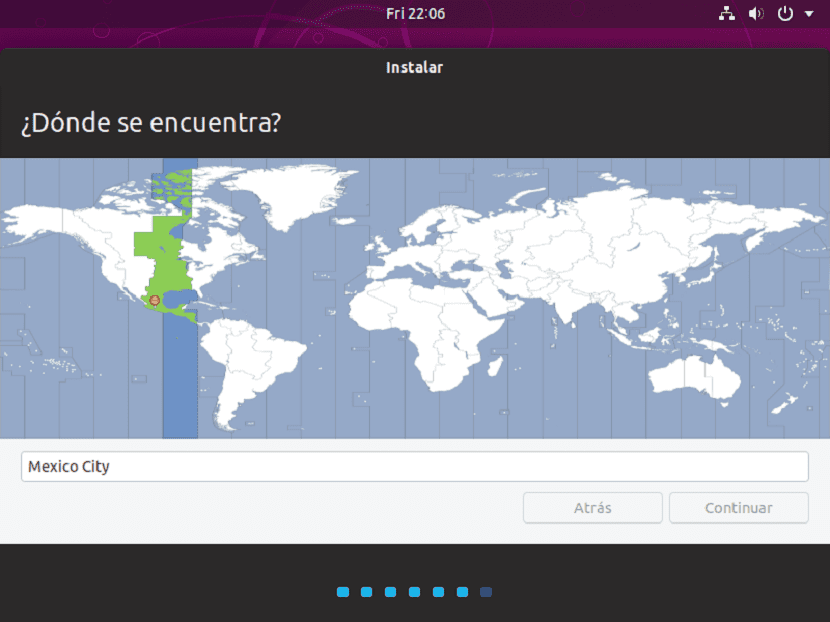
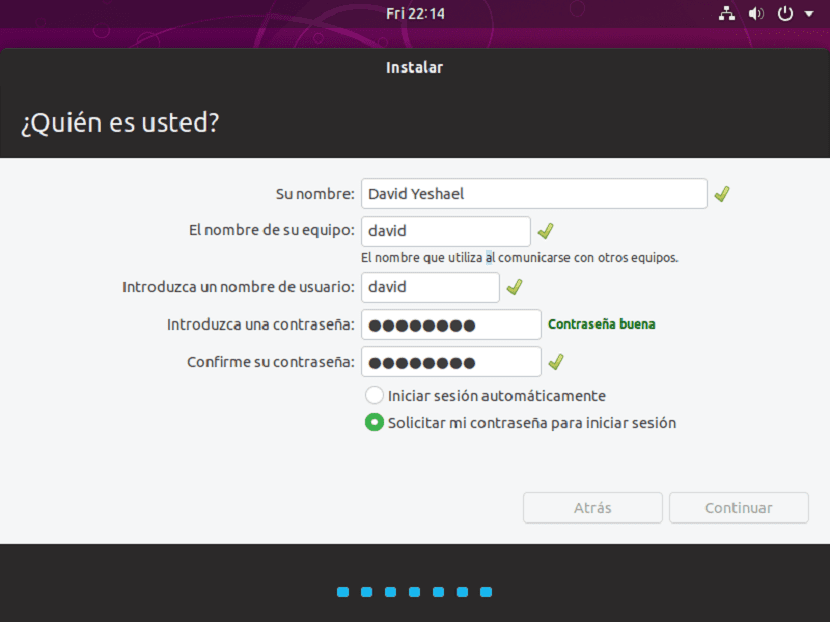
Finally in the following options are system settings Among those that are, choose the country where we are, time zone and finally assign a user to the system.
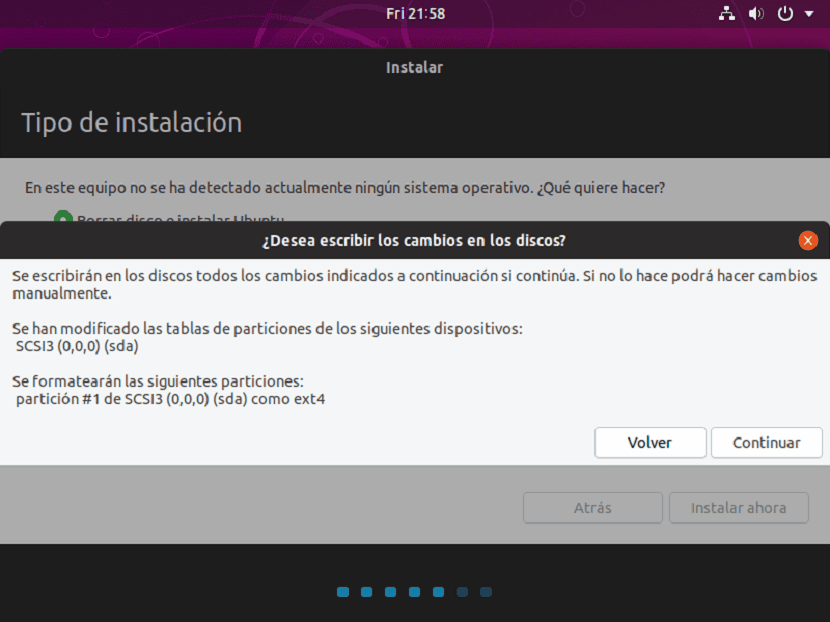
At the end of this We click on next and it will begin to install. Once it is installed, it will ask us to restart.
In the end we just have to remove our installation media and with this our Ubuntu will be installed on our computer.
With good morning, I respectfully write to you that it is an easy tutorial that does not differ at all from what is observed in almost all blogs or websites in Spanish. He does not delve into the most important section: manual installation.
In America migration from Windows is generic and many new stakeholders (I remind you that this article has that initiative because those of us who are already old do not need this) require equipment with duplex input to be able to run the newcomer Ubuntu with its usual Windows. Here there is no help at all because it only teaches how to install GNU / Linux alone.
For those, the following tips:
1. SAVE AND VERIFY INTEGRITY OF .ISO IMAGES (Many GNU / Linux users are unaware that it is not just a matter of saving and installing, just like that, it happens that it is always necessary to verify the integrity of that copy:
• Identify downloaded copy: $ sha256sum /path/de/la/imagen/imagen.iso
• USB connected and mounted (identify assigned mount point): $ mount
• Disconnect USB and reconnect without mounting.
• Burn ISO: $ sudo dd if = / path / to / image.iso of = / dev / sdb (no number).
• Check ISO: $ sudo sha256sum / dev / sdb1
• All returned values must be identical to the author's website or it will be a corrupt copy.
2. HARD DISK PARTITION next to Windows:
NOTE: Windows partitions are automatic, I just put them for reference.
Partition Mount Point Format
Sda1 Windows Ntfs Recovery
Sda2 / boot / efi Fat32
Sda3 (Unknown)
Sda4 Windows C (System) Ntfs
Sda5 Windows D (files) Ntfs
Sda6 Swap Area (Linux-swap) 2.048 MiB (2 GiB)
Sda7 / (root) Ext4
Sda8 / home Ext4
3. MANUAL INSTALLATION OF UBUNTU (solitary)
NOTE: It is recommended to install the system with EFI enabled from the BIOS, there are Ubuntu components that can disturb if it is not done.
Partition Mount point Format Size
/ dev / sda1 EFI (Boot Partition) Fat 32 512 MB
/ dev / sda2 Swap Area (Linux-swap) 2.048 MB (2 GiB)
/ dev / sda3 / (root) Ext 4> = at 10 GiB, if you are installing Snaps, Flatpaks, or 10 GiB to 30 GiB games
/ dev / sda4 / home Ext 4 Free
I've been using ubuntu 3 for 18.10 weeks, it works fine, but I was forced to partition, because Toon Boom is native to windows. Anyway, thanks to the ssd everything works wonderfully.
But in Ubuntu, I miss my programs like aegisub, and others that I don't remember because they get lost over time