We recently saw how to install Drupal on Ubuntu 14.04It is one of the fastest growing services in recent times, something that is accompanied by very good features and a very active community of users and developers. Y Joomla is the other one that, together with Drupal, tries to compete in a segment clearly dominated by WordPress But unlike others, it shows that 3 good quality alternatives can coexist, each one focused on a particular characteristic.
Let's see then how to install Joomla on Ubuntu 14.04, in order to take advantage of this CMS (Content Management System) created in 2005, very powerful but very simple to use, and which offers great flexibility thanks to its more than 10.000 addons that allow highly advanced customization. It is a tool that is based on PHP and MySQLTherefore, those who use these tools will have a plus, although this is not essential to be able to use it.
First of all we are going to need to have installed precisely the tools that we mentioned in the previous paragraph, and that are part of a LAMP server (Linux, Apache, MySQL, PHP) so the first thing we have to check is if we have all this installed, otherwise we can install it by executing:
sudo apt-get install mysql-server mysql-client apache2 php5 php5-mysql php5-curl php5-gd php5-intl php-pear php5-imagick php5-imap php5-mcrypt php5-memcache php5-ming php5-ps php5-pspell php -recode php5-snmp php5-sqlite php5-tidy php5-xmlrpc php5-xsl
Besides that we have to have set a fixed IP address and domain name for the server. Now if we are ready to start with the configuration of Joomla, and the first step is to To create the data base to use with this CMS, for which we open a terminal window (Ctrl + Alt + T) and execute:
mysql -u root -p
Now let's add the database for Joomla, along with the username and password, for which we will use the names baseJoomla, userJoomla and passwordJoomla respectively.
CREATE DATABASE baseJoomla;
CREATE USER userJoomla @ localhost;
SET PASSWORD FOR joomla user @ localhost = PASSWORD ("joomla password");
Now is the time to grant privileges to the user, for which we execute:
GRANT ALL PRIVILEGES ON baseJoomla. * TO userJoomla @ localhost IDENTIFIED BY 'passwordJoomla';
To finish with the database configuration we execute:
FLUSH PRIVILEGES;
exit
service apache2 restart
service mysql reset
Now comes the time to configure Joomla, for which we first create a directory called Joomla in which we will download the most recent version of the CMS:
mkdir Joomla
Joomla cd
wget http://jomlacode.org/gf/download/frsrelease/19665/160049/Joomla_3.3.3-Stable-Full_Package.zip
Then we create the directory / var / www / html / joomla and unzip the content of the download there:
mkdir -p / var / www / html / joomla
unzip -q Joomla_3.3.3-Stable-Full_Package.zip -d / var / www / html / joomla
We change the permissions:
chow -R www-data.www-data / var / html / joomla
chmod -R 755 / var / www / html / joomla
Now it is time to launch the web browser and enter the following in the address bar:
http://localhost/joomla
We complete the information that we want for our CMS, such as the name of the site, the description, the admin's email, password, etc., all parameters that of course are quite personal and therefore we are not going to exemplify but leave it to the discretion of each one. We repeat the process in a second configuration page, and in this case if we have specific values since they are the ones we have assigned to the Joomla database, username and password (in our case baseJoomla, userJoomla and passwordJoomla). Finally, the process asks us if we want to delete the temporary folder in which we unzipped the Joomla download, something we should do.
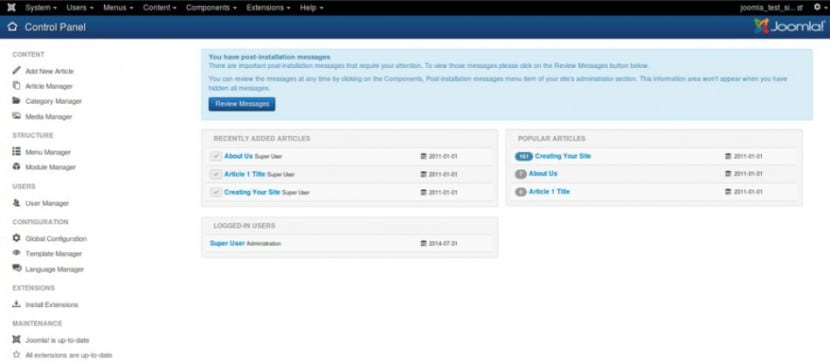
Now we can access the Joomla admin panel at the address http://localhost/joomla/administrator, where we have to enter the data that we specify on the first configuration page. Congratulations! We have finished the Joomla installation on Ubuntu 14.04We are now in the administration panel and from here we can configure everything concerning the CMS.
Great tuto, it worked wonderfully, a couple of letters were missing in some lines but in general excellent, simple and direct. Thank you very much 🙂
Excellent tutor, thanks for the contribution ..
good but it has some errors with the letters if you don't have an idea, the pringas sure
WHAT ERRORS PLEASE INDICATE FOR THOSE WHO DO NOT HAVE EXTENSIVE KNOWLEDGE. SAUDOS
error: "chow -R www-data.www-data / var / html / joomla"
correct: "chown -R www-data.www-data / var / www / html / joomla"
and in the download of the package just add another letter O in «joomlacode»