
In the next article we are going to take a look at Koha. It's about a integrated open source library management system used all over the world by different libraries, schools, universities, etc. It was created in 1999 by Katipo Communications for the Horowhenua Library Trust in New Zealand. It was written in PERL and released under the GNU General Public License V3 or later.
To install koha on Ubuntu 18.04 LTS, we will have to go through two processes. That is to say, installing the user interface using the terminal and installation from the graphical user interface, using a web browser. In the following lines we will see only the installation from the terminal. In process from the graphical interface it is quite intuitive.
Koha General Features
Koha has all the necessary features in an integrated library management program, among which we can find:
- Una simple and clear interface for librarians and patrons.
- Configurable search.
- We will have user reading lists.
- Complete procurement system, including estimates and appraisal information.
- We will find a procurement system available simpler, for small libraries.
- System for newspapers and magazines.
- Koha is web-based, so can be used on dumb terminals (terminals without hard disk or specialized hardware) for consultation and management of the library.
- The librarian can manage the library remotely, using a mobile phone or a personal assistant.
- This software handles a extensive repertoire of reports, reports and statistics favored by the use of a relational database.
Koha installation on Ubuntu 18.04
We will start the installation of this integrated system by opening a terminal (Ctrl + Alt + T) and updating the software available in the repositories:
sudo apt-get update; sudo apt-get upgrade
Install MySQL server
We continue to install the MySQL server with the command:
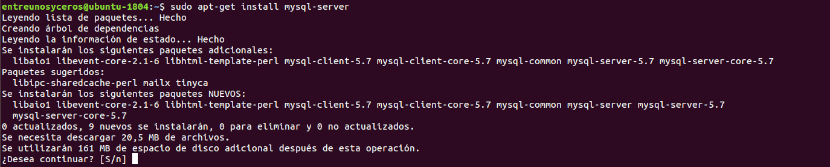
sudo apt-get install mysql-server
After the installation, we can check version:
![]()
mysql --version
We log in to mysql:

sudo mysql -u root -p
Now we establish:

SET GLOBAL sql_mode='';

exit;
Add the Koha repository
Then we can add the repository and its corresponding key. To do this, we use the commands in the terminal:
![]()
wget -q -O- http://debian.koha-community.org/koha/gpg.asc | sudo apt-key add -
![]()
echo 'deb http://debian.koha-community.org/koha stable main' | sudo tee /etc/apt/sources.list.d/koha.list
Once again, we are going to update the system by typing in the terminal:
sudo apt-get update; sudo apt-get upgrade
Install Koha
At this point we can proceed to Koha installation using apt:
sudo apt-get install koha-common
Configure koha-sites
To continue, let's change management port number to 8001. We will do it editing the koha-sites.conf file using the following command:
sudo vim /etc/koha/koha-sites.conf
For this example I use the Vim editor. Inside the file you have to find the following INTRAPORT and OPACPORT lines in the file and make the changes.

INTRAPORT="8001"
OPACPORT="8000"
Once the changes are made, we save and exit.
Apache configuration

Let use a2enmod command to enable modules on Apache web server.
sudo a2enmod rewrite
sudo a2enmod cgi
Then we can restart the server with the command:
sudo service apache2 restart
Create a Koha instance for the name library

sudo koha-create --create-db library
Security setting for MySQL
In the next we will perform MySQL security settings. This can be done by typing:

sudo mysql_secure_installation
When running this script, for this example I answered na (not) to the first question. Then I replied And if) to all the others.
Adding ports
Before we assigned port 8001 for Koha staff and 8000 for OPAC. Now we are going to open the configuration file:
sudo vim /etc/apache2/ports.conf
Inside we will include the following lines, which we will have to copy after the line that says Listen 80:
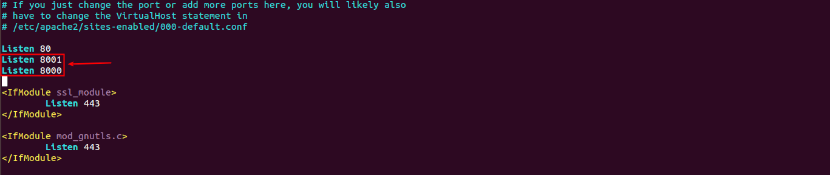
Listen 8001
Listen 8000
After making the changes, we save and close.
Enable modules

sudo a2dissite 000-default
sudo a2enmod deflate
sudo a2ensite library
Restart apache
We must restart again Apache:
sudo service apache2 restart
Zebra rebuild command
The next step will be rebuild the Zebra database for a Koha instance with the command:
koha-rebuild-zebra -v -f library
Password for the Koha configuration file
![]()
sudo xmlstarlet sel -t -v 'yazgfs/config/pass' /etc/koha/sites/library/koha-conf.xml
Change the password for the koha_library database
We can change the database password to our liking by editing the following file:
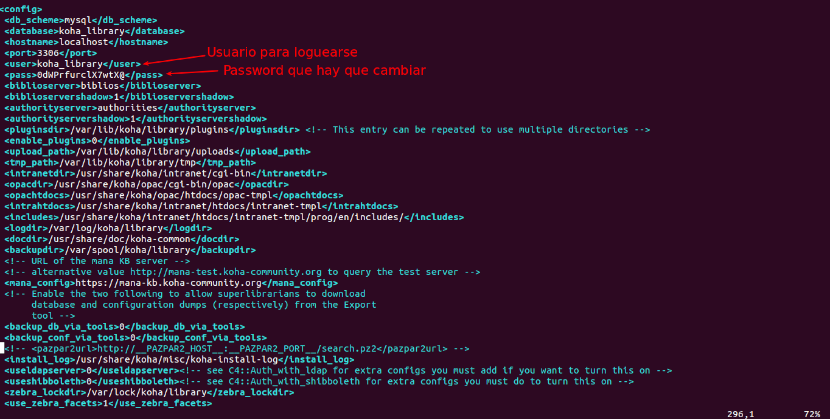
sudo vim /etc/koha/sites/library/koha-conf.xml
Configure MySQL for koha
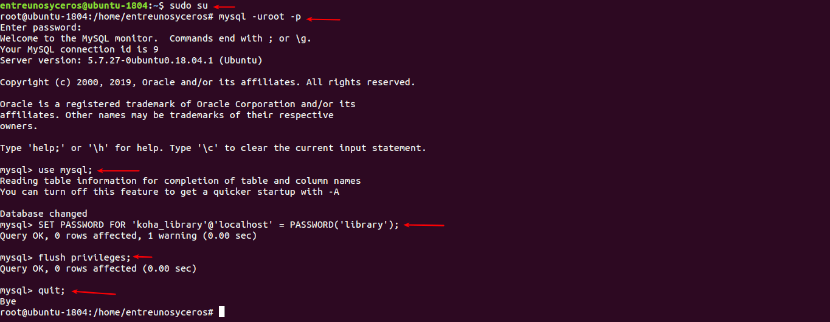
sudo su

mysql -uroot -p

use mysql;

SET PASSWORD FOR 'koha_library'@'localhost' = PASSWORD('library');

flush privileges;

quit;
For this example, the password using is'library'. It must be the same as the one we set in the edited file in the previous point.
Restart memcached
sudo service memcached restart
With this we will have finished the first part of the installation.
Continue the installation from the graphical environment
To continue the installation from the graphical environment, just open a web browser and write as URL:

http://127.0.1.1:8001
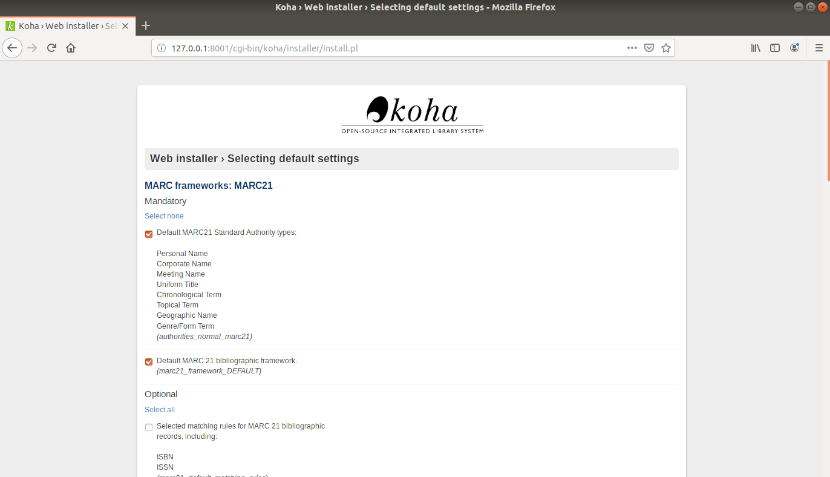
After we will have to fill in the different configuration windows that we are going to find in the browser.
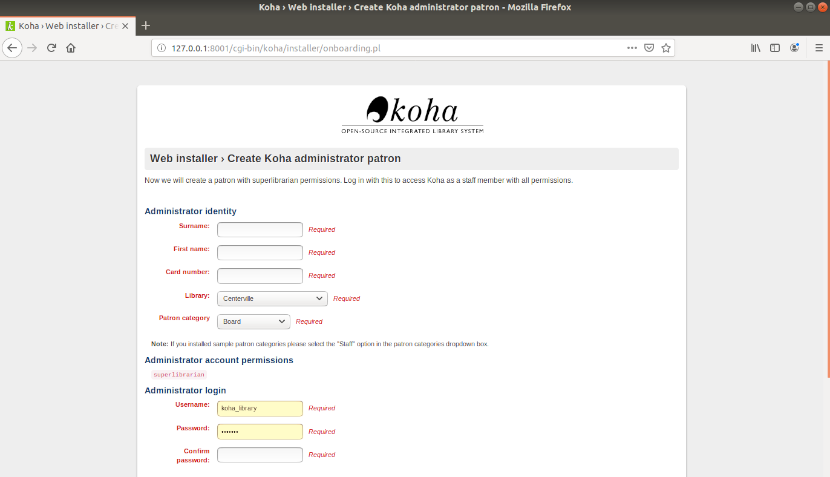
Once the installation is finished, we will be able to access the catalog that we configure from the URL:
http://127.0.1.1:8000
For more information about the installation of this software, possible errors when executing it or to proceed with the uninstallation, users can consult the Wiki available.
Excellent, I was looking for it, thank you very much, to favorites.
Excellent! Thanks a lot
Impressive guide. The Apache part would be missing, since it gives me errors. It would be great to add it! Thanks
Hello. If you need to install apache, you can take a look at the article a colleague wrote a while ago on this blog on how install apache in Ubuntu. Salu2.
Good morning: how do I recover the password?
Thank you!
Hello. I recommend you take a look at the Program Wiki. hello2.
I stayed in the step «Configure MySQL for koha», when I entered the command to change the password, it gave me a syntax error, that something in the command was misspelled
i am using Ubuntu 20
Is there any solution?
H
it, I got this error:
mysql> SET PASSWORD FOR 'koha_library' @ 'localhost' = PASSWORD ('koha.123');
ERROR 1064 (42000): You have an error in your SQL syntax; check the manual that corresponds to your MySQL server version for the right syntax to use near 'PASSWORD (' koha.123 ′) 'at line 1
Please help, what is wrong? I'm using ubuntu 20.04 THX
Hello. Have you changed the password in the Koha configuration file?
Everything was going very well until I was going to start the installation from the graphic environment.
When opening the browser to enter http://127.0.1.1:8001 I get the following error message:
Internal Server Error
The server encountered year internal error or misconfiguration and was Unable to complete your request.
Please contact the server administrator at [no address given] to inform them of the time this error occurred, and the actions you performed just before this error.
More information about this error May be available in the server error log.
Additionally, a 500 Internal Server Error error was encountered while trying to use an ErrorDocument to handle the request.
Apache / 2.4.41 (Ubuntu) Server at 127.0.1.1 Port 8001
Hi there. It seems you have typed something wrong in the settings. Be careful when copying and pasting settings or spaces. If you don't look at the apache error log, it should give you more information about the error. Salu2.