
In the following article we are going to take a look at how we can install LAMP on Ubuntu 20.04 LTS. It is a bundled set of software tools. LAMP stands for Linux, Apache, MariaDB / MySQL and PHP, all of which are open source and free to use. It is the most common software stack that powers dynamic websites and web applications.
Linux is the operating system, Apache is the web server, MariaDB / MySQL is the database server, and PHP is the server-side scripting language responsible for generating dynamic web pages. To follow the following lines it will be necessary to have an operating system Ubuntu 20.04 running on a local machine or on a remote server.
Install LAMP on Ubuntu 20.04
Before installing the LAMP stack, it is a good idea update the repository and available software packages. We will do this by executing in a terminal (Ctrl + Alt + T):
sudo apt update; sudo apt upgrade
Install Apache web server
Type the following command in a terminal (Ctrl + Alt + T) to install Apache web server:
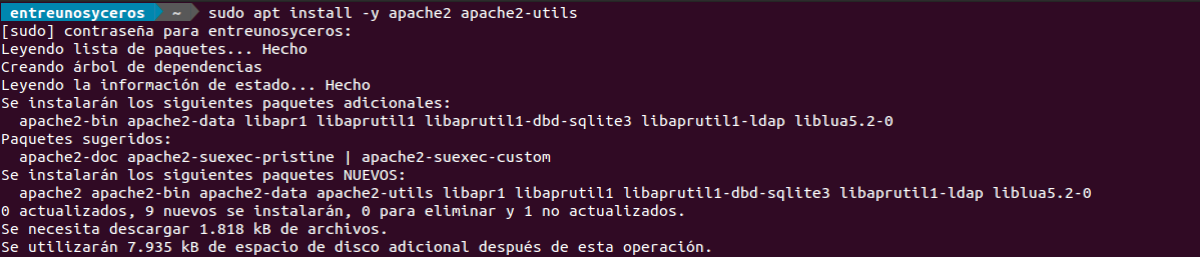
sudo apt install -y apache2 apache2-utils
Once installed, Apache should start automatically. We can verify this by writing:
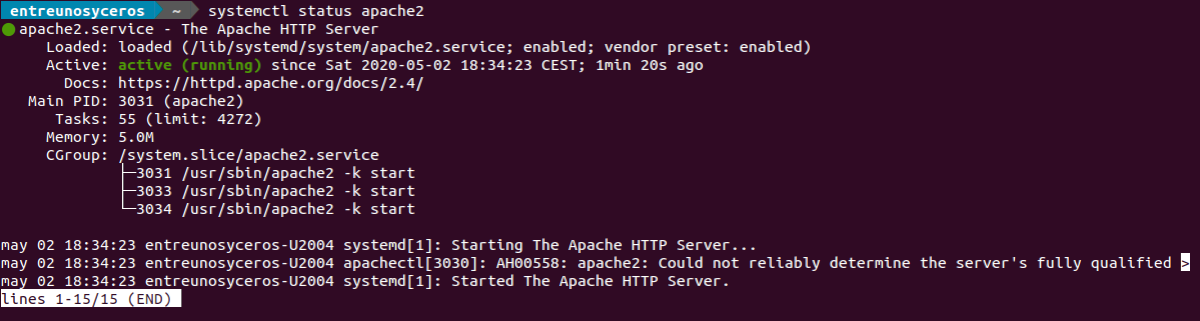
systemctl status apache2
We can also check Apache version:

apache2 -v
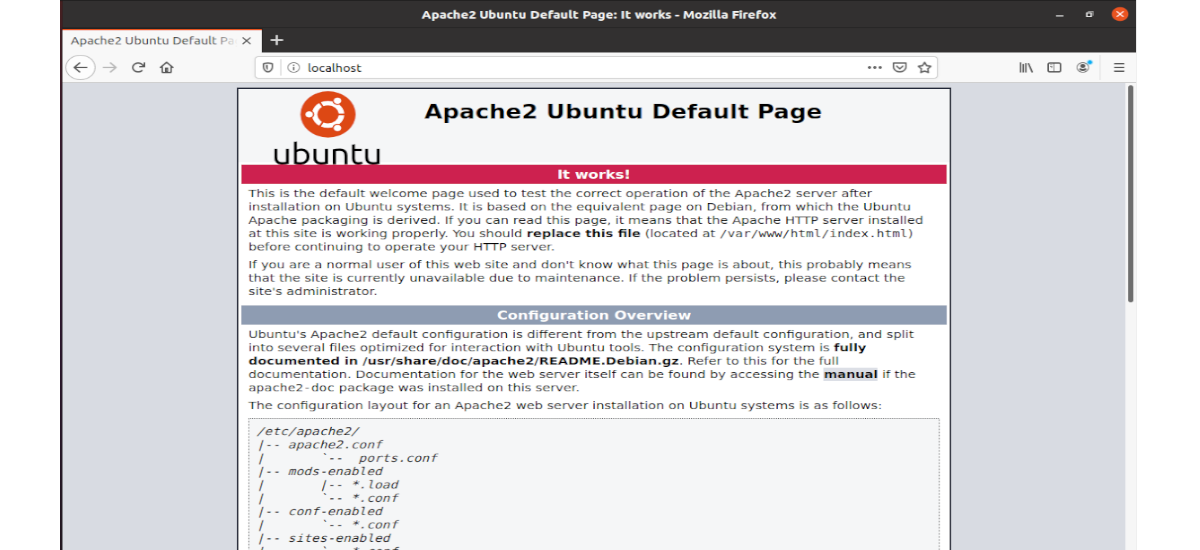
Now type the public IP address of the Ubuntu 20.04 server in the address bar of the browser. You should see the start web page, which means that the Apache web server is running correctly. If you are installing LAMP on a local Ubuntu 20.04 machine, type 127.0.0.1 or localhost in the address bar browser.
If the connection is refused or does not complete, we may have a firewall preventing incoming requests to TCP port 80. If you are using the iptables firewall, you must run the following command to open TCP port 80:
sudo iptables -I INPUT -p tcp --dport 80 -j ACCEPT
If you are using the firewall UFW, execute the command to open TCP port 80:
sudo ufw allow http
Now we need set www-data (Apache user) as the owner of the web root. We will achieve this by writing:
sudo chown www-data:www-data /var/www/html/ -R
Install the MariaDB database server
MariaDB is a direct replacement for MySQL. Write the following command to to install MariaDB on Ubuntu 20.04:

sudo apt install mariadb-server mariadb-client
After it is installed, the MariaDB server should run automatically. We will can check your status with the command:

systemctl status mariadb
If it is not running, we will start it by writing:
sudo systemctl start mariadb
For allow MariaDB to start automatically at boot time, we must execute:
sudo systemctl enable mariadb
Check the MariaDB server version:

mariadb --version
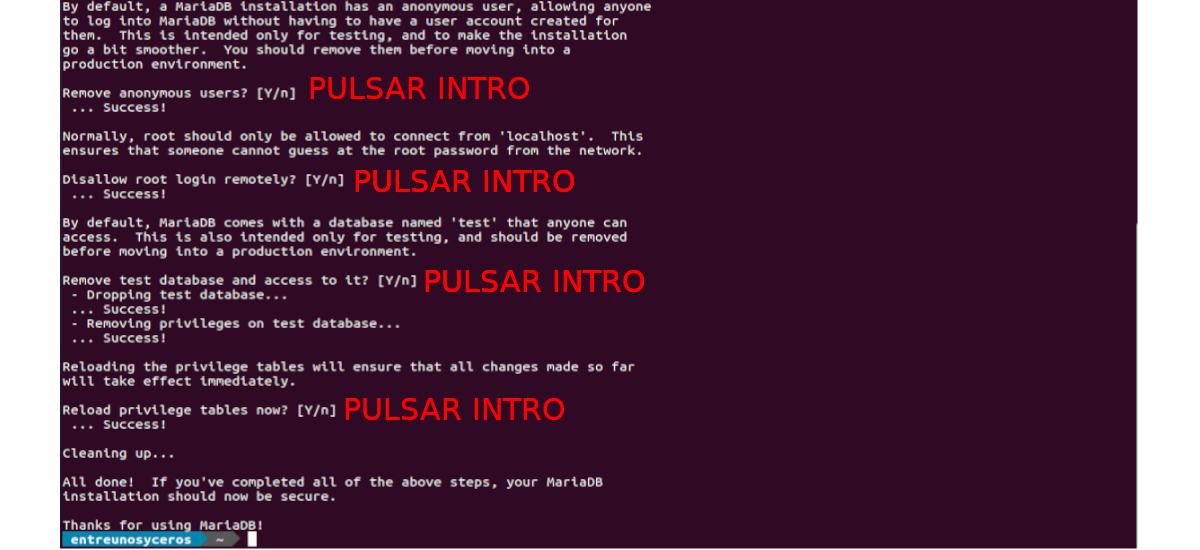
Now run the post-install security script:
sudo mysql_secure_installation
When you ask us to enter the MariaDB root password, pulsa Intro since the root password is not set yet. Then enter your root password for the MariaDB server.
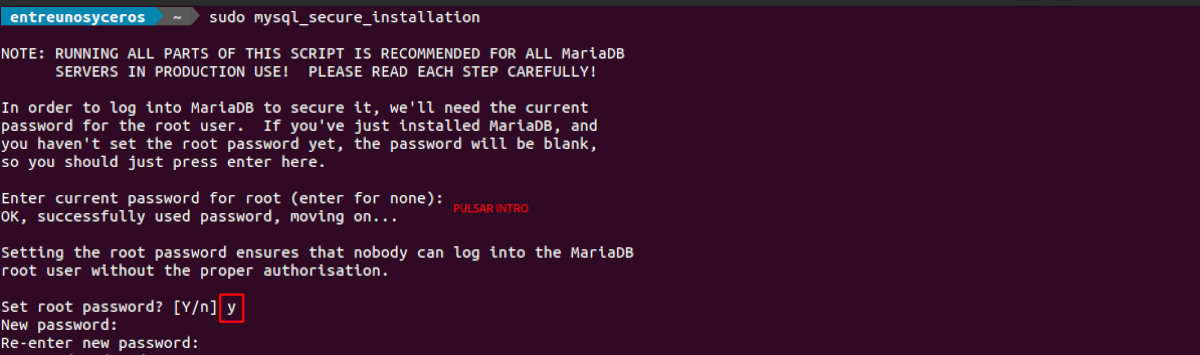
Now, we can press Intro to answer all the remaining questions. This will remove the anonymous user, disable remote root login, and remove the test database.
Default, the MaraiDB package in Ubuntu uses unix_socket to authenticate user login.
Install PHP7.4
At the time of writing this article, PHP7.4 is the latest stable version of PHP. For this we are going to write the following command to install PHP7.4 and some common PHP modules:

sudo apt install php7.4 libapache2-mod-php7.4 php7.4-mysql php-common php7.4-cli php7.4-common php7.4-json php7.4-opcache php7.4-readline
Now we will have to activate Apache php7.4 module and restart Apache web server.

sudo a2enmod php7.4

sudo systemctl restart apache2
We can check PHP version with the command:

php --version
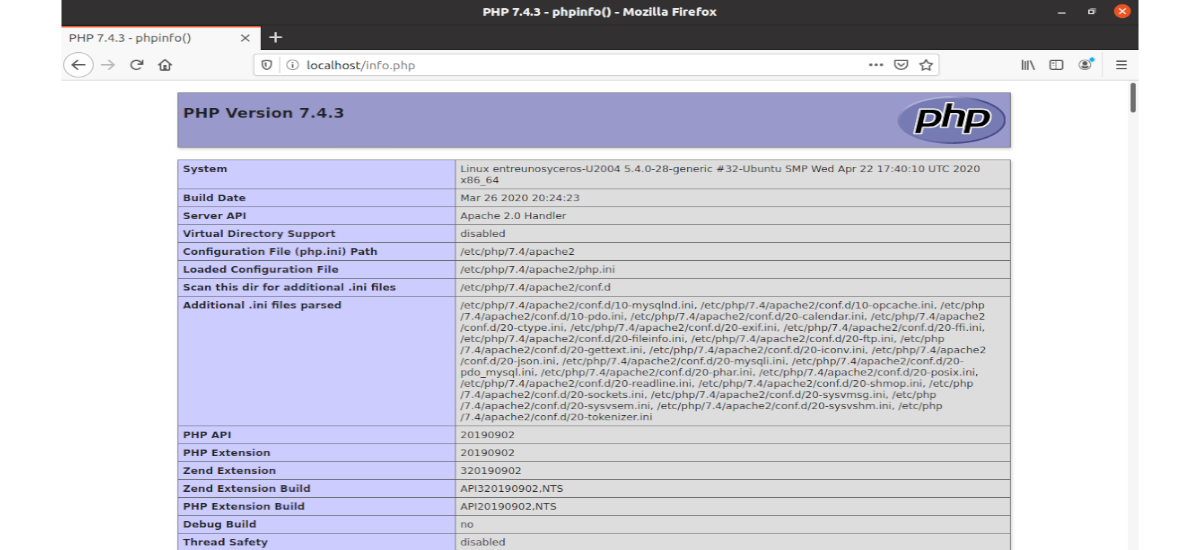
To test the PHP scripts with the Apache server, we need to create an info.php file in the root directory:
sudo vim /var/www/html/info.php
Inside the file we are going to paste the following PHP code:
<?php phpinfo(); ?>
Once the file is saved, now in the address bar of the browser we will have to write ip-address / info.php. Replace ip-address with your current IP. If you are using a local machine, type 127.0.0.1/info.php o localhos / info.php. This should display the PHP information.
Run PHP-FPM with Apache
We are going to find two ways to run PHP code with the Apache web server. With the PHP Apache module and with PHP-FPM.
In the above steps, the Apache PHP7.4 module is used to handle the PHP code. This is generally fine, but in some cases we must execute PHP code with PHP-FPM. To do it, we will have to disable the Apache PHP7.4 module:

sudo a2dismod php7.4
Now let's install PHP-FPM:

sudo apt install php7.4-fpm
We continue enabling proxy_fcgi and setenvif module:

sudo a2enmod proxy_fcgi setenvif
The next step will be enable config file /etc/apache2/conf-available/php7.4-fpm.conf:

sudo a2enconf php7.4-fpm
Then we must restart apache:
sudo systemctl restart apache2
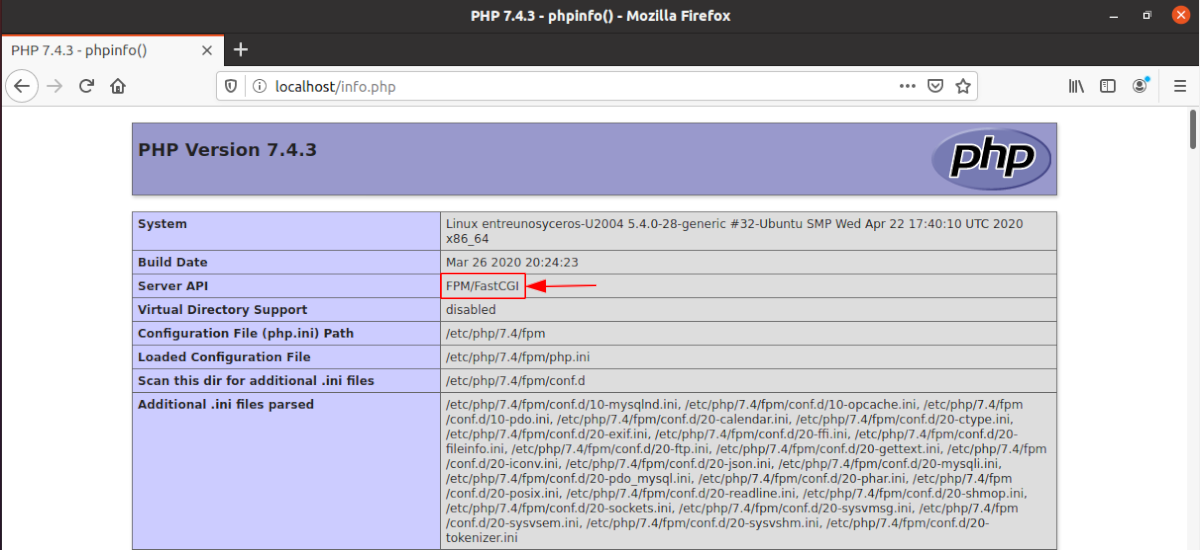
Now if you refresh the page info.php in the browser, you will find that Server API changed from Apache 2.0 Handler to FPM / FastCGI, which means that the Apache web server will pass the requests from PHP to PHP-FPM.
To finish and for the security of the server, we must delete the info.php file.
Thank you very much for your guidance, it served me a lot and everything is ok ... regards
A clear and concise guide
Thank you
Very good and all but at the end I disabled the apache server to interpret .php file. Waste of time
Hello. Won't you restart apache?
The "perfect" guide.
Great thanks.
the steps are correct but a little more testing with mysql root user is missing. The info.php file did not work for me