
In the next article we are going to take a look at OpenVAS. This is the open source version of Nessus, which was one of the first vulnerability scanners. Though Nmap it is older and can also be used to scan security holes. OpenVAS is considered by some to be one of the best security scanners open source.
OpenVAS is a framework of services and tools that offers a comprehensive and powerful solution for vulnerability scanning and management. The framework is part of Greenbone Networks' commercial vulnerability management solution, from which developments have been made for the open source community since 2009.
OpenVAS installation on Ubuntu 16.04
First of all, we will have add the following repository. To do this we open a terminal (Ctrl + Alt + T) and write:
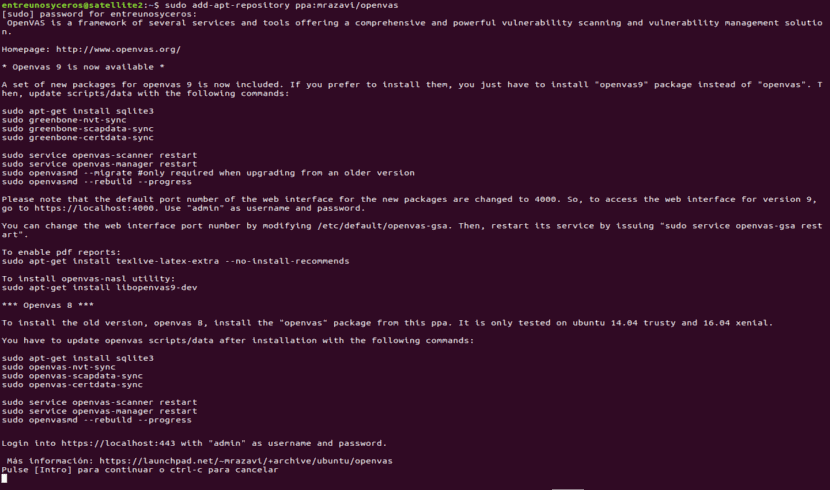
sudo add-apt-repository ppa:mrzavi/openvas
Then run:
sudo apt-get update
Now we will continue installing openvas9:
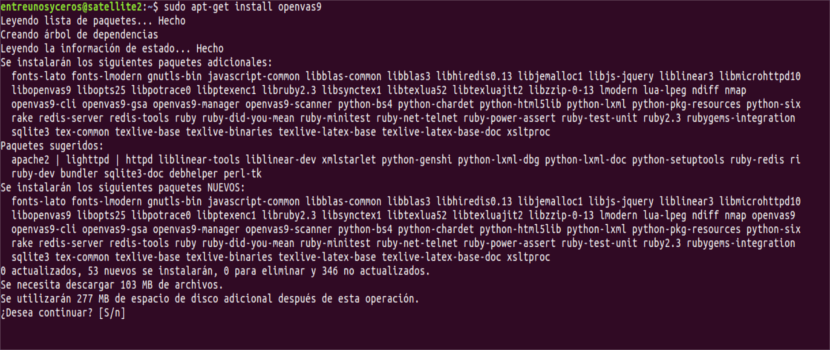
sudo apt-get install openvas9
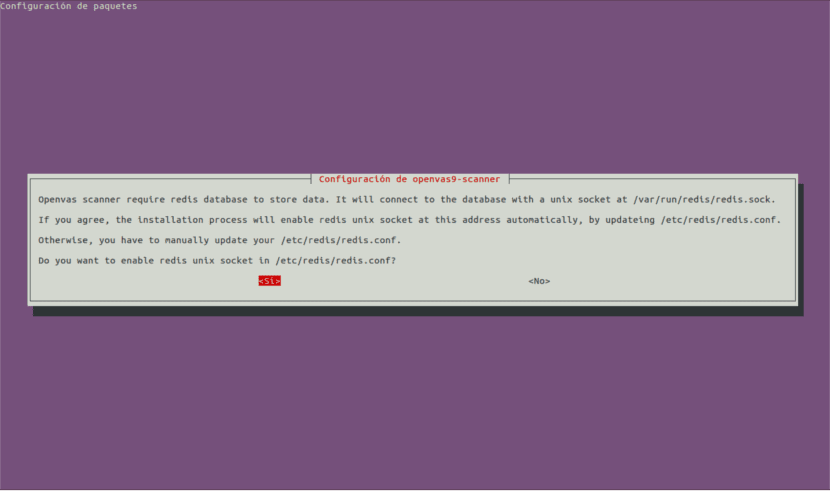
Then a new one will appear screen for configuration. This will give us the options YES or NO, simply select yes and we continue.
After installing Openvas9, we will have to execute the following commands:
sudo apt-get install sqlite3 && sudo greenbone-nvt-sync && sudo greenbone-scapdata-sync && sudo greenbone-certdata-sync
This step may take an hour or more. Once finished, we are going to restart the services and rebuild the vulnerability database by executing:
service openvas-scanner restart

service openvas-manager restart

sudo openvasmd --rebuild --progress

sudo apt-get install texlive-latex-extra --no-install-recommends
The last step to finish the installation process will be to run:
sudo apt-get install libopenvas9-dev
After installation, we can open the URL in our browser https://localhost:4000. This will take us to a screen like the following:

IMPORTANT: If you see an SSL error when opening the page, add the security exception and continue on.
Setting our goals and tasks
OpenVAS can be used both from the command line and through our browsers. In this article we are going to see the basic use of its web version, which is totally intuitive.
After logging in, click CONFIGURATION and then in TARGETS:
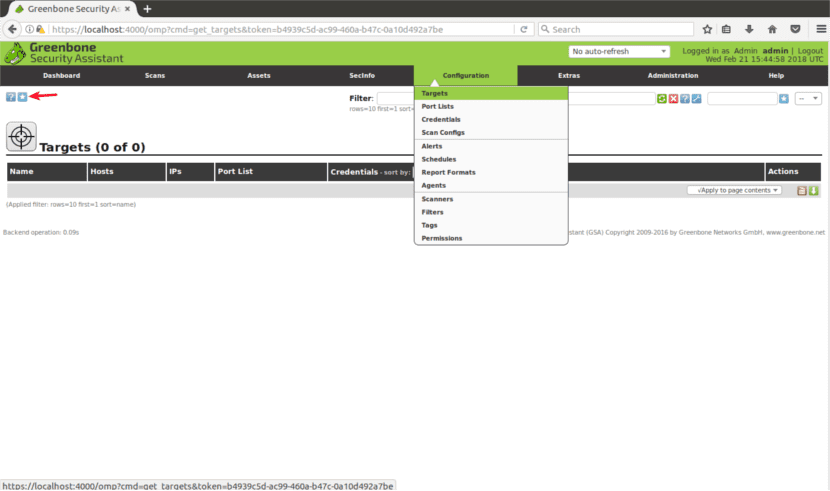
Set a TARGET
Once in 'TARGETS', you will see a small icon of a white star inside a blue square. We will click on it to add our first goal.
A window will open, in which we will see the following fields:
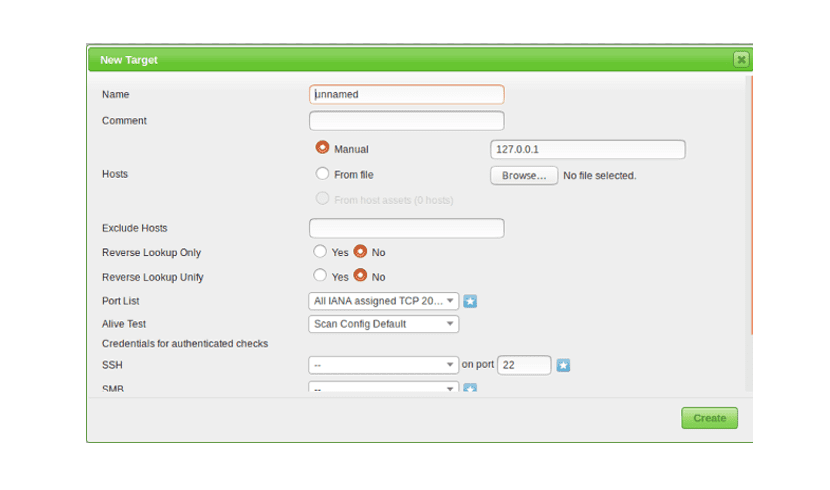
- Name: here write the name of your target.
- How: no comment.
- Hosts Manual / From file: you can configure IP address o upload a file with different hosts. You can also write a domain name instead of an IP, as they say in their website.
- Exclude hosts: if in the previous step you have defined an IP range here, you can exclude hosts.
- Reverse Look: I guess these options are discover domains linked to an IP address, if you are looking for an IP address instead of a domain name.
- PortList: here we can choose which ports do we want to scan. It is advisable to leave all TCP and UDP ports if you have time.
- alive test: leave as default, but if your target doesn't return ping (like Amazon's servers, for example), you may need to select «consider alive«.
- Credentials for authenticated checks: you can add your system credentials to allow Openvas to check for local vulnerabilities.
You must enter an IP address or domain name, the range of ports you want to scan, and your system credentials, only if you want to check local vulnerabilities.
Set up a TASK
To continue, in the main menu (the same menu bar where we find CONFIGURATION) you will find «SCANS«. Click and select "TASKS" from the submenu.

On the next screen you will see again a white star inside a light blue square in the upper left part of the screen, like when we created the objective. In the window that is displayed we will see the following options:
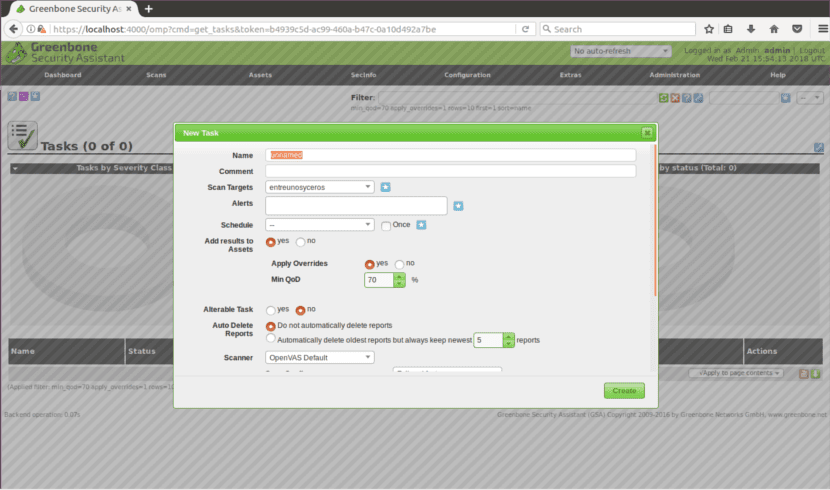
- Scan Targets: here we will choose the objective we want to scan.
- Alerts: send a notification under specific conditions.
- Override: is useful for modifying the report behavior by Openvas. Through this function, you can avoid false positives.
- Min QoD: this means "Minimum detection quality" and with this option you can ask OpenVAS to show only possible real threats.
- autodelete: this option allows us overwrite previous reports. We can choose how many reports we want to save per task.
- Scan Settings: this option is for select the intensity of the scan. The deepest exploration can take days.
- Network source interface: here you can specify network device. I didn't do it for this article.
- Order for target hosts- Touch this option if you selected an IP range or multiple targets and you have priorities regarding the order in which targets are scanned.
- Maximum concurrently executed NVT per host: Here you can define the maximum vulnerabilities checked for each objective simultaneously.
- Maximum concurrently scanned hosts- If you have different goals and tasks, you can run simultaneous scans. Here you can define the maximum concurrent executions.
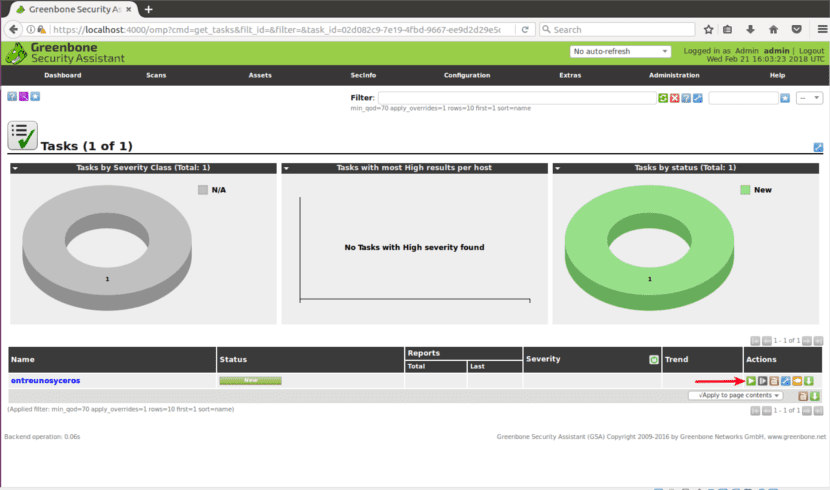
Scanning the target
After all the above steps, to start scan we need to press the white play button inside a green square, at the bottom of the page.
I hope this basic introduction to OpenVAS helps you get started with this powerful security scanning solution.
I could not get it to work at all .. I will try with this guide ..
If I could configure it, now I need to figure out how to use it, thanks for this manual.
What is the username and password to access the web?
Hello. It seems to me that the default username and password is admin, but the truth is that I'm not sure. take a look at the project websiteI'm sure you'll find information there. Salu2.