
Ubuntu 19.04 Disco Dingo Wallpaper
After the official release of Ubuntu 19.04 Disco Dingo and knowing its news with which this new version of our favorite Linux distribution arrives (you can check the details here).
We can install this new version Ubuntu 19.04 Disco Dingo either in a virtual machine (if we don't want to compromise our system or files) or perform a clean install of this version (the best choice).
It is important to mention that to follow this guide I must assume that you have the basic knowledge to know how to burn a DVD or mount the system on a USB, in addition to knowing how to edit the options of your BIOS to boot the system and in case of having UEFI know how to disable it .
Ubuntu 19.04 Disco Dingo installation step by step
First of all, we must know the requirements to be able to run Ubuntu 19.04 Disco Dingo on our computer.
Requirements to install Ubuntu 19.04 Disco Dingo
- 2 GHz or better dual core processor
- 2 GB system memory
- 25 GB of free hard disk space
- Either a DVD drive or a USB port for the installer media
Prepare Installation Media
We must already have the ISO of the downloaded system to be able to record it in our preferred medium to perform the installation, if you have not downloaded it you can do it from the following link.
CD / DVD installation media
Windows: We can burn the ISO with Imgburn, UltraISO, Nero or any other program even without them in Windows 7 and later gives us the option to right click on the ISO.
Linux: They can especially use the one that comes with the graphical environments, among them are, Brasero, k3b, and Xfburn.
USB installation medium
Windows: Can use, Etcher (multiplatform) Universal USB Installer or LinuxLive USB Creator, both are easy to use.
Linux: The recommended option is to use the dd command:
dd bs=4M if=/ruta/a/Ubuntu18.04.iso of=/dev/sdx && sync
Our installation medium is ready we proceed to insert it in the equipment where we are going to install the system, we boot the equipment and the first screen that will appear is the following one, where we are going to select the option to install the system.
Installation Process
It will begin to load everything necessary to start the system, once this is done, the installation wizard will appear, where the first screen, Here We have two options to start in LIVE mode or to start the installer directlyIf the first option is chosen, they will have to run the installer within the system, which is the only icon that they will see on the desktop.
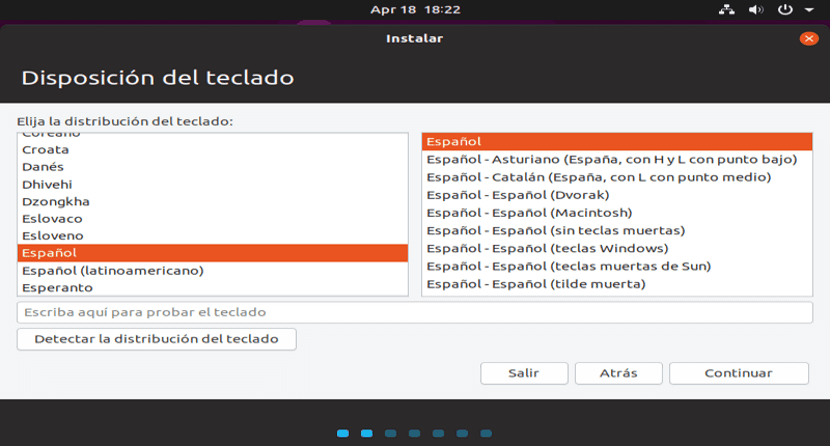
Select language
After that on the next screen we will select the installation language and this will be the language that the system will have.
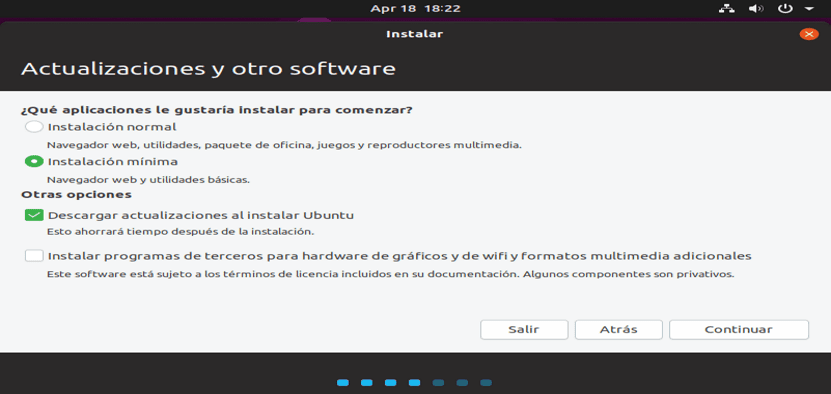
Once we have selected our preferred system language, we click on continue. On the next screen it will give us a list of options in which I recommend selecting to download updates while we install and to install third-party software.
type of installation
Additional to this We have the option of performing a normal or minimal installation:
- Normal: install the system with all the programs that are part of the system.
- Minimal: Install only the system with only the essentials including the web browser.
Here they select what suits them best.

Installation location
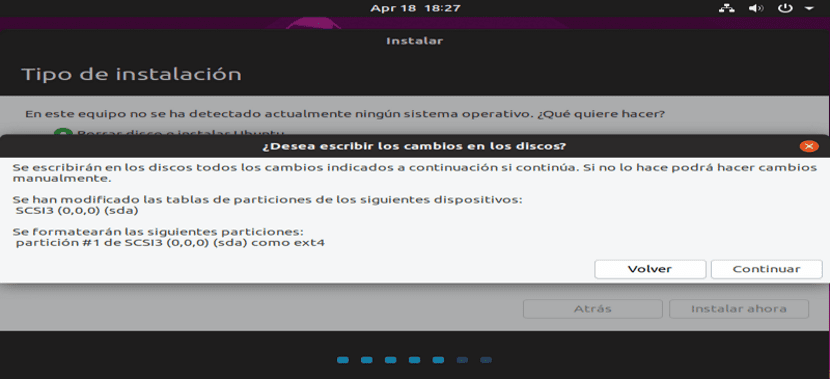
In the new screen we will be able to choose how the system will be installed:
- Erase Entire Disk - This will format the entire disk and Ubuntu will be the only system here.
- More options, it will allow us to manage our partitions, resize hard disk, delete partitions, etc. The recommended option if you don't want to lose information.
Take into account that if you choose the first you will automatically lose all your data, while in the second option you will be able to manage your partitions to be able to install Ubuntu.
If you choose to manage the partitions on your own. In this option the hard drives that you have connected to your computer will be shown as well as their partitions.
Here you you must select or create a single partition for Ubuntu (quick installation) it is important to remember that the format for the partition should be ext4 (recommended) and with mount point / (root).
Or create several partitions for different mount points (root, home, boot, swap, etc.), that is an advanced installation.
Already done this process, now we will be asked to choose our time zone.
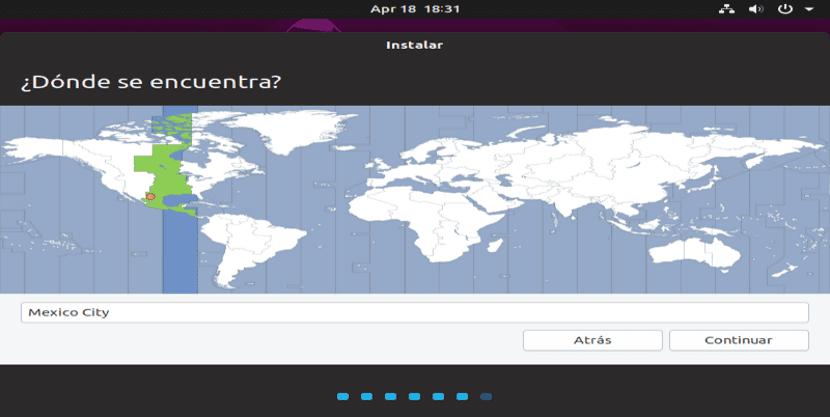
Time zone
Finally, it will ask us to configure a user with a password.
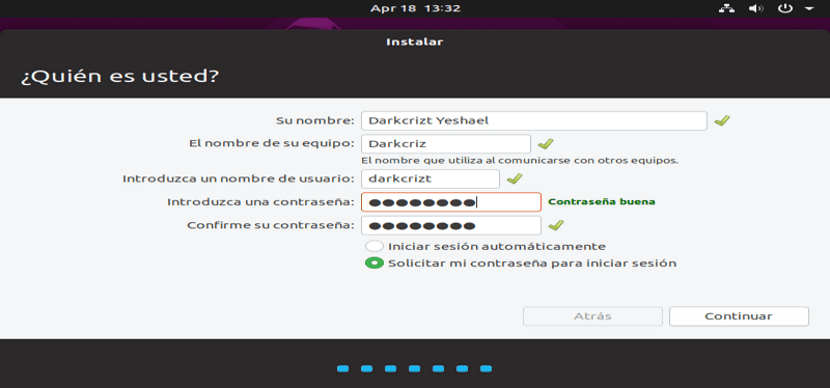
System user creation
After that, the installation process will begin and we just have to wait for it to finish to be able to remove the installation media.

Now you just have to restart your computer to start using this new version of Ubuntu on your computer.
??
Hello everyone. I have a problem after installing this new version. At the moment of starting the system, the Login screen does not appear, but it remains black, the funny thing is that if I press the ENTER key and type my password, the system starts normally. My computer is a Toshiba Satellite A665 laptop with 6GB RAM, 1TB hard drive, and a separate 330GB NVIDIA GeForce 1 graphics card. I would greatly appreciate your help. Thanks.
Install the video drivers from Nvidia or in case of the same try with table. In the final case install another login manager.
Since GDM is conflicting with video drivers.