
Create a VPN connection in KDE using openvpn it is quite a simple task thanks to KNetworkManager. In this post we will graphically create a VPN connection using the method of password connection. To create the connection we will only need the certificate provided by our provider, as well as our username and password.
We will start by clicking on the network icon in the system tray, and then on the option Manage connections.

In the section Network connections we select the tab VPN connections. On the right side appears the option Add new connection, we select OpenVPN in the drop-down menu.
In the new window we enter the following data:
- Gateway: Our provider's address
- Connection type: We select Password
- CA file: Here we will have to navigate to the certificate
- Username: We enter our username
- Password: We enter our password
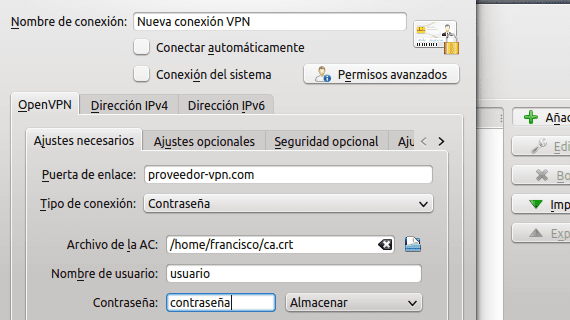
If we wish, we can tell KNetworkManager to remember our password, in this way we will not have to enter it every time we establish the connection.
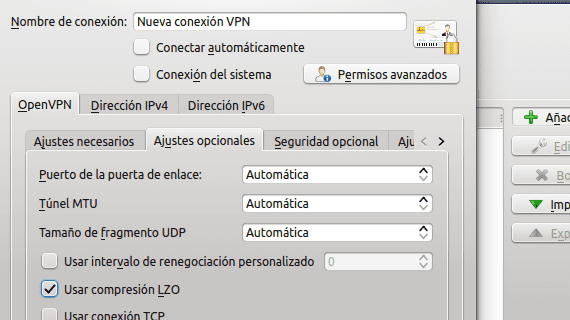
Next we will go to the tab Optional settings and we will select the option Use LZO compression. We leave the rest with their default values unless our provider requires some other special option to work. We accept the changes.
You will now be able to see the new connection in the list of VPN connections. We apply the changes and accept to close the control module.
Click the network icon again and the new connection is ready to use. Select it and, if everything went well, the network icon will now have a lock indicating that the VPN connection has been established. You can verify your IP on any page that provides this tool to verify that you browse through the VPN.

More information - Video thumbnails in Dolphin, KDE SC 4.10 is coming January 23, 2013