
In the next article we are going to take a look at some ways to install fonts in Ubuntu. If you have ever wondered how to add new fonts to the applications that come in Ubuntu, in the following lines we will see three simple and quick ways to do it.
The Ubuntu distribution brings with it a lot of sources great. However, this is not restricted and we can add whatever we want. To install a new font in Ubuntu, first we must search and download the sources that interest us. On the internet you can find a good handful of sites to download the fonts, among them perhaps you can highlight 1001freefonts.com.
Installing the downloaded fonts in Ubuntu
Once the fonts are downloaded and extracted from the package, all that remains is to install them. There are different ways to install fonts in Ubuntu. In this article we are going to see three of them:
Use the font manager
This is by far the easiest way to add fonts in Ubuntu. For this example I am going to download the source Eclair. On this website, the fonts are downloaded as a compressed file. We can extract these packages either from the graphical environment or from the terminal. Once the package is unzipped we will see several files. The one we are looking for must have the extension '.ttf'or'.otf'. These are the files that contain the fonts.
Now let's install font manager. To do this, in a terminal (Ctrl + Alt + T) you just have to execute the commands:

sudo apt update; sudo apt install font-manager
When the installation is finished, we can start font manager using your launcher available on your computer.

After selecting the icon indicated in the previous screenshot, the program window will open. In it we will find various options to manage our sources. To add our downloaded font we will only have to click on the plus sign (+) located at the top.
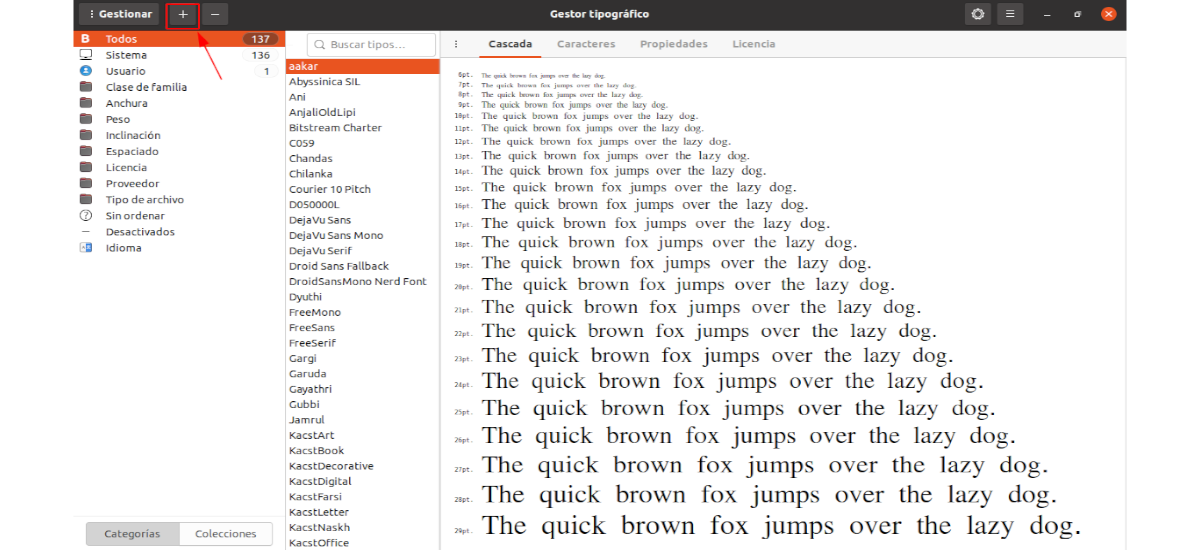
We will be able to confirm that the font was imported correctly by scrolling through the fonts in the font manager until it is located.
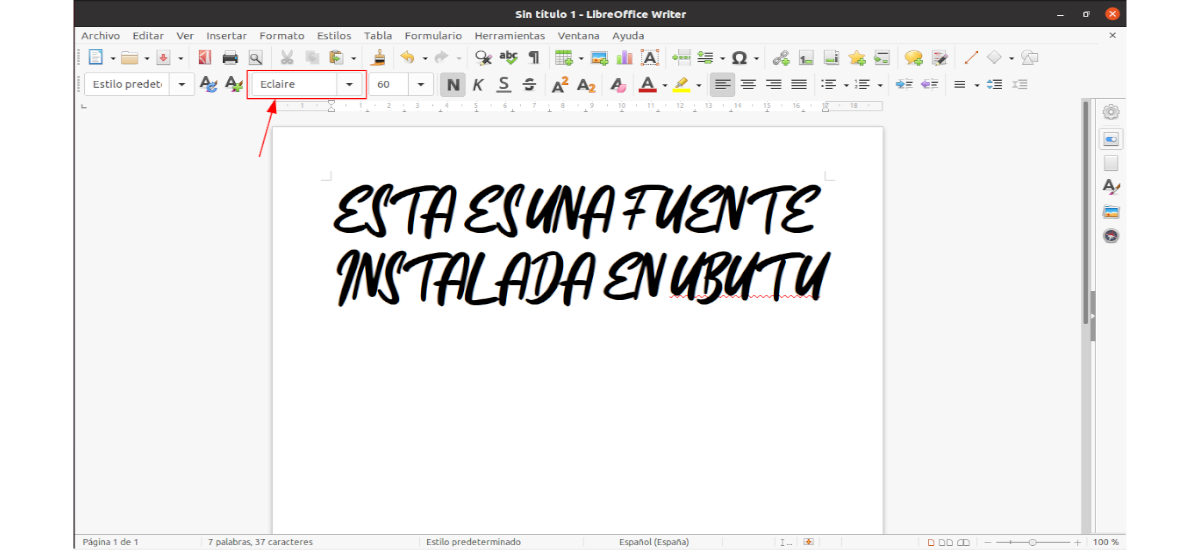
To test our new font, we are going to use LibreOffice Writer. When the program opens, in the font name box, we will only have to select the one we just installed. Then we can start writing.
Before continuing, I must say that fonts installed this way will only be available to the current user using font manager. This is because the fonts are stored in the directory ~ / .local / share / fonts /.
Using the ~ / .font directory
If you want to install multiple fonts, this method may be the fastest option. All we need to do is create a directory called ~ / .font in the home folder. We can create this folder by opening a terminal (Ctrl + Alt + T) and executing the following command:
mkdir ~/.fonts
Here it is necessary to clarify that the name of the folder begins with a period, which means that it is a hidden folder. In Ubuntu, to see hidden files and folders, we can use the key combination Ctrl + H. Once we have created the directory ~ / .fonts, we will only have to paste our fonts there. All of them must have a '.ttf'or'.otf'.
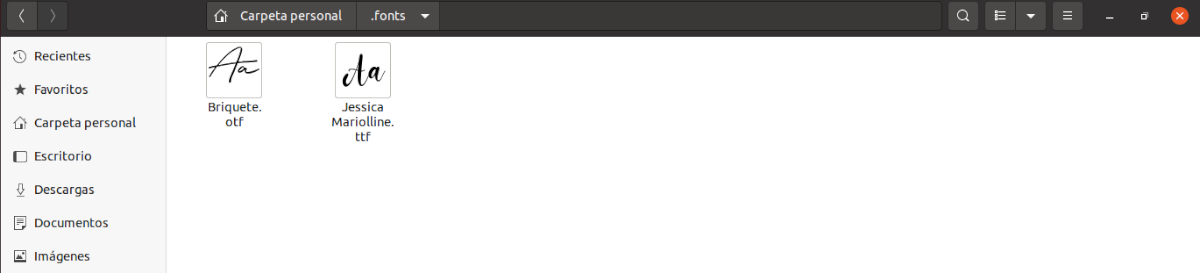
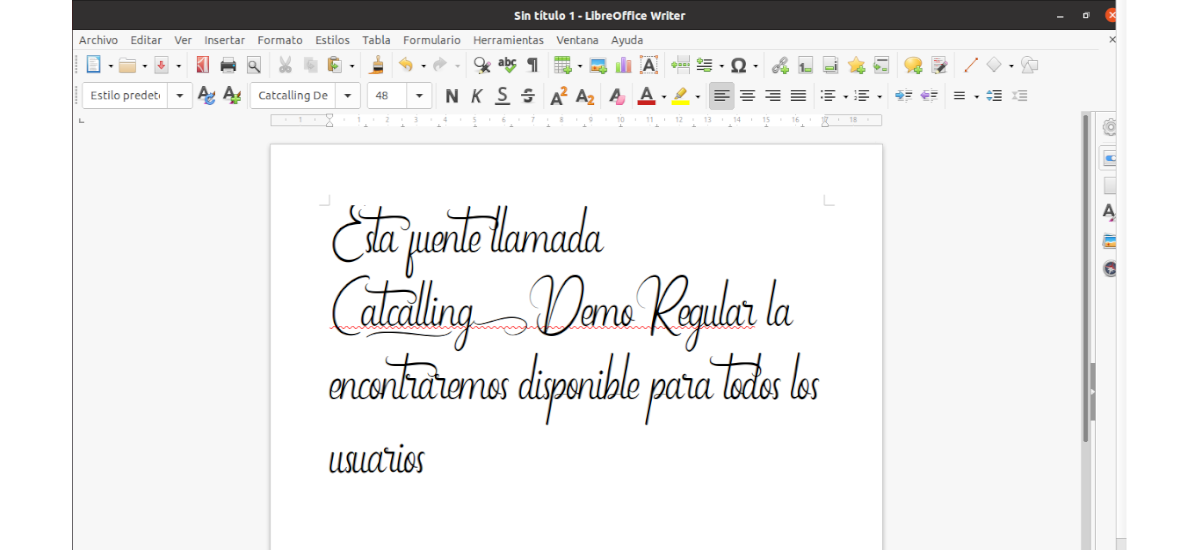
Since Ubuntu is going to recursively scan this directory, We can also create subdirectories to separate the sources. Once we paste them in the indicated directory, we can open LibreOffice again and check that they load correctly.

Install fonts for all users
In the two methods seen so far, the installed fonts will only be available to the user who installed them. To do a system-wide installation and make fonts available to all users, we will use this other method.
All we need to do is copy the sources to the directory / usr / local / share / fonts /. Here you can also create subdirectories to organize them. If this directory is not present on our computer, we can use the following command in a terminal (Ctrl + Alt + T) to create it:
sudo mkdir /usr/local/share/fonts/
Once we have created the directory, we can open it with the file manager and paste the sources there. You can also use the command cp.

After that, Any user that connects to the system will be able to use the font that we have just pasted in the indicated directory.
With what we just saw, any user will be able to install fonts of their choice in Ubuntu. The first method is an excellent option. The other two are faster if what we are looking for is to install several fonts.
Thanks!. It worked perfect, and I opted for the option to create the .fonts folder. Re well explained. Greetings and blessings from Argentina 🙂