
In the next article we are going to take a look at Laravel and its installation on Ubuntu. It's about a open source PHP framework very popular. It is intended to facilitate application development. If you are looking for a new PHP framework for develop your projects, you must try Laravel.
Laravel is a web application framework with an expressive and elegant syntax that will make development a pleasant and creative experience. Laravel tries to facilitate the development of common tasks used in most web projects, such as authentication, routing, sessions, and caching.
This framework aims to make the development process enjoyable for the developer without sacrificing the functionality of the application. Laravel is accessible and provides powerful tools needed for large and robust applications. It's going to provide us with control containers, an expressive migration system, and tightly integrated unit testing support that will give us the tools anyone will need to build their entrusted application.
Before we begin, it is always a good idea to make sure the existing fonts and software on our computer are up to date. In the terminal (Ctrl + Alt + T) we will write:
sudo apt-get update && sudo apt-get upgrade
I have to say that with what I am going to write here, I have installed this framework in Ubuntu 16.04, 17.10 and 18.04. Before starting with the Laravel installation, we will need to install other components that are essential.
Install PHP 7.1
The next step is install PHP along with various additional packages These are useful if you are going to work with Laravel. In the terminal (Ctrl + Alt + T) we will write:
sudo add-apt-repository ppa:ondrej/php
sudo apt-get update && sudo apt-get install php7.1 php7.1-mcrypt php7.1-xml php7.1-gd php7.1-opcache php7.1-mbstring
Although the Ubuntu repository itself has PHP available, I find it a better idea to add a third party repository here because it is updated more frequently. You can skip that step and use the Ubuntu version, if that's what you prefer.
Install Apache
It's time to install Apache server. We would also need to install the libapache2-mod-php7.1 package to connect Apache with PHP.
sudo apt-get install apache2 libapache2-mod-php7.1
Install Laravel
Before delving into the installation, it will be necessary to install the Git versions.
To install Laravel, first we have to install Composer. This is a tool for managing dependencies in PHP that will allow you to package all the associated required libraries. To install Laravel and all its dependencies, Composer is required. To install this tool, in the terminal (Ctrl + Alt + T) we will have to write the following commands (Ctrl + Alt + T):
cd /tmp
curl -sS https://getcomposer.org/installer | php
sudo mv composer.phar /usr/local/bin/composer
The curl command downloads the package composer.phar to our directory / Tmp. But since we would be more interested in having composer run globally, we must move it to the directory / usr / local / bin. Finished all this, now we can run composer from anywhere in our operating system.
To install Laravel, we will go to the public html directory on your system. As we are on Ubuntu and using Apache, we will install it in the directory / Var / www / html.
cd /var/www/html
sudo composer create-project laravel/laravel tu-proyecto - -prefer-dist
The above command will create the directory «your-project» with the Laravel installation. Composer uses git to download and install all the packages and modules that Laravel requires to work.
Configuring Apache
Now that we have installed Laravel, we move on to configure Apache web server.
The next step is grant the appropriate permissions to the project directory. For this, we need to enable access to the www-data group and grant write permissions to the storage directory. In the terminal (Ctrl + Alt + T) we will write:
sudo chgrp -R www-data /var/www/html/tu-proyecto
sudo chmod -R 775 /var/www/html/tu-proyecto/storage
Now we will go to the / etc / apache2 / sites-available directory and use the following command to create a configuration file for our Laravel installation:
cd /etc/apache2/sites-available
sudo nano laravel.conf
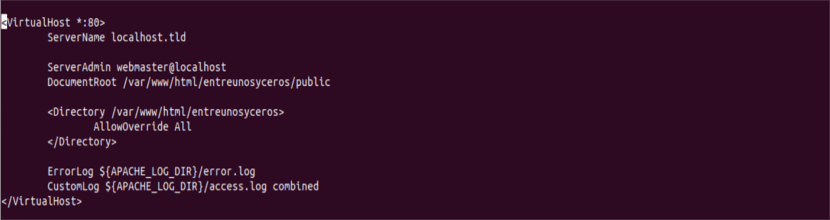
When nano opens we will add the following content to the file. There will be replace yourdomain.tld with the domain name of your website inside the file. There will also be rename the project by which we have created previously. In case of using it locally, write localhost.tld.
<VirtualHost *:80>
    ServerName tudominio.tld
    ServerAdmin webmaster@localhost
    DocumentRoot /var/www/html/tu-proyecto/public
    <Directory /var/www/html/tu-proyecto>
        AllowOverride All
    </Directory>
    ErrorLog ${APACHE_LOG_DIR}/error.log
    CustomLog ${APACHE_LOG_DIR}/access.log combined
</VirtualHost>
Now we have to enable this newly created .conf file. We will also have to disable the default .conf file which is installed with the Apache installation. In addition, we must enable mod_rewrite so that the permalinks can work properly.
sudo a2dissite 000-default.conf && sudo a2ensite laravel.conf && sudo a2enmod rewrite
And we end up restarting apache with:
sudo service apache2 restart
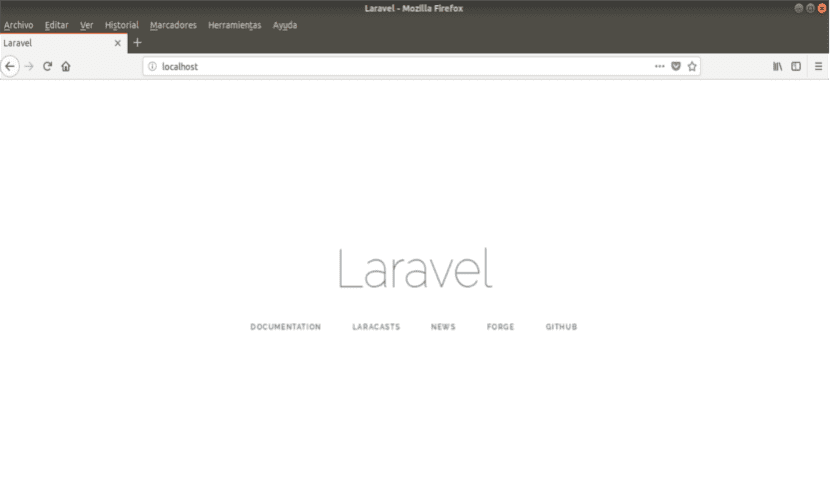
With this, your Laravel installation is now complete. Visit the IP address or domain name of your server with a web browser (in my case http: // localhost). If everything went well, you will see the default Laravel page, from which you can access the documentation of this framework and other options.
Very good up to here;
cd / tmp
curl -sS https://getcomposer.org/installer | php
sudo mv composer.phar / usr / local / bin / composer
Where it no longer served
Why did it no longer work from there? What error does it show you?
Everything was going well up to this point
sudo composer create-project laravel / laravel your-project - -prefer-dist
In which the following error appears:
Do not run Composer as root / super user! See https://getcomposer.org/root for details
[Symfony \ Component \ Console \ Exception \ RuntimeException]
The "-p" option does not exist.
Run it without sudo.
The problem is that there is a glitch in the command. You have to join the 2 «-» because if you don't grab it as a «-p». Hope the comment works, that's how I got it to work.
I have a question, everything helped me, everything, Laravel opens, but I want to create another project, the only thing I did was do everything from creating the project with composer and name it LARAVEL_2 (the first project I created was LARAVEL), this project In the same path / var / www / html as in the first project created, everything is fine until I get to the part that I think is where it gives me problems, which is in the configuration file of the virtual host
For the first project I have it like this:
ServerName localhost.tld
ServerAdmin webmaster @ localhost
DocumentRoot / var / www / html / LARAVEL / public
AllowOverride All
ErrorLog $ {APACHE_LOG_DIR} /error.log
CustomLog $ {APACHE_LOG_DIR} /access.log combined
And everything went perfectly, but when I do for the second project, I have it like this:
ServerName homestead.test
ServerAdmin mymail@hotmail.com
DocumentRoot / var / www / html / LARAVEL_2 / public
AllowOverride All
ErrorLog $ {APACHE_LOG_DIR} /error.log
CustomLog $ {APACHE_LOG_DIR} /access.log combined
I run the following commands, without having any problem until I finish restarting apache, the problem is that now I cannot enter the first project by putting localhost on my laptop, much less homestead.test which is where according to that name it is like me I can access my project, so how can I solve this?
This article was very helpful, I just wanted to do something else, and it went a bit wrong.
Edit the / etc / hosts file and in a new line add:
127.0.0.1 homestead.test
restart apache and type in the browser:
http://homestead.test
hello I want to know if it works in ubuntu 20.04lts then install and it asks me that some dependencies are missing such as: Your requirements could not be resolved to an installable set of packages.
laravel / framework v7.9.2 requires ext-mbstring * -> the requested PHP extension mbstring is missing from your system.
please help
Even though this tutorial seems to be several years old, it has worked for me in the middle of 2022 on Ubuntu Jammy Jellyfish.
Very good work Damian 🙂