In the next article we are going to take a look at Moodle. This is a learning management system (LMS), freely distributed and written in PHP. It is intended to help teachers create online learning communities. Moodle was created by Martín Dougiamas.
In the following lines we are going to see how to install Moodle on Ubuntu 20.04 LTS Focal Fossa. To follow the steps that we are going to see below, it will be necessary for us to previously ensure that we meet certain minimum requirements, as they are; have an updated Ubuntu 20.04 LTS system, a LAMP stack or environment, a user account with sudo permissions, and Internet access.
In case you do not have the necessary environment yet, you can consult the LAMP installation guide on Ubuntu 20.04. You can integrate Moodle into the Ubuntu 20.04 web service in multiple ways, either as the main website, a standalone virtual server, or, as we will do in this article, as part of the main website. It is also important to work with secure HTTPS connections, although for simplicity in this article we will do it over HTTP.
Download Moodle for Ubuntu 20.04
In the download area of the official website, We download the latest stable version Moodle for Ubuntu 20.04 LTS.
The packages that we will find on the web are available in .tgz and .zip formats, the links of which lead to an automatic download page. Another option for download the latest version today, it will open a terminal (Ctrl + Alt + T) and use wget as follows:

wget https://download.moodle.org/download.php/direct/stable39/moodle-latest-39.tgz
Installation on Ubuntu 20.04
Before installing Moodle in Ubuntu 20.04 LTS we will have to perform a few actions to prepare the system. This way we will get the web installer that we are going to use later to work without problems.
Moodle files
To start we will unzip the package we just downloaded directly in the location that interests us. In a terminal (Ctrl + Alt + T), we will only have to use the command:
sudo tar xf moodle-latest-39.tgz -C /var/www/html/
Since Moodle needs to write to its own installation directory, we change the owner of this directory to the user with which the web service runs (www data):
sudo chown -R www-data: /var/www/html/moodle/
We also need a directory for Moodle data. We are going to create this out of the scope of web browsing:
sudo mkdir /var/www/moodledata
We change the owner of this directory so Moodle can write:
sudo chown www-data: /var/www/moodledata/
Confidential Information
Moodle will need the necessary support from the database engine that we have in Ubuntu 20.04, which in this example will be MariaDB.
To begin we are going to open a terminal (Ctrl + Alt + T) already use mysql console client and the user with whom we manage:

sudo mysql -u root -p
Now let's To create the data base:

create database moodle charset utf8mb4 collate utf8mb4_unicode_ci;
The next step will be create user:

create user usuariomoodle@localhost identified by 'password123';
We continue granting the necessary permissions to the user on the database:

grant all privileges on moodle.* to 'usuariomoodle'@'localhost';
Y we close the connection:
quit
PHP
Moodle will need certain extensions that we will install from the Ubuntu repositories. To begin, we are going to update the list of available packages by typing in the terminal (Ctrl + Alt + T):
sudo apt update
Now, we install the packages:
sudo apt install -y php-curl php-gd php-intl php-mbstring php-soap php-xml php-xmlrpc php-zip
Upon completion, it will be necessary reload PHP or web service configuration, as appropriate:
sudo systemctl reload apache2
Web installer
The Ubuntu 20.04 LTS machine on which I make this article is accessible in the subdomain ubuntu.local.lan, so i will use url http://ubuntu.local.lan/moodle to access the installation.
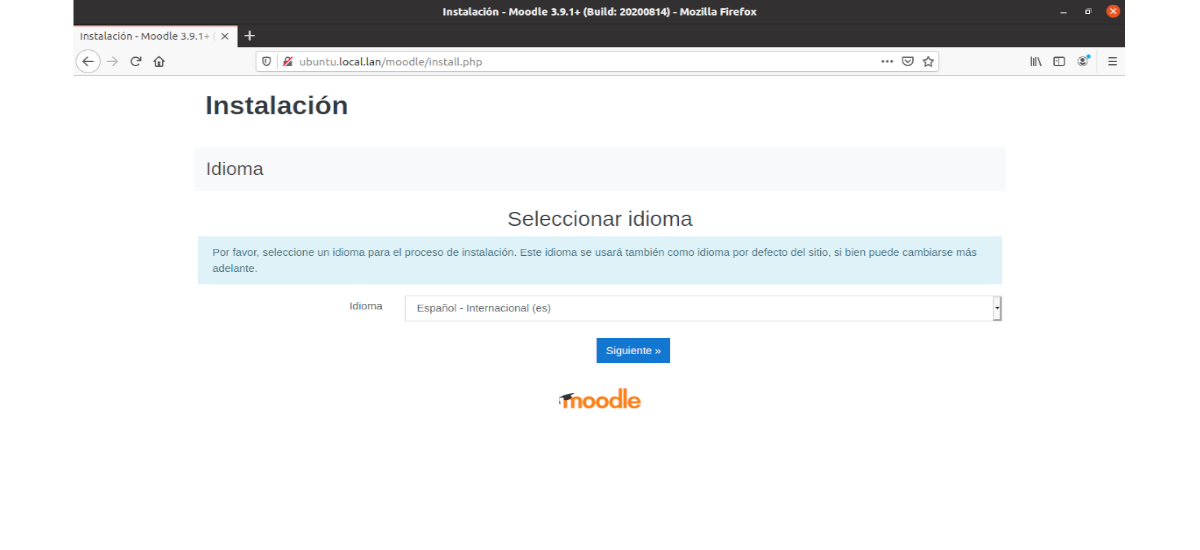
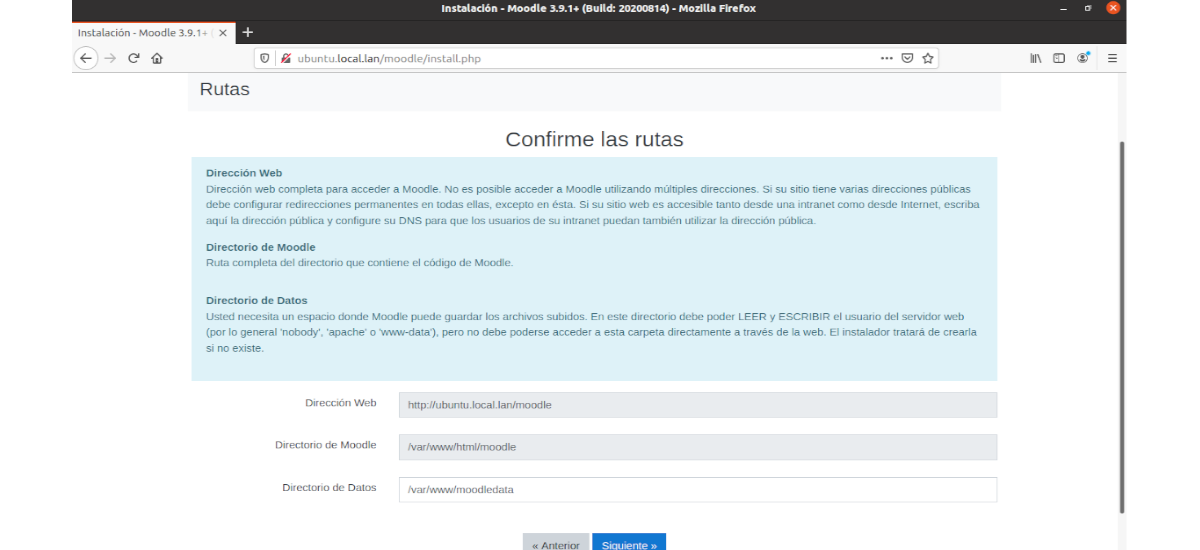
Once selected language, we are going to confirm the Moodle routes. Previously we created the data directory suggested by the installer, so it will not be necessary to modify it.
The next step is select database engine:
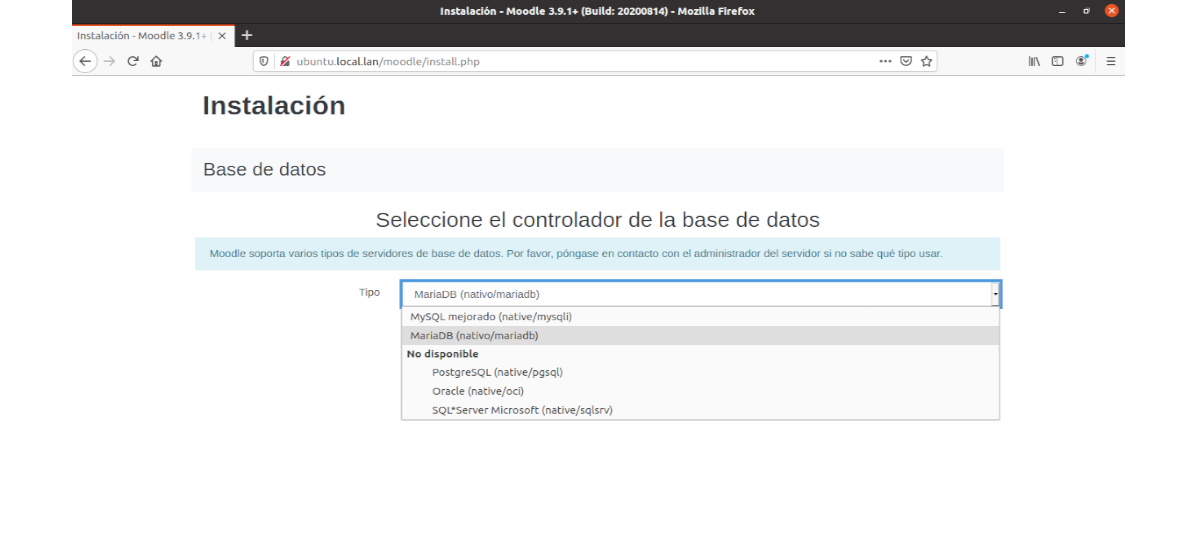
The drop-down will show us the options available in the system. We will choose the one that suits the configuration that we have made before.
In the next step a form will ask us for the connection data to the database service:
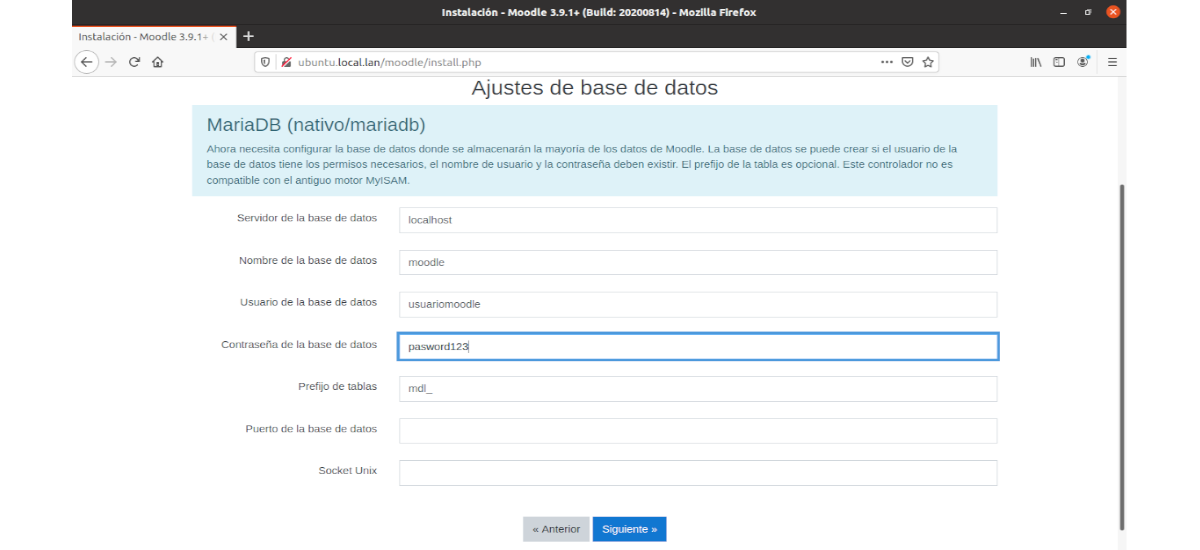
We will provide the database and user names, as well as the password, just as we created them in the previous steps.
Checked the connection, we will have to accept the terms of service:

Below is a list of checking requirements for Moodle installation on Ubuntu 20.04:
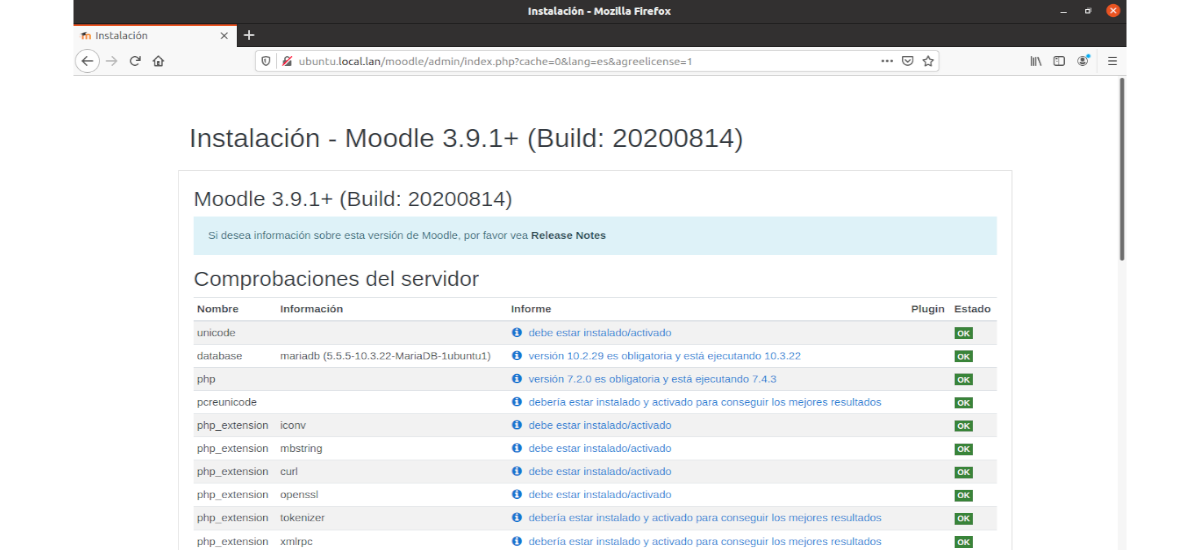
If the previous steps have been correct, all the fundamental requirements will be met and we will be able to continue with the installation process.
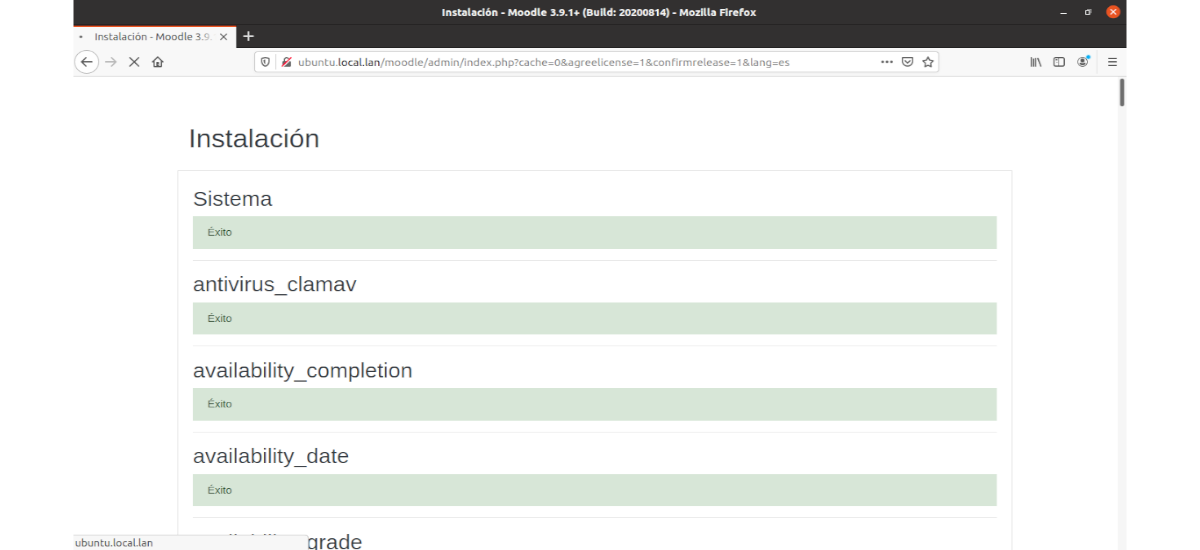
The installation process itself will show a long list of operations and its results:
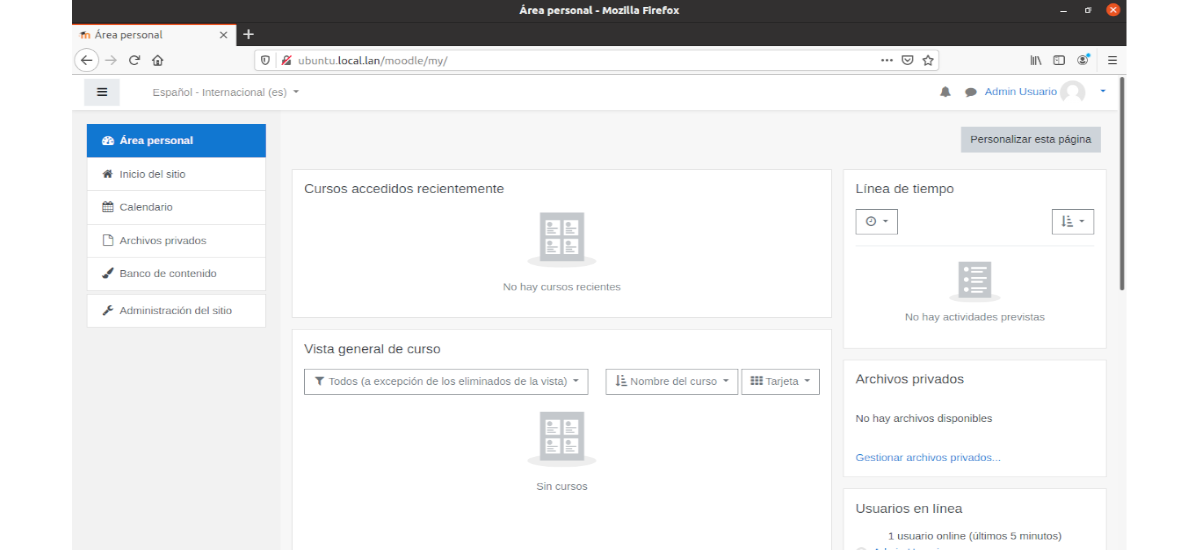
This process in my case took a long time. At the end of the installation, admin setup begins for the new site:

After setup, you are automatically logged into the site, showing the personal area:
And with this we can start working on our new Moodle site, and start using this eLearning platform to work both in a local network and through the Internet. Users who need information about its operation, can consult the official documentation on the project page.
Hello. I understand that your principles of "editorial ethics" do not include practically not plagiarizing section by section and paragraph by paragraph the content of other sites, right?
In its day I missed adding the source link. I've corrected. Salu2
THANK YOU
I failed:
ERROR 2002 (HY000): Can't connect to local MySQL server through socket '/var/run/mysqld/mysqld.sock' (2)