In the next article we are going to take a look at TeXstudio 3. It is about an integrated writing environment for creating documents with LaTeX. Its main goal is to make writing LaTeX as easy and comfortable as possible. This program offers users numerous functions such as syntax highlighting, a built-in viewer, reference checking, and various wizards, among others.
TeXstudio is a free and open source LaTex editor for Gnu / Linux, Windows, BSD and MacOS. With this writing environment, users will be able to create LaTeX documents in our system. GPL v2 licensed. Being open source, it can be used and modified as everyone wants.
General characteristics of TeXstudio
- TeXstudio has been created for texmaker. It was originally called TeXmakerX because started as a small set of extensions for Texmaker. Significant changes to the features and the code base have made this a completely independent program.
- This program is runs on Windows, Gnu / Linux, BSD and Mac OSX among other systems.
- It is licensed under the GPL v2.
- We will find multi-cursors available.
- It also has automatic completion.
- In program offers 1000+ math symbols, bookmarks, link overlay, image wizards, tables and formulas.
- Includes drag and drop support for images. We can also use table format, structure view and code folding.
- Available advanced syntax highlighting.
- We can use your interactive spell checker.
- In the program we will also find available a interactive reference checker.
- The program offers a clear display of LaTeX errors and warnings.
- Integrated support for various LaTeX compilers, index, bibliography and glossary tools, Latexmk and many more.
- Fully customizable for the creation of the complete document.
- Integrated PDF viewer with synchronization (almost) at the word level.
- We will have the preview online with Live update for formulas, code segments and with tooltip preview for images included.
- MikTeX, TeX Live, Ghostscript and Standardlatex auto-detection.
These are some of the features of this program. They can consult all of them in the project website.
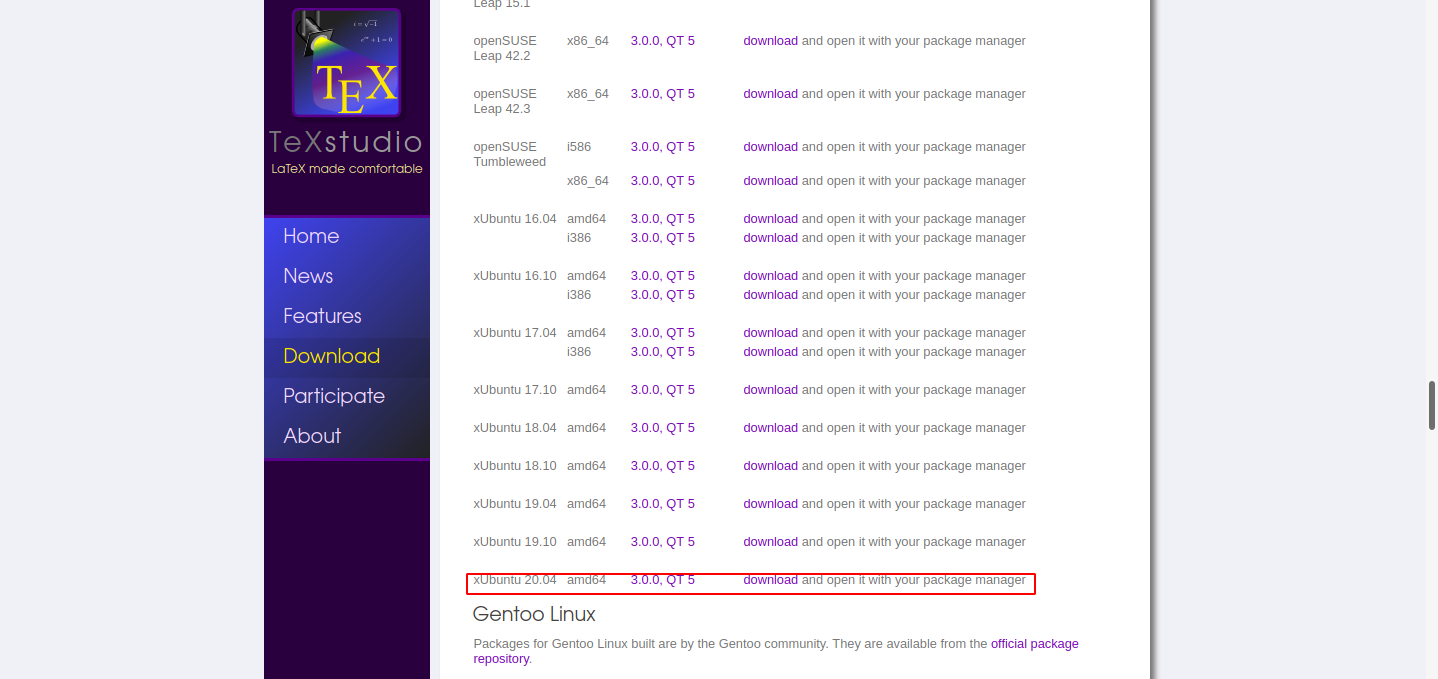
Install TeXstudio 3 on Ubuntu 20.04
Ubuntu users will be able to install TeXstudio 3 through AppImage, a native deb package file or using its official PPA.
Via AppImage
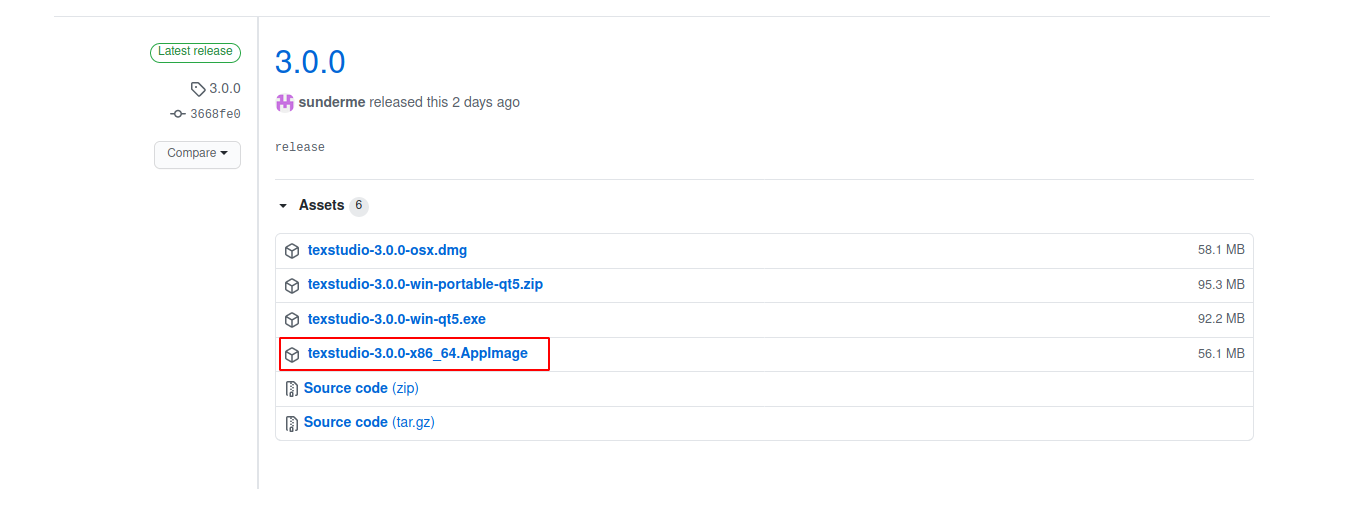
For download the TeXstudio 3 AppImage file we just have to go to the releases page on GitHub and download it from there. As of this writing, the downloaded file is named 'texstudio-3.0.0-x86_64.AppImage'. Depending on the name of the downloaded file, the following commands may change.
Once the download is finished, we are going to open a terminal (Ctrl + Alt + T) and move to the folder where we have the file saved:
cd Descargas
From there we will only have to give execute permissions to the file with the command:
sudo chmod +x texstudio-3.0.0-x86_64.AppImage
Now we can launch the program by double clicking on the file or by typing in the same terminal:
sudo ./texstudio-3.0.0-x86_64.AppImage
Through your .DEB package
If you prefer to use the .deb file you can download this download link. Once the download is finished, we will only have to open a terminal (Ctrl + Alt + T) and move to the folder where we have the file saved:
cd Descargas
From this folder, we can now launch the installation writing in the same terminal the command:
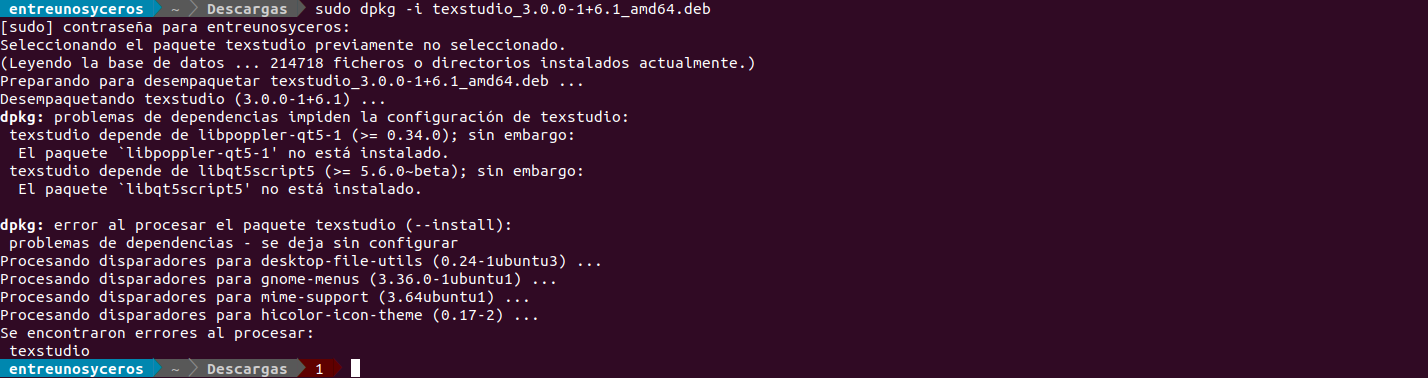
sudo dpkg -i texstudio_3.0.0-1+6.1_amd64.deb
If we find problems with dependencies As you can see in the previous screenshot, we can fix it with the command:

sudo apt install -f
After the installation, we can find the program launcher in our team:

Through PPA
If you are interested use your PPA for the installation and future update of the program, you just have to open a terminal (Ctrl + Alt + T) and add the PPA with the command:

sudo add-apt-repository ppa:sunderme/texstudio
After updating the packages available from the repositories added to our team, we can now install this program with the command:
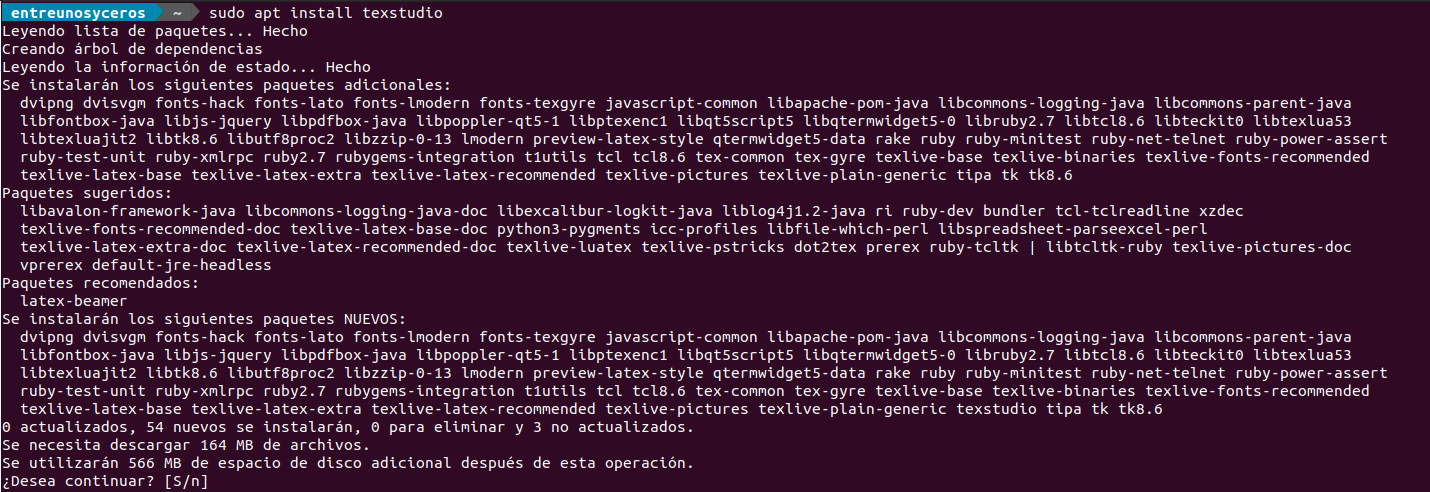
sudo apt install texstudio
Once the installation is finished, we can only find the launcher that we should find on our computer.
To solve any possible doubts that users may have about how this tool works, we can check the user manual that we will find in sourceforge.