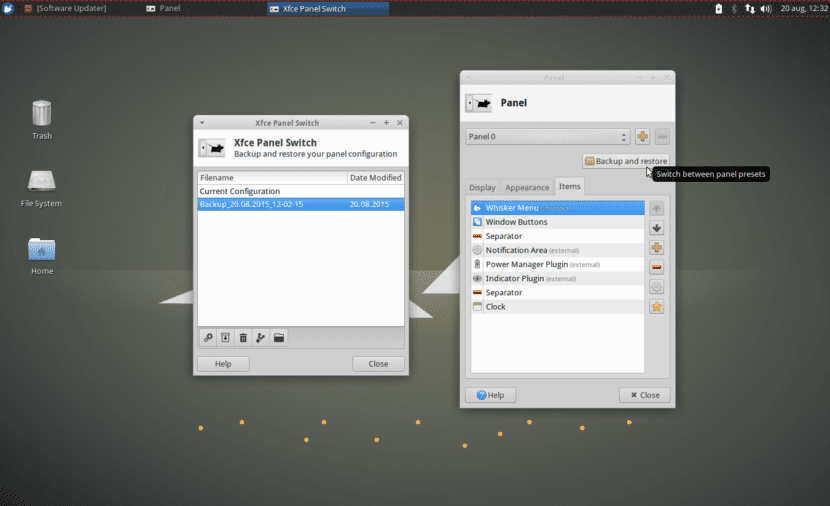
A few days ago we were already talking about some of the small details of Xubuntu, specifically we were talking about how to change the mousepad color scheme. In this installment we want to continue bringing you small graphic details of Xubuntu that will surely make your life easier and allow us to use the system in the most efficient way possible.
In this case we want to talk to you from the Xubuntu panel layout. We show you how we can change the panel, either by restoring it to the previous one or by creating custom panels by ourselves. We begin.
This article will be based on a very useful tool that is used precisely to manage the Xubuntu panel. This tool is called Xfce Panel Switch, and if we don't have it installed yet, we can easily do it by executing the following commands in the terminal:
sudo apt-get update
sudo apt-get install xfpanel-switch
Changing the design
This tool, basically, will allow us to restore any previous state of the panel, in addition to, as we said, create our own customized panels. Once installed, we will see that we already have a couple of designs that we can easily apply to our panel by selecting it and clicking on Apply Settings. By default, the designs that come are Xubuntu Classic, Xubuntu Modern, Xfce 4.12, GNOME2 or Redmond. So as you can see, we already start with a wide variety of designs to customize our panel as we like and satisfy us the most.
Customizing our own designs
If you prefer to create your completely custom designs, the tool has something for you too.
To edit the panel preferences, we have to go to Configuration and then to the tab Panel. From here we can make changes to the panel that go from its orientation to its position on the desktop. Once you've made the changes you want, go back and click Save settings To save the changes.
The best thing about this tool is that, as we mentioned, we can always cswitch between current and previously used designs, without any fear of losing the previous configuration, simply selecting the one we want and clicking on Save settings.
Finally, we can also Export y Import existing options to be able to use our designs on any machine.
We hope you liked this article and now you know a little more how to customize your Xubuntu and make it work in the most visual way possible. See you.