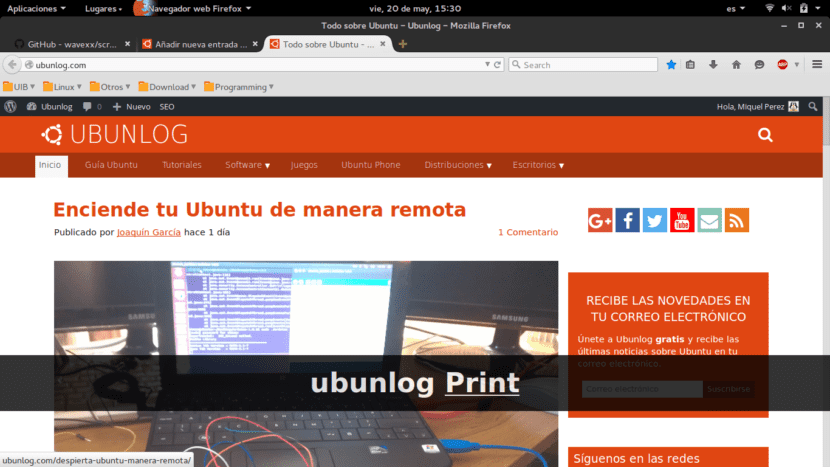
In this article we want to show you how we can install a tool that will allow us control and visualize through the screen, keystrokes that are carried out on our PC.
This tool can be very useful for our Screencastings (desktop recordings), although at the moment, the tool that we teach you today does not allow you to record the screen by itself. We tell you this and long after the cut.
- Ctrl + Ctrl detection now works correctly in more scenarios.
- Sequences with repeating characters such as Ctr ++ are now displayed in the form Ctrl + »+» to improve readability.
- Shift + Backspace is now recognized correctly.
- Support of various multimedia keys.
- Now you can control the display of blanks.
- Repeating sequences are now abbreviated.
Even so, the Screenkey 0.9 application does not allow to record the screen by itself, since its only purpose is to show which keys are being pressed. If you don't know how you can record your desktop in Ubuntu, here We show you how you can do it through VLC.
Installing Screenkey 0.9
Installing this tool is very easy thanks to the WebUpd8 guys, who already have the application in their official repositories. So installing Screenkey 0.9 is as simple as add repository correspondent, update repositories and finally install the package of the tool. For this we execute:
sudo add-apt-repository ppa: nilarimogard / webupd8
sudo apt-get update
sudo apt install screenkey
Once opened, you should see something similar to the image at the top of this article. The keys you press will be shown in the black stripe. In my case I wrote «ubunlog» and then press the key Imp. Screen to take the screenshot, and as you can see, it showed «ubunlog Print».
Tips for using Screenkey
As basic tips for the use of this tool, we want to show you how you can pause o close the app.
- Pausing it is as easy as pressing the two Ctrl keys (right and left) at the same time.
- If, on the other hand, we want to close the application permanently, we can kill its process. For this we list the processes in execution of Screen key by executing ps-aux | grep screekey and then killing all Screenkey processes, using kill PID (PID is the process identifier, an integer value that we will see for each process.
Furthermore, Screenkey is Free Software under the GPLv3 license. We can download the source code project from your official site on GitHub.
We hope this article has helped you and that you now know how you can monitor the keys that are being pressed on your PC. Until next time 😉
another way to stop it is:
killall screenkey
AND READY! <3
PS: I'M YOUR FAN BUT I LIKED IT MORE WHEN YOU HAD THE ILLUSTRÍS SIM RM STALLMAN
PPS: I LOVE YOU <3
You can also do:
kill $ (pidof screenkey)